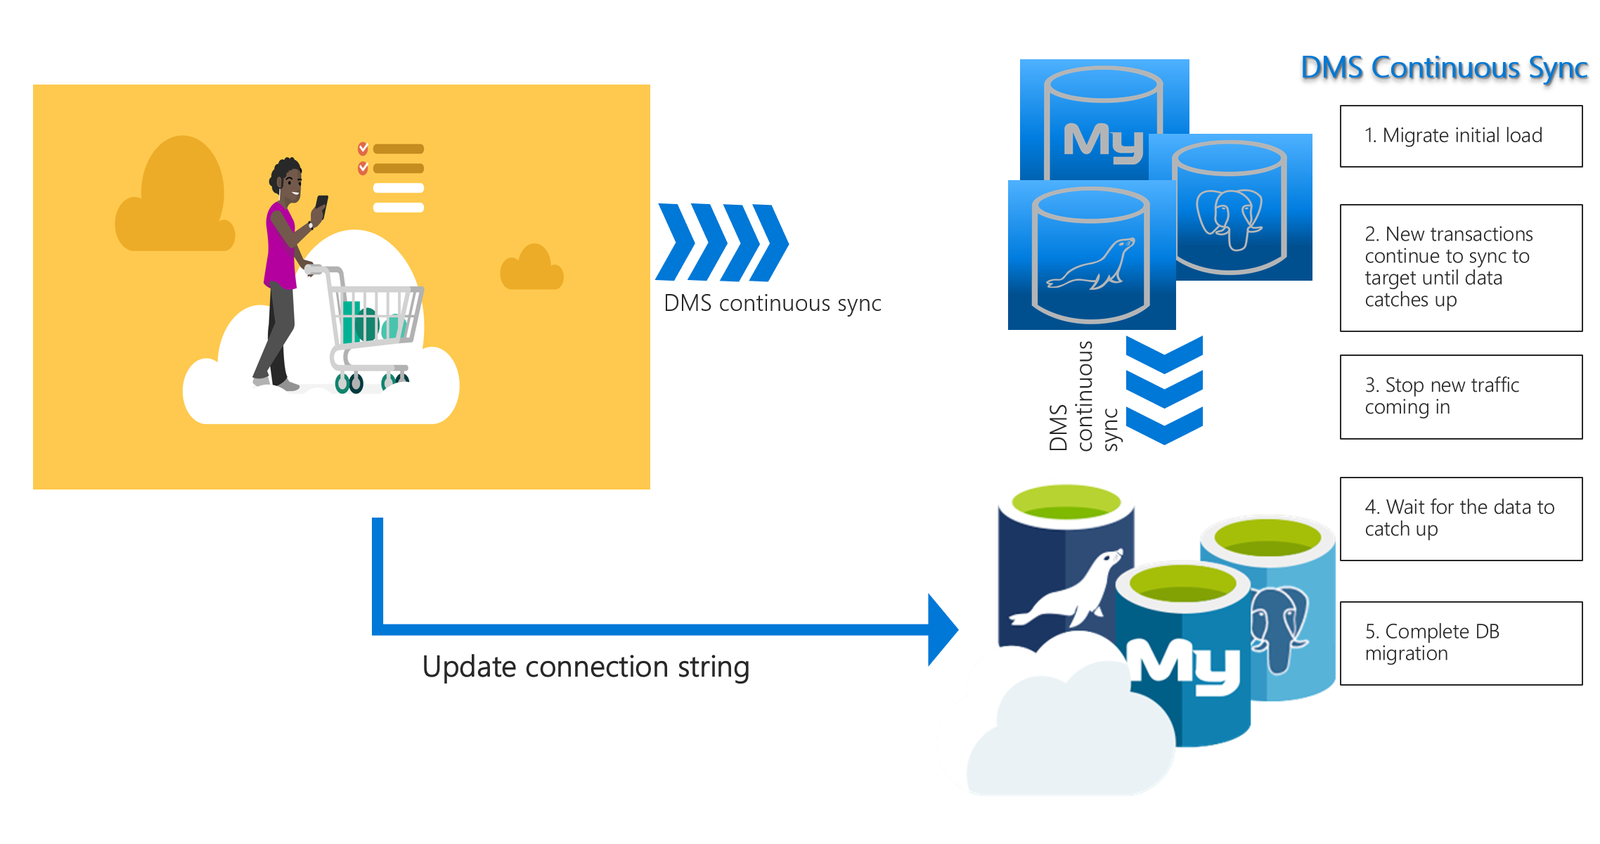
Azure Database Migration Service can be used to migrate the databases from an on-premises PostgreSQL instance to Azure Database for PostgreSQL with minimal downtime to the application.
Prerequisites:-
Setup Postgresql on a azure VM

Enable CDC and connection settings in source DB’s postgresql.conf file
# — Connection Settings –
listen_addresses = ‘*’ # what IP address(es) to listen on;
# — Settings –
wal_level = logical # minimal, replica, or logical
# (change requires restart)
# REPLICATION
# Set these on the master and on any standby that will send replication data.
max_wal_senders = 10 # max number of walsender processes
# (change requires restart)
max_replication_slots = 5 # max number of replication slots
# (change requires restart)
Restart the postgres service.
Download dvdrental sample data from google
Created one Database named test and importing dvdrental in to test Database.
pg_restore -U postgres -d test dvdrental.tar
Login to source DB and verify the data.
psql “host=akankshaVM port=5432 dbname=postgres user=postgres
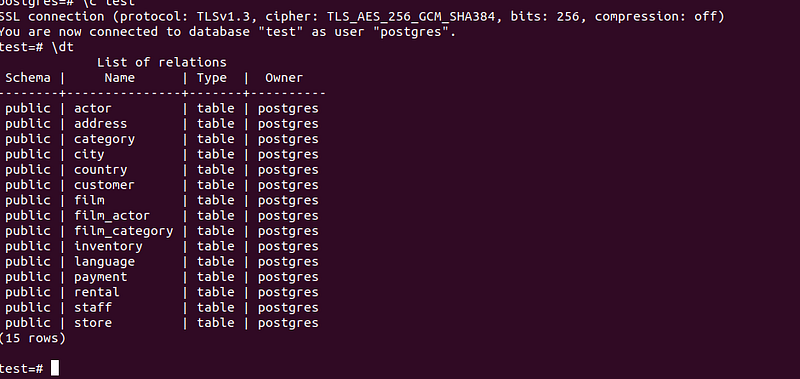
Now our source DB is ready.
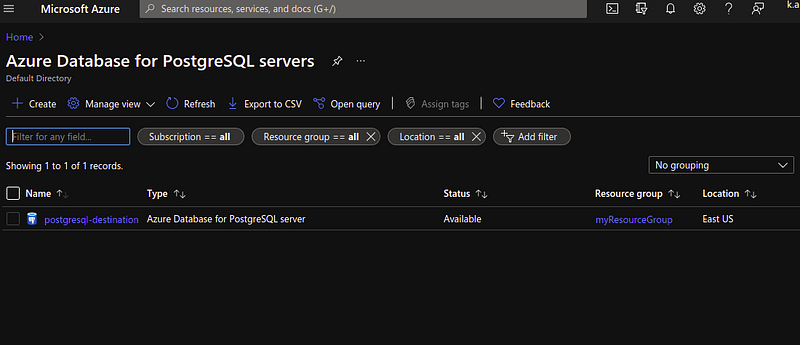
Now create a Azure Database for PostgreSQL which is managed by azure.
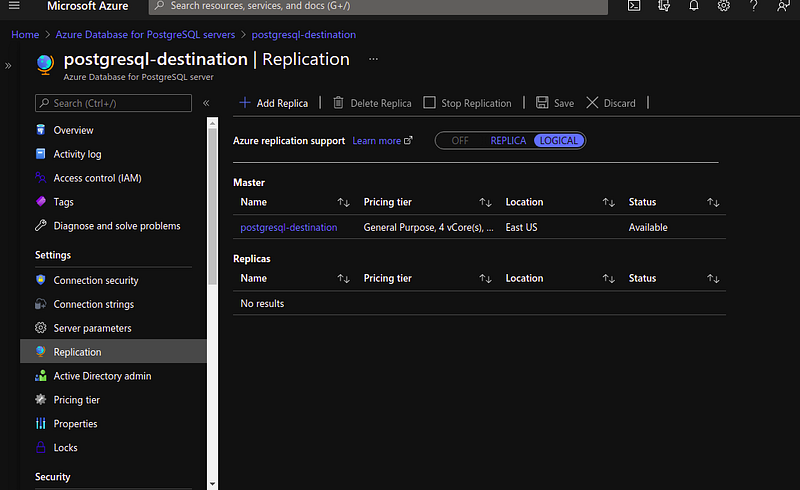
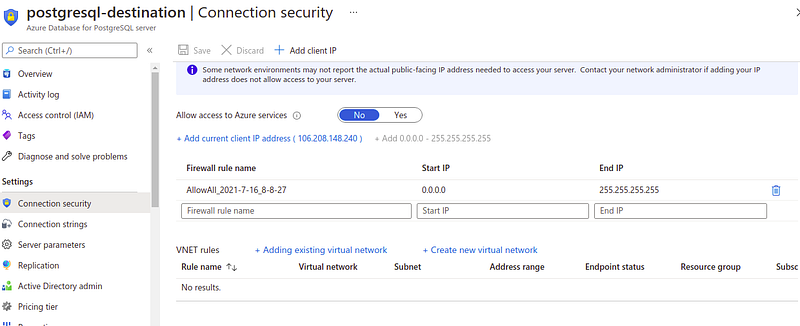
Enable logical replication and update firewall settings
Firewall setting-
Migrate the sample schema
Migrate the schema from source to destination using pg_dump utility
To complete all the database objects like table schemas, indexes and stored procedures, we need to extract schema from the source database and apply to the database.
Use pg_dump -s command to create a schema dump file for a database.
pg_dump -o -h hostname -U db_username -d db_name -s > your_schema.sql
For example, to create a schema dump file for the test database:
pg_dump -o -h akankshaVM -U postgres -d test -s -O -x > dvdrentalSchema.sql
Create an empty database in your target environment, which is Azure Database for PostgreSQL.
Import the schema into the target database you created by restoring the schema dump file.
psql -h hostname -U db_username -d db_name < your_schema.sql
For example:-
psql -h postgresql-destination.postgres.database.azure.com -U akanksha@postgresql-destination -d dvdrental < dvdrentalSchema.sql
[ looking for data warehousing services ]
Register the Microsoft.DataMigration resource provider
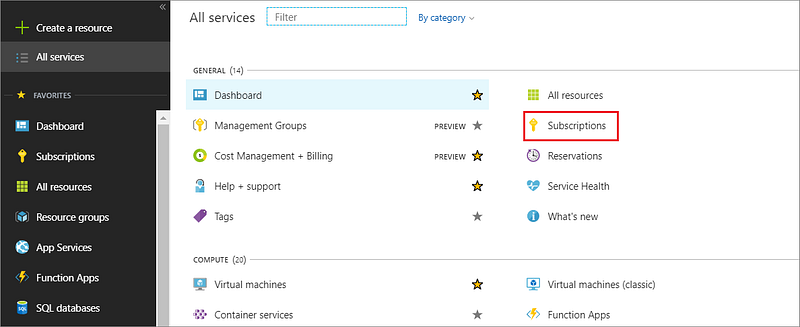
- Sign in to the Azure portal, select All services, and then select Subscriptions.
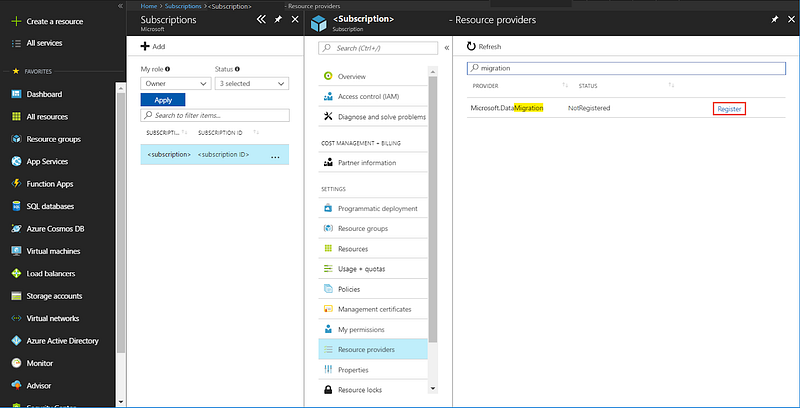
2. Select the subscription in which you want to create the instance of Azure Database Migration Service, and then select Resource providers.

3. Search for migration, and then to the right of Microsoft.DataMigration, select Register.
Create a DMS instance
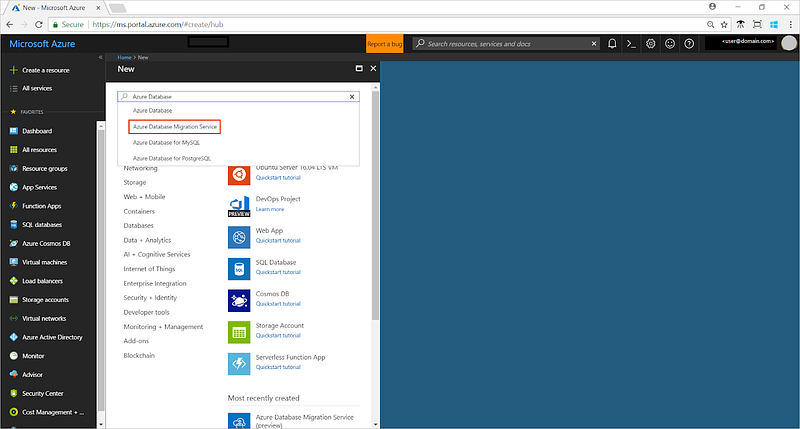
- In the Azure portal, select + Create a resource, search for Azure Database Migration Service, and then select Azure Database Migration Service from the drop-down list.
2. On the Azure Database Migration Service screen, select Create.
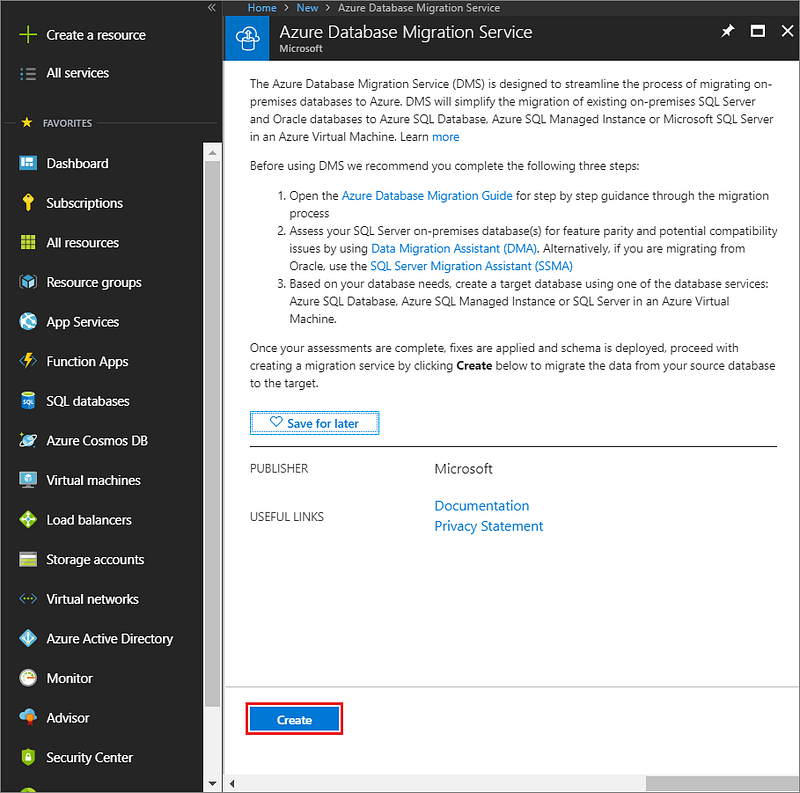
3. On the Create Migration Service screen, specify a name, the subscription, a new or existing resource group, and the location for the service.
4. Select an existing virtual network or create a new one.
The virtual network provides Azure Database Migration Service with access to the source PostgreSQL server and the target Azure Database for PostgreSQL instance.
5. Select a pricing tier.
Premium SKU is recommended for online Data Migration
6. Select Review + create to create the service.
Service creation will complete within about 10 to 15 minutes.
Create a migration project
After the service is created, locate it within the Azure portal, open it, and then create a new migration project.
- In the Azure portal, select All services, search for Azure Database Migration Service, and then select Azure Database Migration Services.
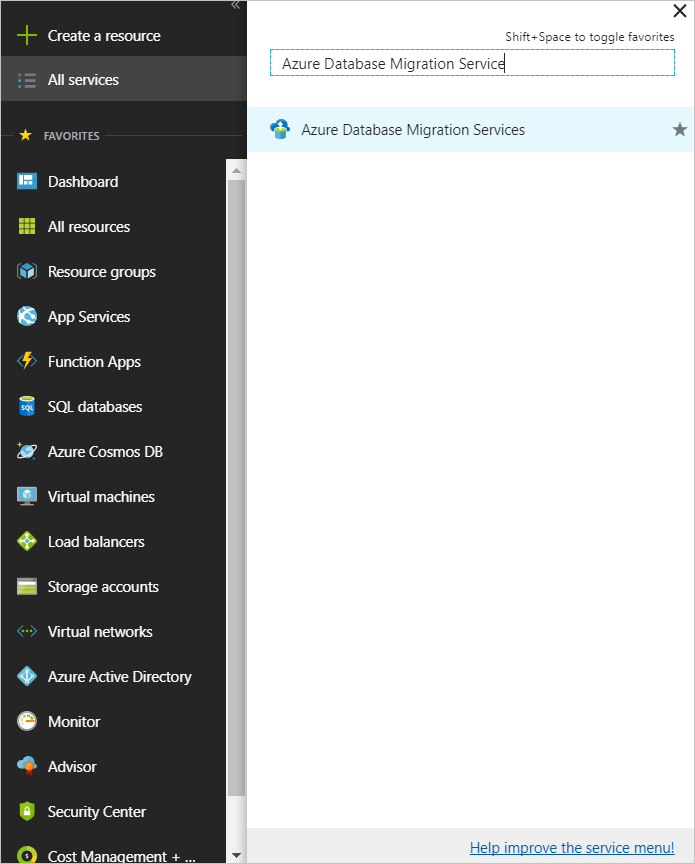
2. On the Azure Database Migration Services screen, search for the name of Azure Database Migration Service instance that you created, select the instance, and then select + New Migration Project.
3. On the New migration project screen, specify a name for the project, in the Source server type text box, select PostgreSQL, in the Target server type text box, select Azure Database for PostgreSQL.
4. In the Choose type of activity section, select Online data migration.

Note
Alternately, you can choose Create project only to create the migration project now and execute the migration later.
5. Select Save, note the requirements to successfully use Azure Database Migration Service to migrate data, and then select Create and run activity.
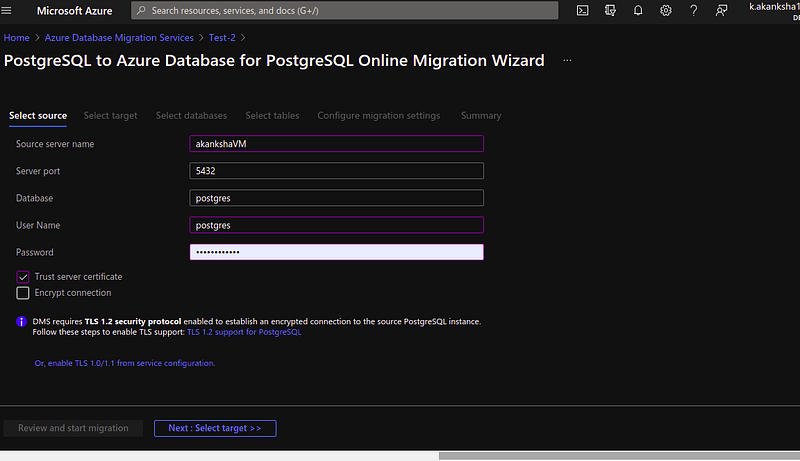
Specify source details
On the Add Source Details screen, specify the connection details for the source PostgreSQL instance.
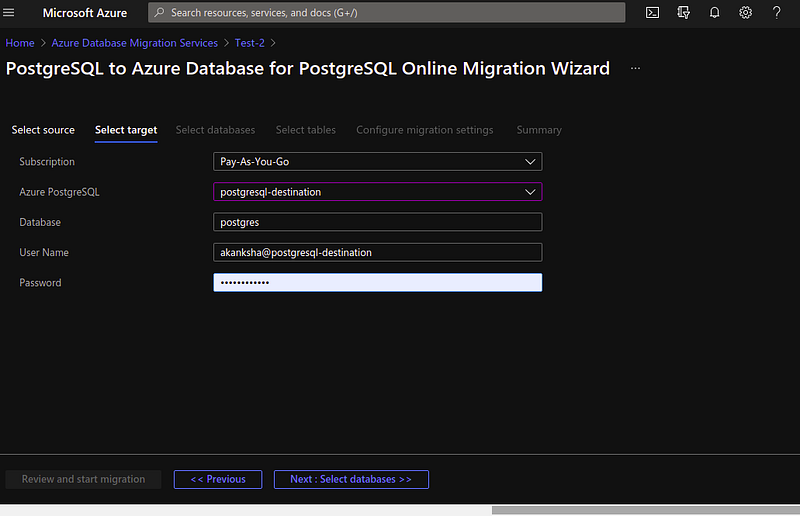
Specify target details
On the Target details screen, specify the connection details for the target server, which is the pre-provisioned instance of Azure Postgresql to which the DVD Rentals schema was deployed by using pg_dump.
If the target database contains the same database name as the source database, Azure Database Migration Service selects the target database by default.
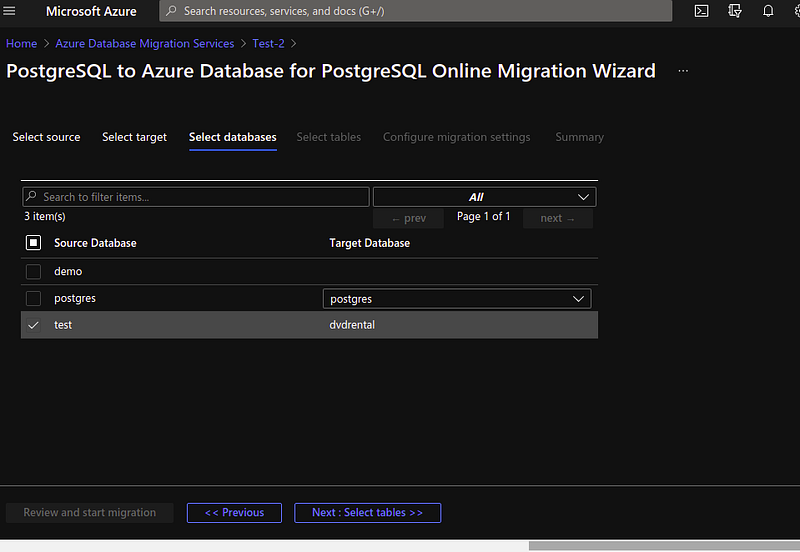
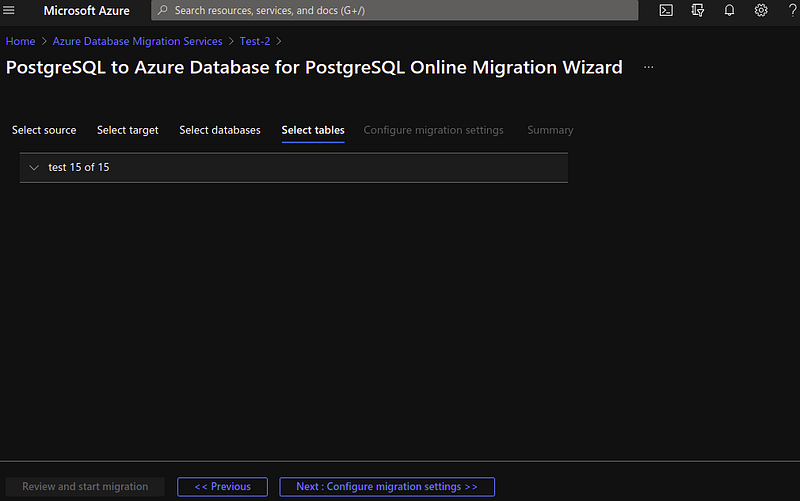
Select Save, and then on the Map to target databases screen, map the source and the target database for migration.
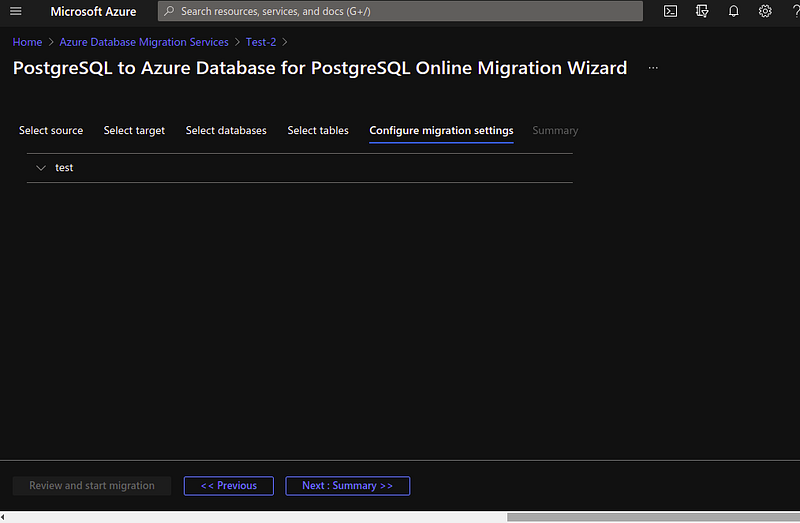
Select Save, and then on the Migration settings screen, accept the default values.
Select Save, on the Migration summary screen, in the Activity name text box, specify a name for the migration activity, and then review the summary to ensure that the source and target details match what you previously specified.
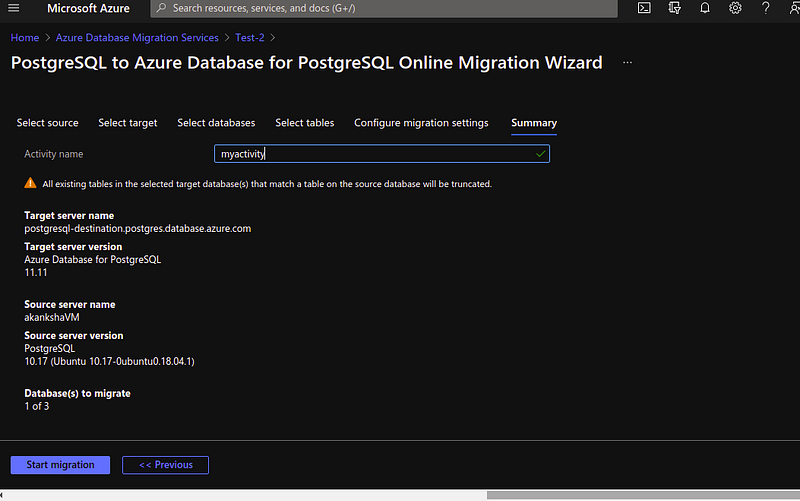
Run the migration
- Select Run migration.
The migration activity window appears, and the Status of the activity should update to show as Backup in Progress.
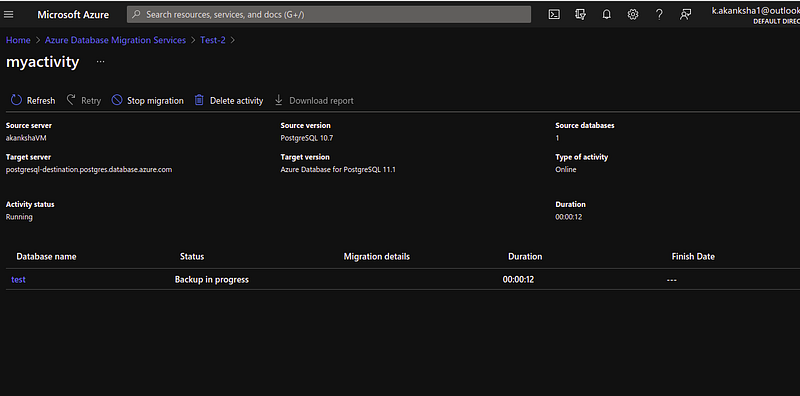
Monitor the migration
- On the migration activity screen, select Refresh to update the display until the Status of the migration shows as Complete.

2. When the migration is complete, under Database Name, select a specific database to get to the migration status for Full data load and Incremental data sync operations.
Note:-
Full data load shows the initial load migration status, while Incremental data sync shows change data capture (CDC) status.

Perform migration cutover
After the initial Full load is completed, the databases are marked Ready to cutover.
- When you’re ready to complete the database migration, select Start Cutover.
- Wait until the Pending changes counter shows 0 to ensure that all incoming transactions to the source database are stopped, select the Confirm checkbox, and then select Apply.
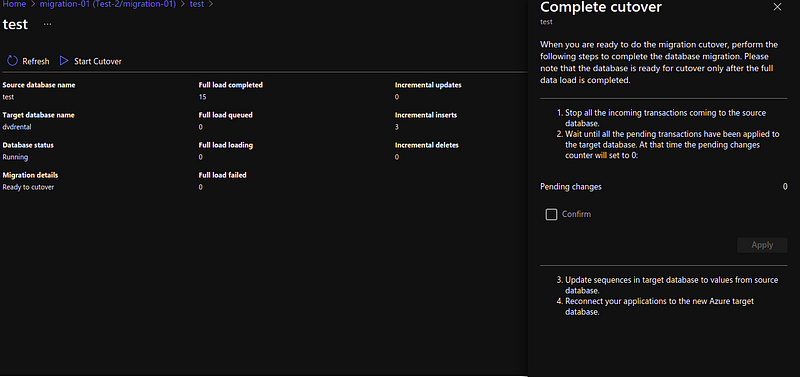
3. When the database migration status shows Completed, recreate sequences (if applicable), and connect your applications to the new target instance of Azure Database for PostgreSQL.
Related Searches: DevOps solution provider | AWS Partner