Codeherent was founded in the year 2016 by the founding team after they met in Alacrity Foundation, a UK entrepreneurship course, in 2015. The founding team’s main focus was how to improve DevOps with a fast Infrastructure as Code (IaC) review process.
The tool is singularly focused on Terraform and is helping multiple organizations to understand, optimize and review their Cloud Infrastructure in a diagrammatic manner. They recognize the fact that organizations are clambering for DevOps maturity, GitOps centralization, and infrastructure agility. Abstracting IaC into an interactive diagram removes the complexity and helps us all to keep moving forward quickly.
Codeherent is a tool made for easy deployment of Terraform resources and modules with an infrastructure diagram that shows us which resources are in use. The deployment cycle can be accelerated with a significantly simplified review process that shows the predicted impact of the resource changes and code updations on live cloud infrastructure.
Platforms that are supported by Codeherent are:
1. AWS
2. Azure
3. Google Cloud Platform
4. Openstack
5. VMWare Vsphere
Getting started with Codeherent:
When you login first, Codeherent provides you with a default organization, where you can work on your code and with the visual representation of the code. You can add your organization details.
A default user with your name will be created when you sign up.
We will see how to get started with the Codeherent tool. Below are the steps which we can perform:
- Integrate VCS with your Codeherent account
The git providers that you can integrate with are:
- GitHub
- GitLab
- Azure DevOps
Once you choose any of the above VCS, Codeherent will redirect to the login page of the respective VCS.
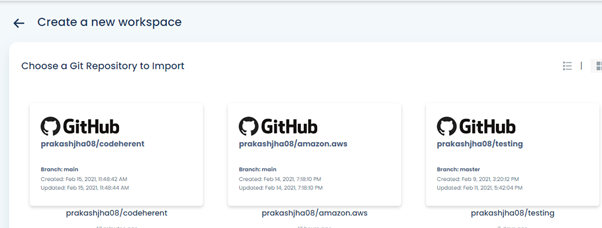
We will, for an instance, choose GitHub.
When you import Github, you will get all the repositories present in your account. Choose the one which you will be working on.
2. You can choose a backend type or you can have your configuration file and skip the state configuration through Codeherent.

The Workspace will be created hereafter.
Initial configuration:
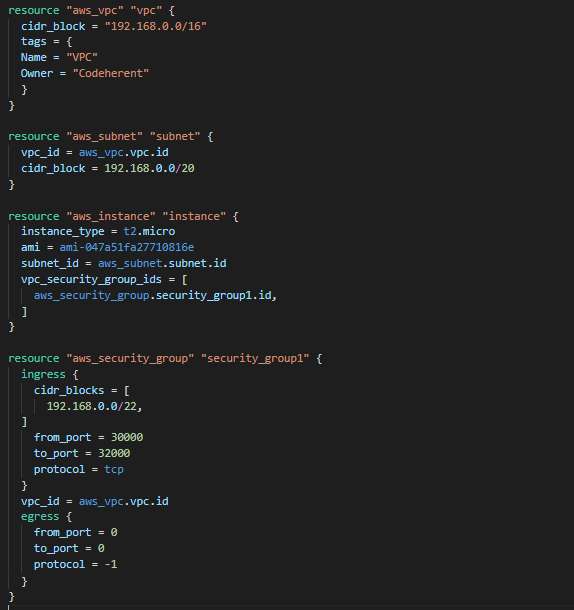
Main.tf – One VPC

Configuration changes made in Codeherent:
One Subnet, EC2, and a security group
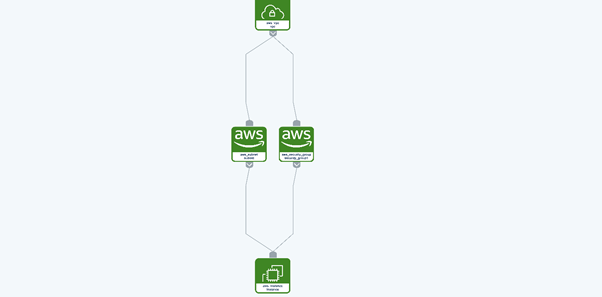
After the configuration is added, Codeherent comes up with a detailed infrastructure diagram which can be kept as a blueprint for further changes. It gives a dependency graph. The below diagram shows a VPC, one subnet, and a security group under the VPC. It also has an Instance that is being created under the subnet and the security group is attached to it.
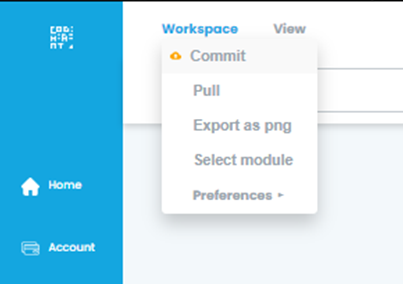
Once the changes are done, we can push the same to GitHub by clicking on commit.
Working with modules in Codeherent:
Once we clone the GitHub repository, we can switch to the child modules as well, and make the changes as required.
Below is the structure for module wise approach:

In this example, we will work on both the root module and child module,
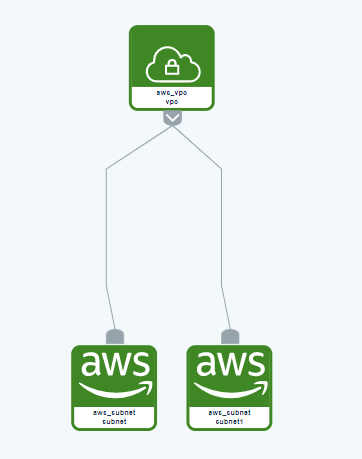
VPC child module: We have 1 VPC and 1 subnet for now.
Here, we will add a new subnet,
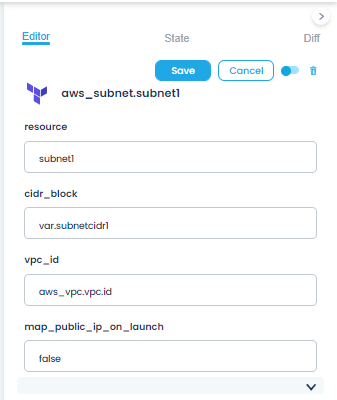
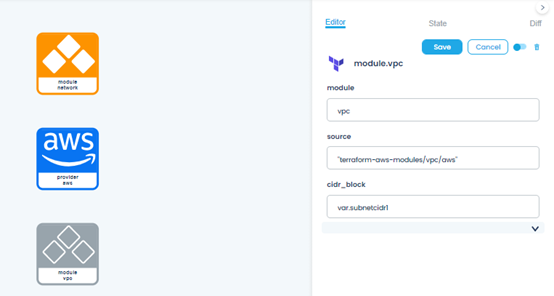
Adding new module:
Backend: How to use Codeherent as a backend?
Terraform must store state about your managed infrastructure and configuration. This state is used by Terraform to map real-world resources to your configuration, keep track of metadata, and improve performance for large infrastructures. This state is stored by default in a local file named “terraform.tfstate”, but it can also be stored remotely, in a backend, which works better in a team environment. S3 in AWS, azure blob storage in Azure can be used for keeping the state file secure.
Codeherent can be used as a backend for terraform state file configuration. It is accessed by Terraform via HTTP backend, we need to work on some steps before configuring the backend.
Step-1: Generate an API key
- Navigate to the admin portal.
- Navigate to API keys.
- Generate a new API key and keep note of your API key and API secret.
Step-2: Create a “backend.tf” and add the terraform configuration ‘backend’ block to connect to the Codeherent remote backend:
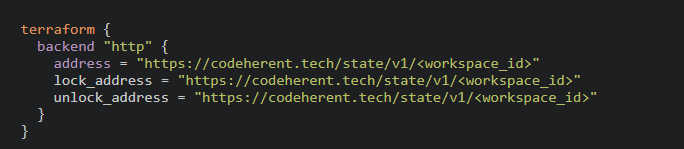
Where <workspace_id> can be any string. If you like Codeherent to automatically associate the state with a Codeherent workspace, use the workspace uuid.
Step-3: Configure terraform environment using CLI
Create a file named backend with below details:
username = <api_key>
password = <api_secret>
And run “terraform init -backend-config=backend”
Running Terraform commands:
We can run Terraform commands inside Codeherent’s embedded Terraform Environment.
Configuring the Environment
A Workspace in Codeherent can be defined as a project that you are working on. If you clone a repository, named “TestingTFwithCodeherent”, from a VCS, it would be called a workspace. In Codeherent’s words, “Workspaces are connections to git repositories containing Terraform code. Users can interact with workspaces – creating, editing, and removing Terraform resources through the visual development canvas.”
The Terraform Environment is configured by creating profiles within workspaces. Each profile represents a unique configuration specific to a workspace. Workspaces can have multiple profiles e.g dev, staging, production.
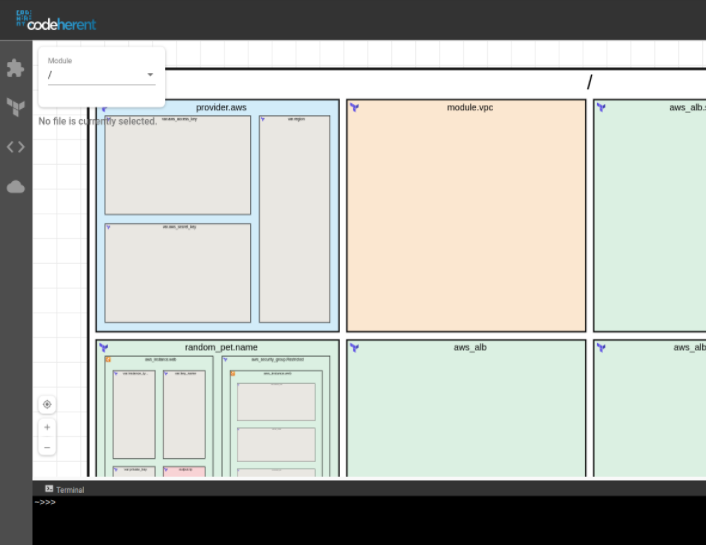
- Open the terminal and click to open the settings:
- Add a profile, and save it using the form:

Running Commands
- Navigate to the Terraform Commands sidebar:
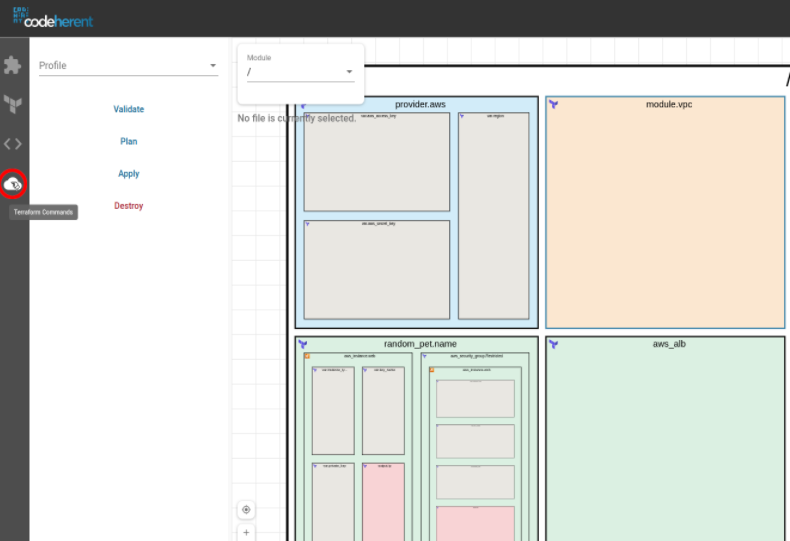
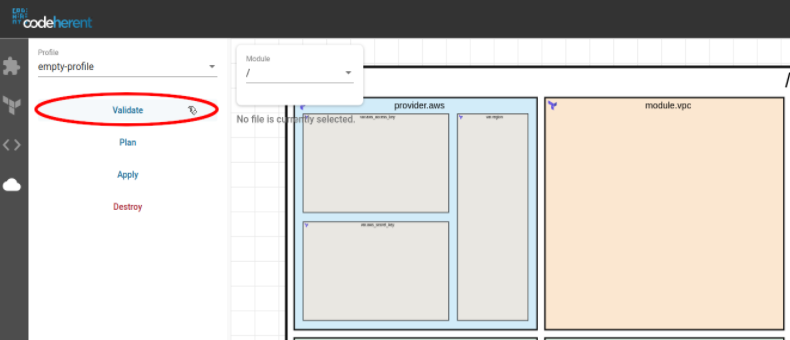
- Select a profile:

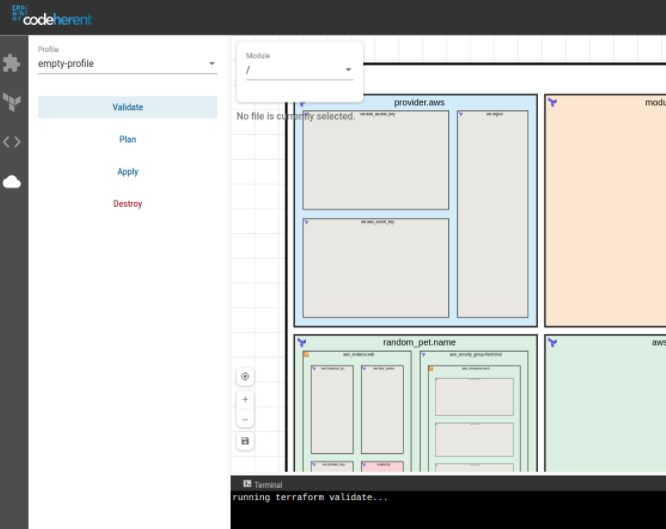
Terraform Validate
Select ‘Validate’ from the sidebar.
Verify that you’ve selected the correct Terraform action, then click ‘Confirm’.
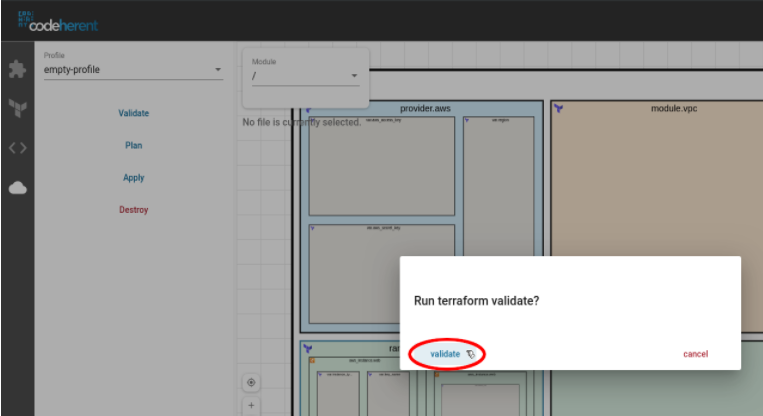
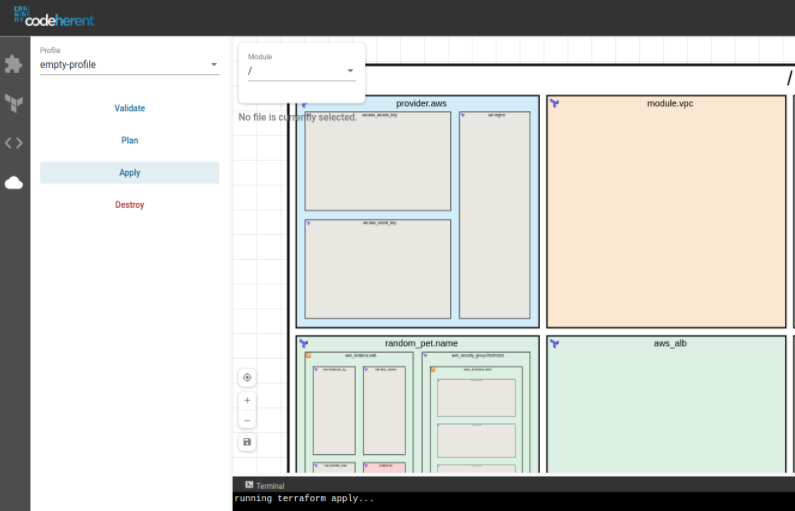
The Terminal will then inform you that the command is running, and automatically update with the resulting output from the command.
Terraform Plan
Select ‘Plan’ from the sidebar.
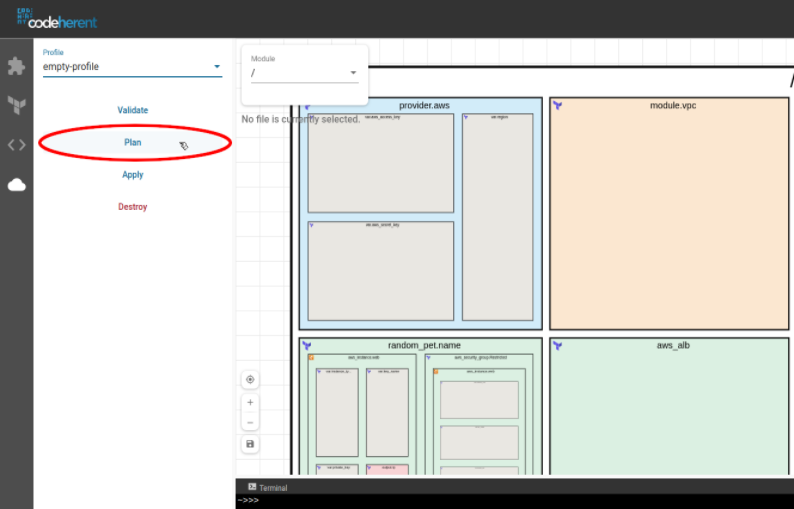
Verify that you’ve selected the correct Terraform action, then click ‘Confirm’.
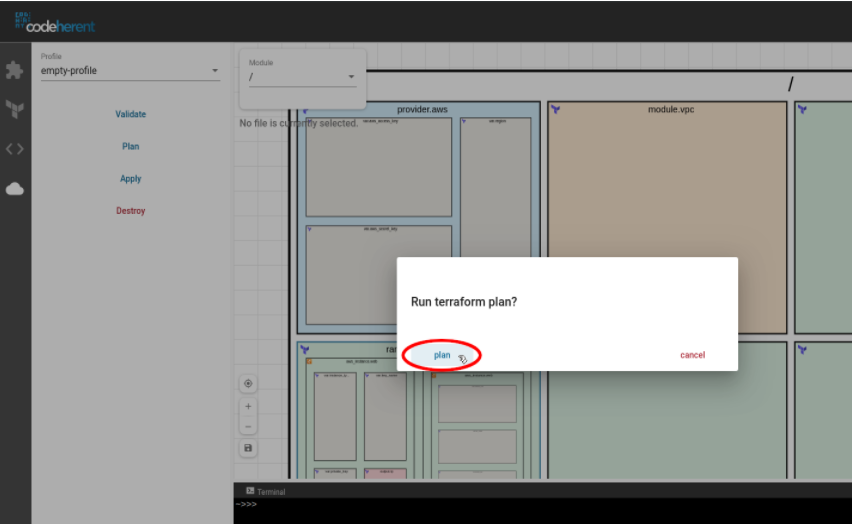
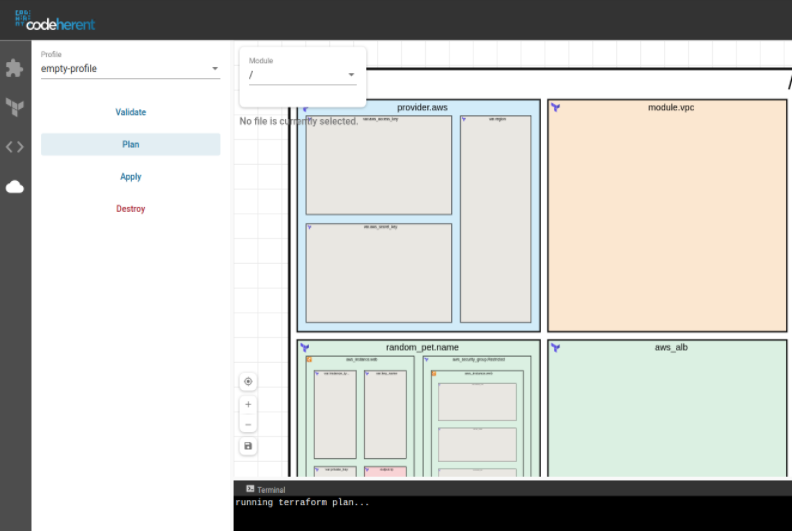
The command will run and respective output will appear on the command line
Terraform Apply
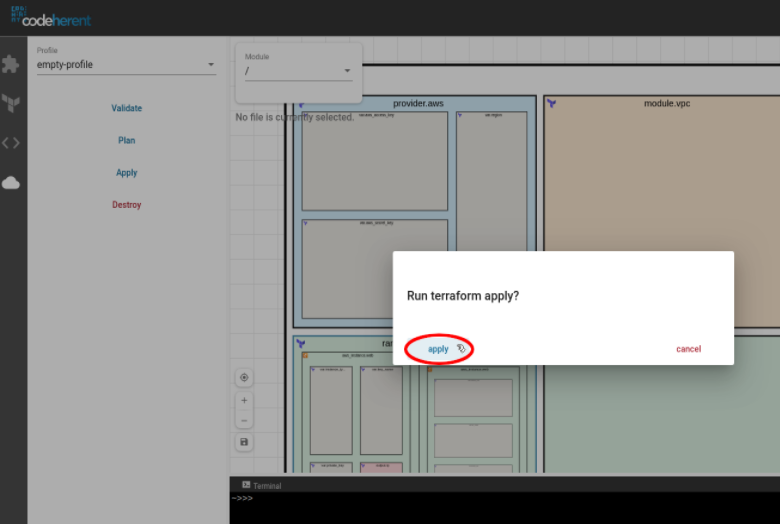
Select ‘Apply’ from the sidebar.
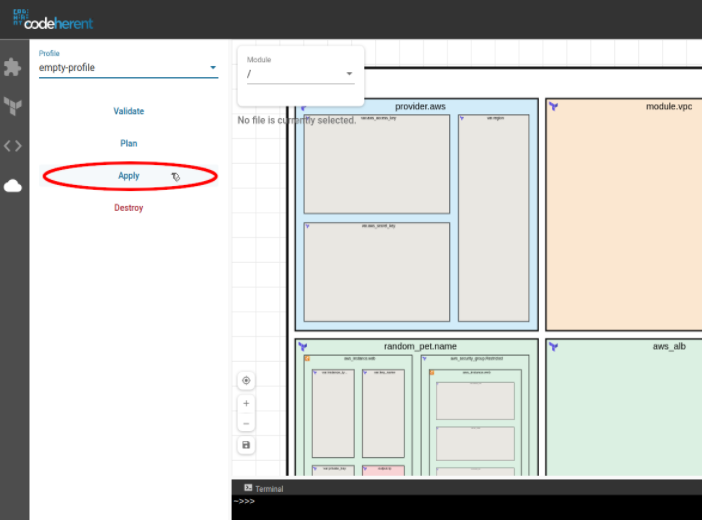
Verify that you’ve selected the correct Terraform action, then click ‘Confirm’.
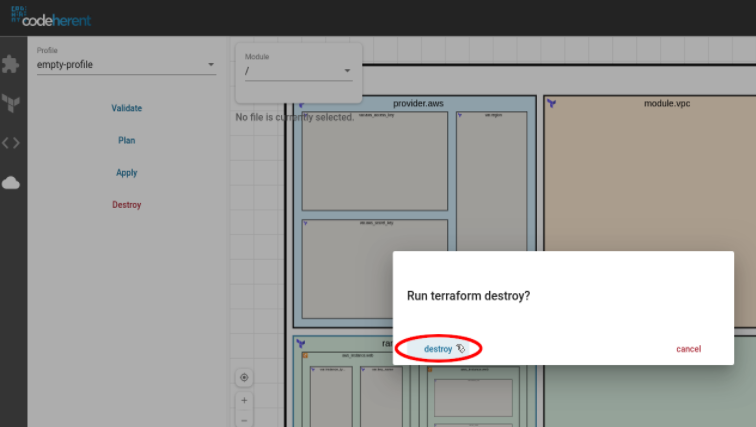
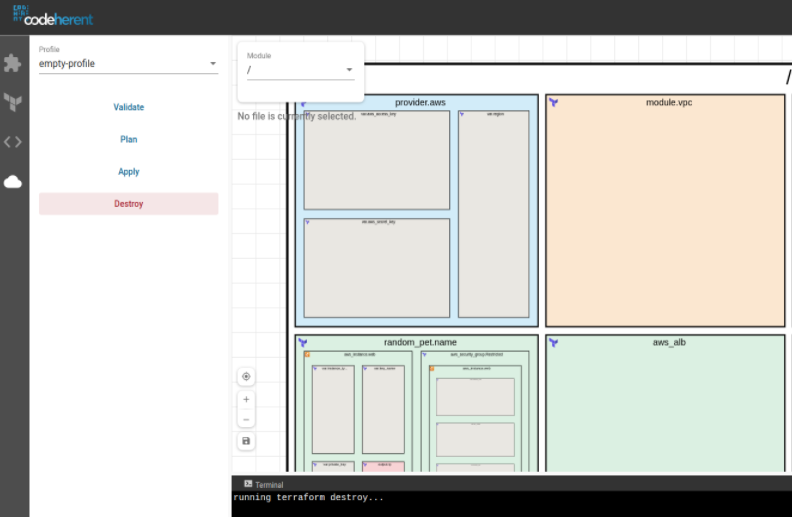
Terraform Destroy
Select ‘Destroy’ from the sidebar.
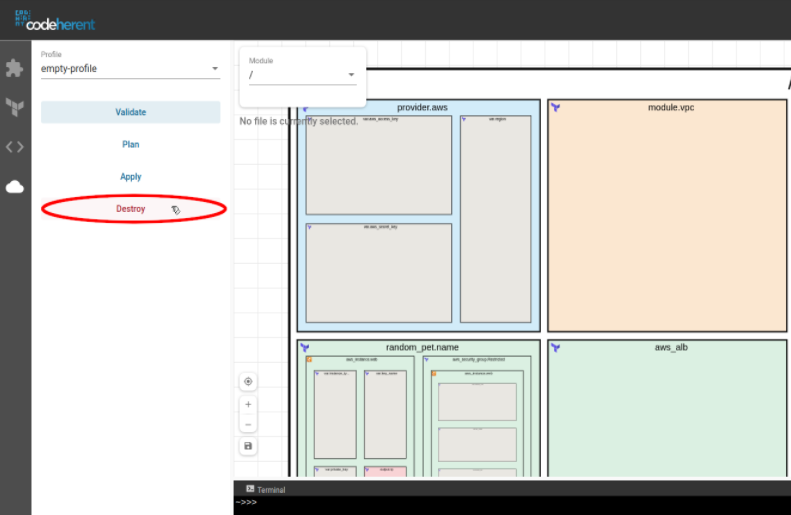
Verify that you’ve selected the correct Terraform action, then click ‘Confirm’.
Why shall I go for Codeherent?
A question that may arise in our minds, “why to choose Codeherent?!”. Let’s see why!
- You can create resources as per need that is supported by Terraform
- Creates an infrastructure diagram based on the resources in use, which can be exported in PNG format
- You can provide values and commit the changes directly to VCS, code changes in the repository can also be pulled in the tool.
- Modules are chosen from terraform public repository, later you can change the source and values as desired
- Codeherent can be used as a backend for terraform configuration
- It can be used with clouds like- AWS, Azure, GCP, Openstack, and VMWare VSphere, if you have a multi-cloud environment, working with terraform for all these clouds will become easy with Codeherent.
- You can login to the respective Cloud accounts via access keys and work with terraform commands while using the paid version of the tool.
Challenges:
As someone has rightly said, “No-one is perfect”, Codeherent also has its own challenges. We will see few differences with Cloudcraft, a similar tool that is used for AWS architecture diagram creation. Let us see what are those challenges:
- We can download 2-D images, unlike Cloudcraft which provides options of both 2-D and 3-D image downloads.
- Codeherent works directly with files present in VCS repositories. So, the files should be present in which resources need to be created.
- Codeherent does not provide billing details of the resources that will be created, but Cloudcraft shows how much cost will be incurred to the organization if they create infrastructure as per the architecture diagram.
Pricing:
Pricing Tiers are categorized into 3 types:
- Basic Plan:
Codeherent allows its user base to work on a basic plan at £0 per month. It supports:
- Up to 5 users
- Up to 5 workspaces
- Unlimited exports
- SaaS deployments
- Pro:
Pro Plan’s pricing is £25 per user per month. Features include:
- Unlimited users
- Unlimited workspaces
- Unlimited exports
- SaaS deployments
- Enterprise:
For Enterprise Plan, you can connect with the sales team by filling in your details at https://codeherent.tech/contact/.
Features include:
- Everything in Pro
- Account manager
- Priority support
- On-prem or SaaS
Conclusion:
As we are near the end, let’s have a look at the key take-aways of this blog.
- Visualization: Codeherent is a really useful tool if you would like to visualize how your terraform code looks like.
- Collaborate: You can invite others to review and edit your TF codes, if required.
- Improve: Reduce deployment cycles by quickly identifying state-file differences. View resource data and edit your configuration directly in your infrastructure diagram.
So, if you are reading this blog and are working with Terraform code, login to https://codeherent.tech/ and start creating infrastructure diagrams.
Thank you for reading. Happy Learning!!
Blog Pundit: Abhishek Dubey, Adeel, and Avinaw Sharma
Opstree is an End to End DevOps solution provider