Introduction
To set up a self-hosted agent in Azure DevOps, follow these steps: First, generate a Personal Access Token (PAT). Next, go to Organization Settings to create an agent pool. Next, download the appropriate agent package for your operating system (whether it’s Windows or Linux). Then, run the `config.cmd` or `./config.sh` command to register the agent. Be sure to install the agent in a directory that doesn’t contain spaces, such as `C:\agents`.
Azure DevOps is an integrated service provided by Azure. In recent times, it is observed that Azure DevOps is increasing its penetration into the DevOps community. Being a SaaS service, it doesn’t come with a pre-configured host or better say, an agent to execute its commands. That’s why whenever we want to use our Azure DevOps Pipeline we need to have an agent configured in our Agent Pool. In this blog, we will learn how to configure an agent and later on how to create a service for our host.
Let’s Get Started
Configuring a self-hosted Agent might seem complicated but by following the below steps we can easily configure an agent in our Agent Pool. So let’s get started.
What is Azure DevOps?
Azure DevOps is a cloud-based platform designed to equip software development teams with integrated tools. From planning tasks and collaborating on code to building applications, testing features, and deploying to production, it covers all essential aspects of the development lifecycle. The platform caters to the diverse needs of teams by offering different service models. For small teams, the free version allows for quick start, while comprehensive subscription and usage-based payment plans facilitate complete project management for larger projects.
Azure Self-hosted Agent
An agent that you set up and manage on your own to run jobs is a self-hosted agent. Though we can use a Microsoft Hosted Agent, we prefer a self-hosted Agent. This is to have more control to install dependent software needed for our builds and deployments, machine-level caches and configuration persist from run to run, boosting speed and maintaining the backup of our logs. You can use self-hosted agents in Azure Pipelines or Azure DevOps Server, formerly named Team Foundation Server (TFS). To successfully configure a self-hosted Agent we need an Agent Pool, download & unzip the package, Personal Access Token (PAT) and execute a few shell commands. Let’s move step by step.
Explore how a zero-downtime migration to Azure was delivered at scale.
Creating And Agent Pool
Step 1:
Click on Project Settings at the bottom left corner
Step 2:
Go to Agent Pools under the Pipelines header.
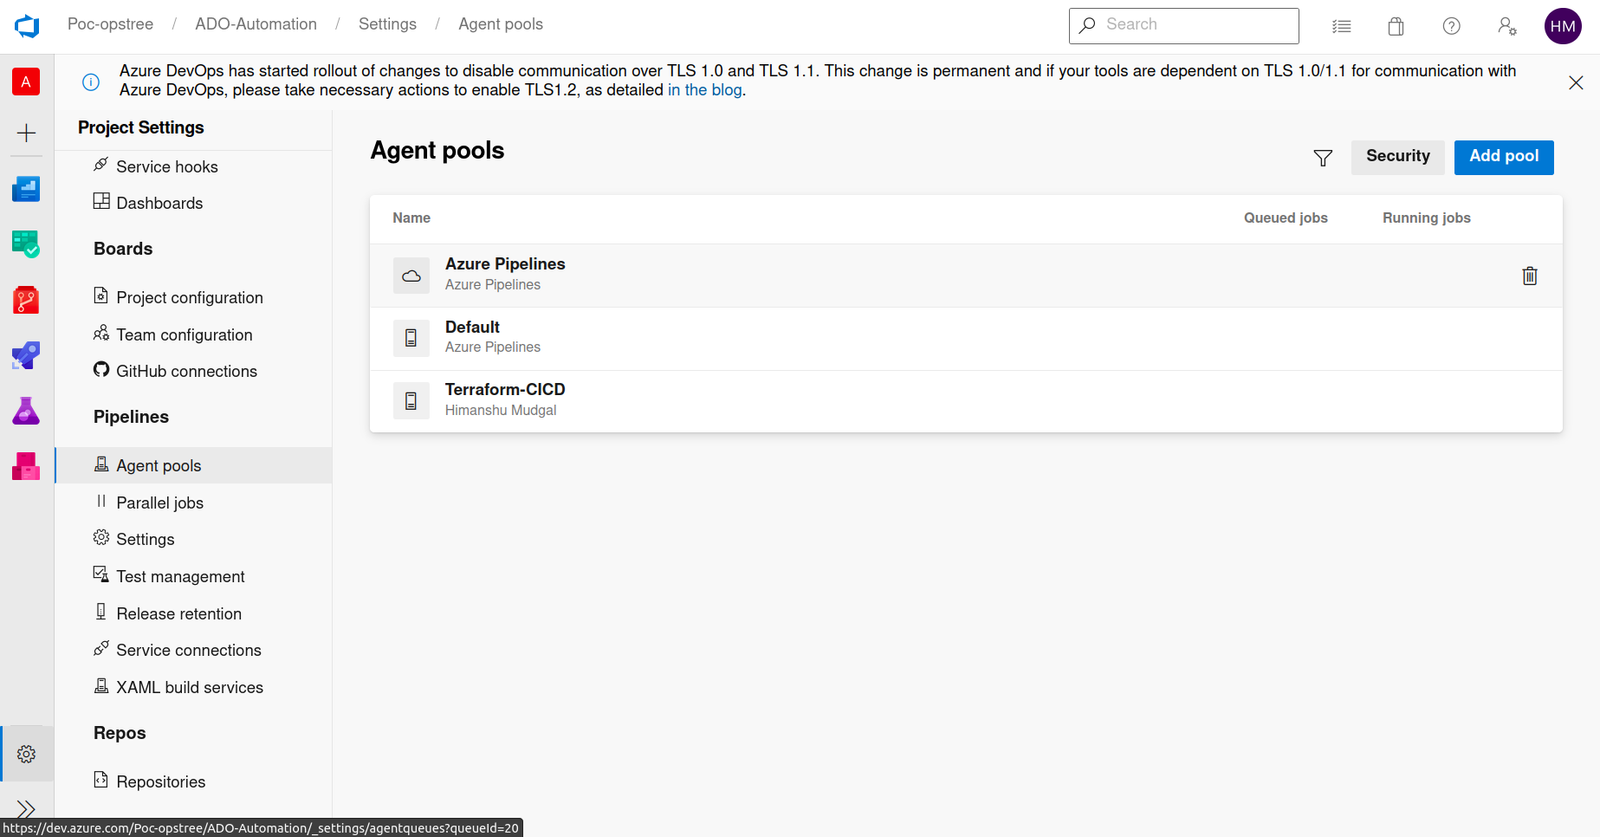
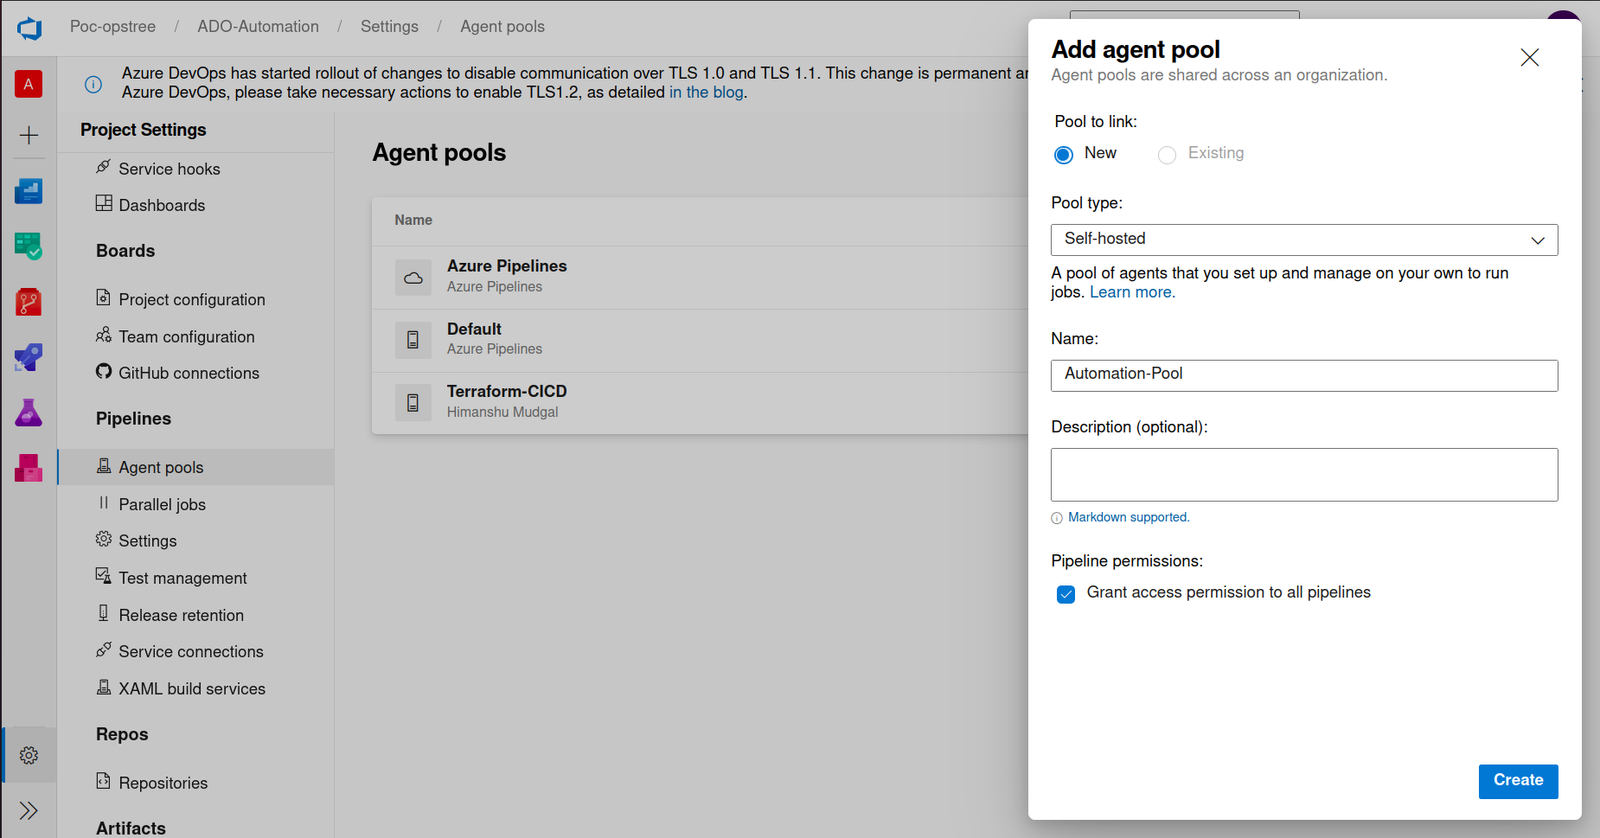
Step 3:
Click Add Pool and choose self-hosted Agent
Get The Agent
Step 4:
Now move inside your newly created pool & click on New Agent & Choose Your os-flavor and move forward accordingly.
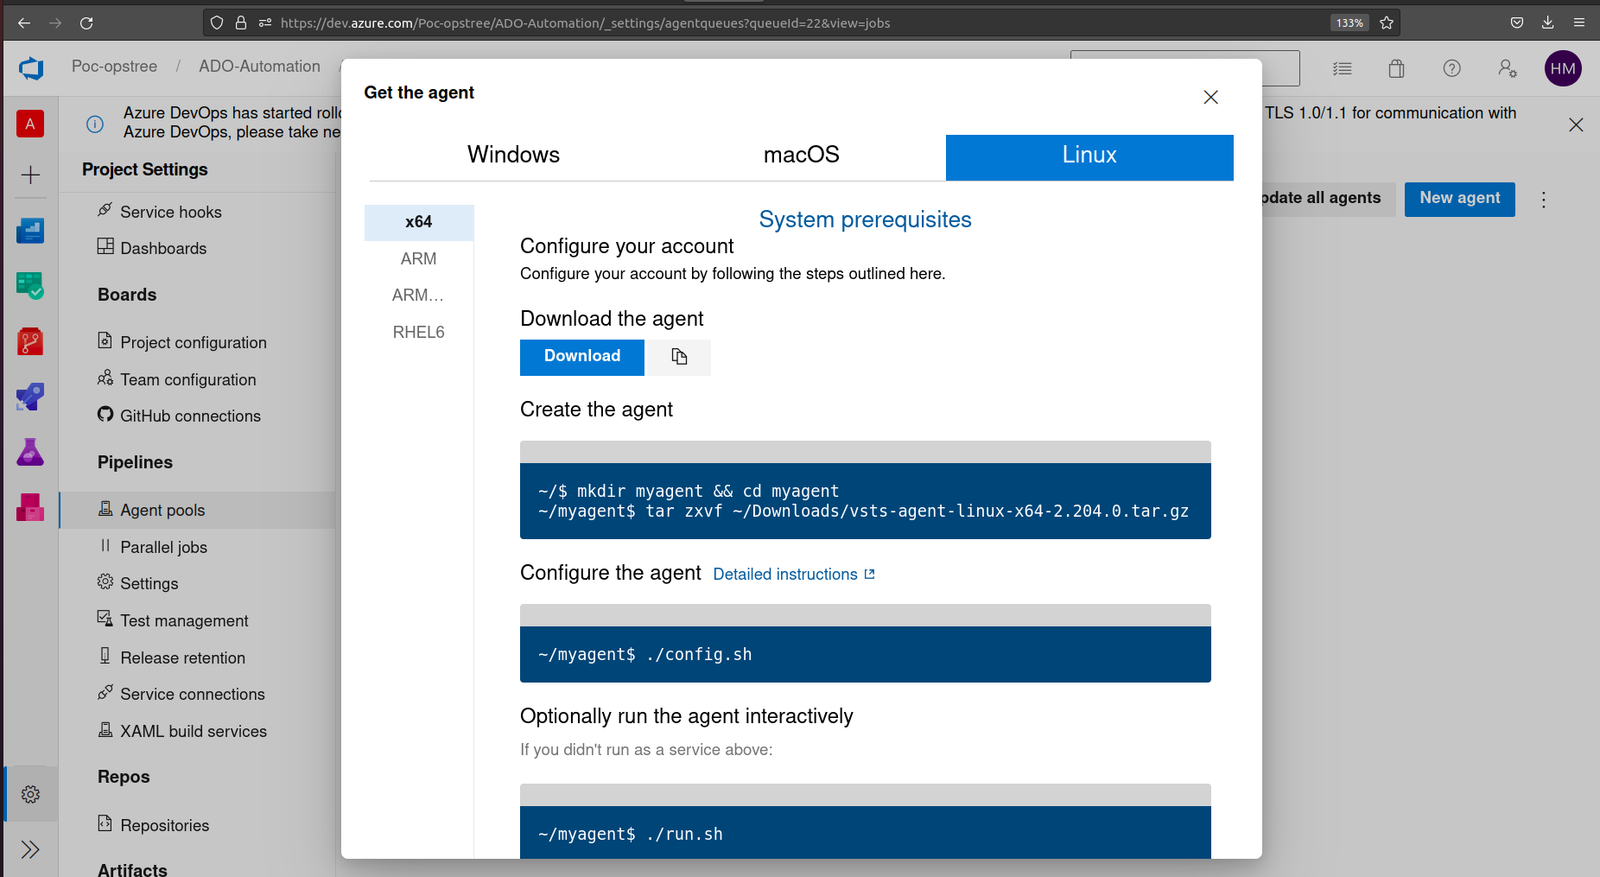
You can also use the following commands to configure your Linux agent for ADO.
cd myagent
wget https://vstsagentpackage.azureedge.net/agent/2.204.0/vsts-agent-linux-x64-2.204.0.tar.gz
tar zxvf vsts-agent-linux-x64-2.204.0.tar.gz
Generate Personal Access Token
Step 4:
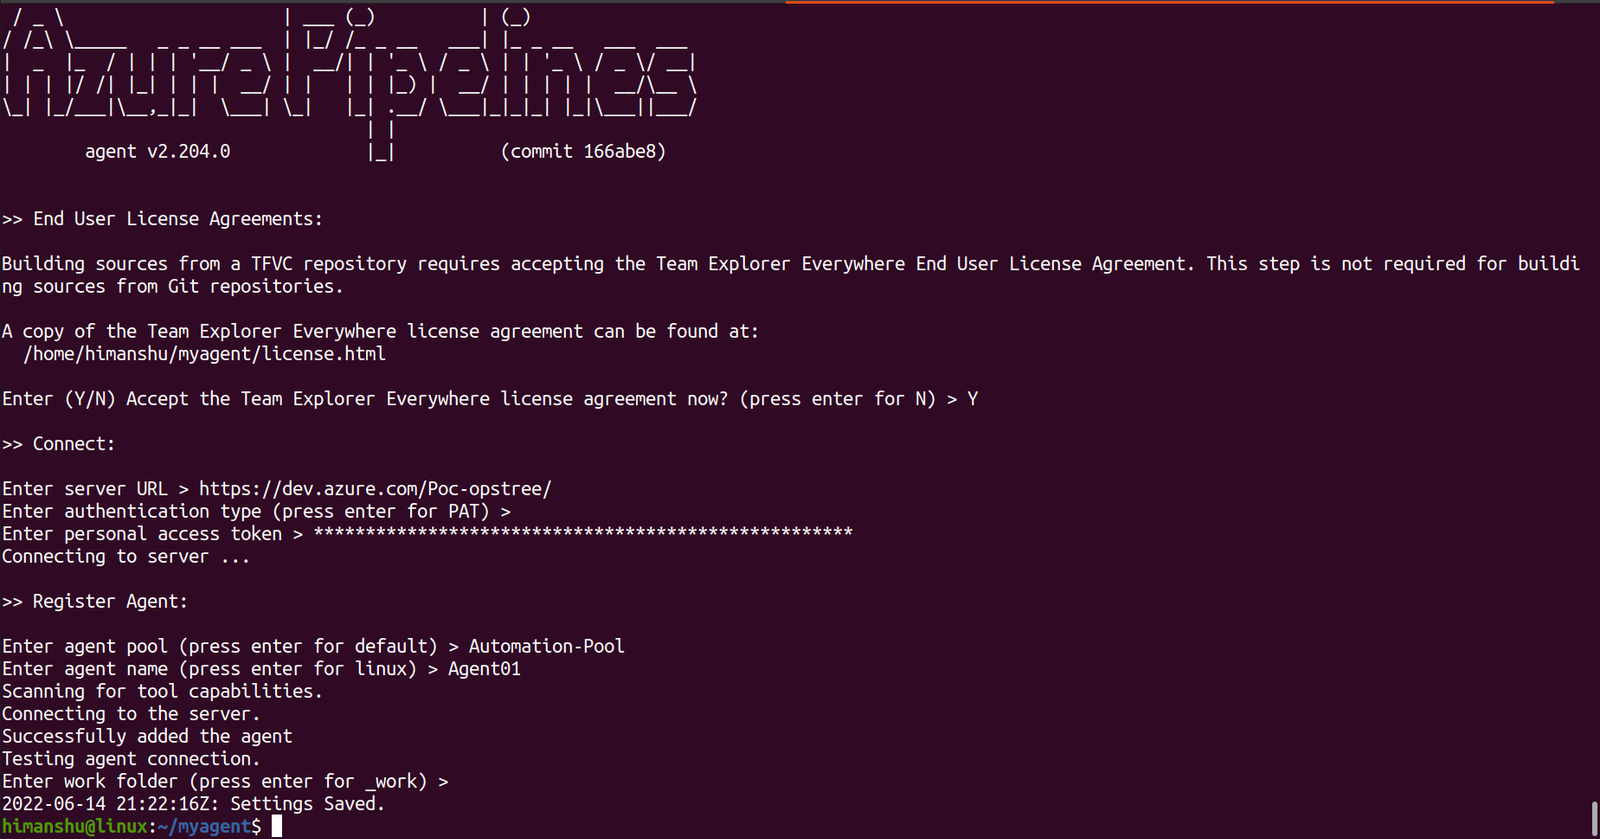
Configure your first Linux Agent.
Run ./config.sh in your terminal.

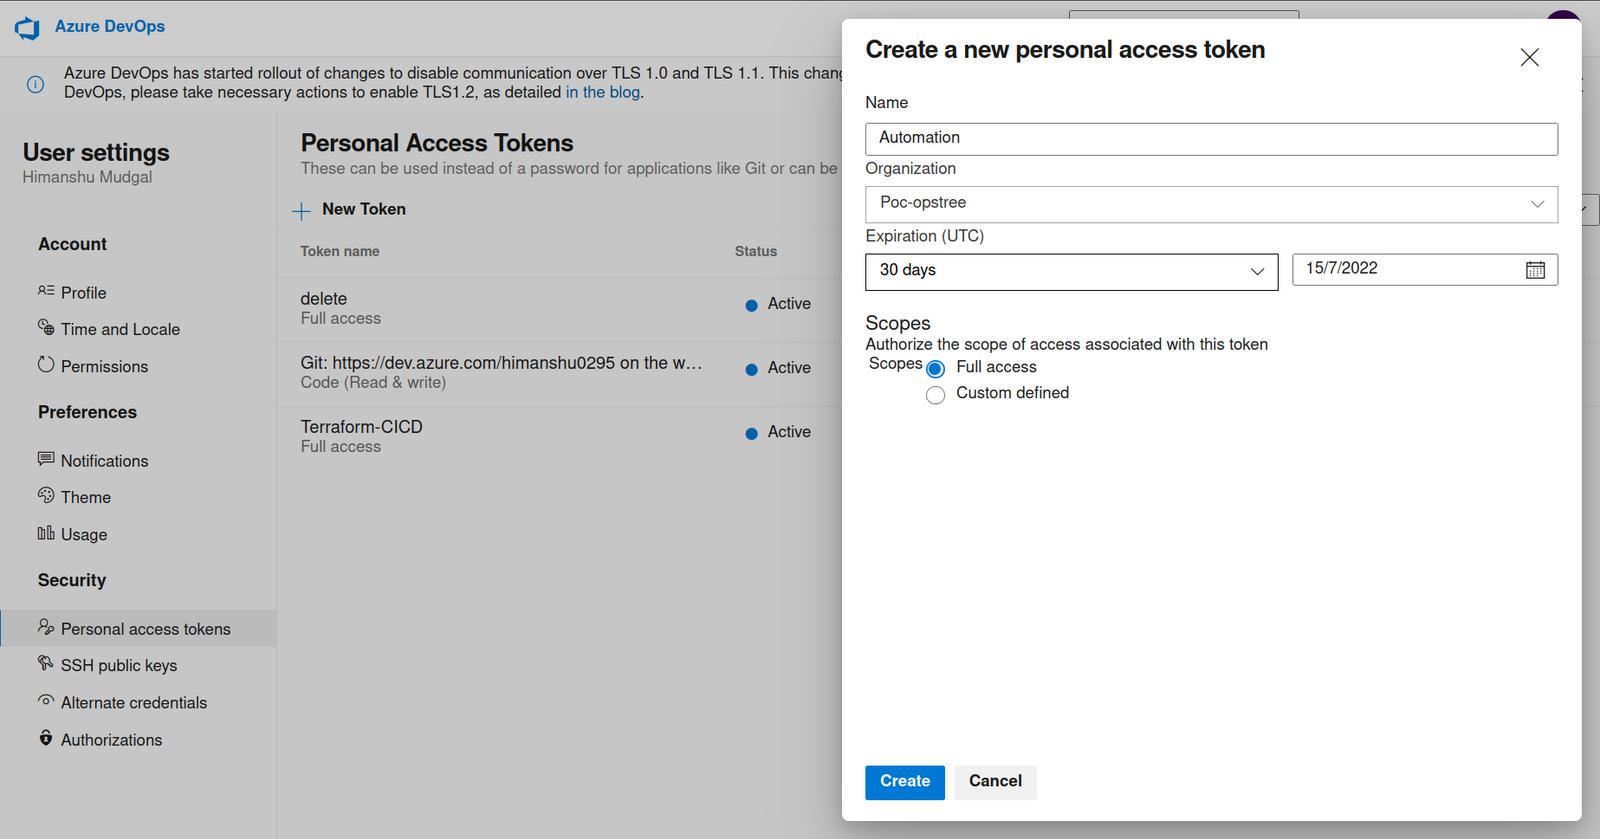
Now you need to generate a Personal Access Token (PAT).
For that, you need to go to the Personal Access Tokens section under User Settings located in the top right corner of your screen. Name it accordingly and grant permissions as per your requirements
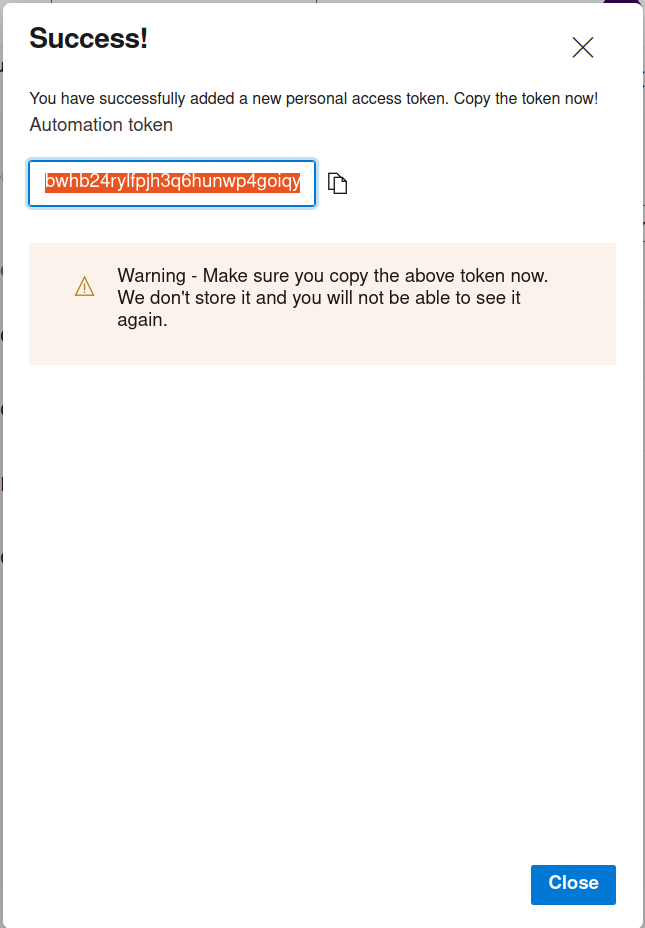
Warning – Make sure you copy the token. Azure doesn’t store it and you will not be able to see it again. PAT can only be regenerated.
Configuring Agent
Step 5:
Now paste that PAT in your terminal
Enter agent pool (press enter for default)
Enter agent name (press enter for Linux)
Enter work folder (press enter for _work)
And you’re done with your ADO Self Hosted Agent Configuration
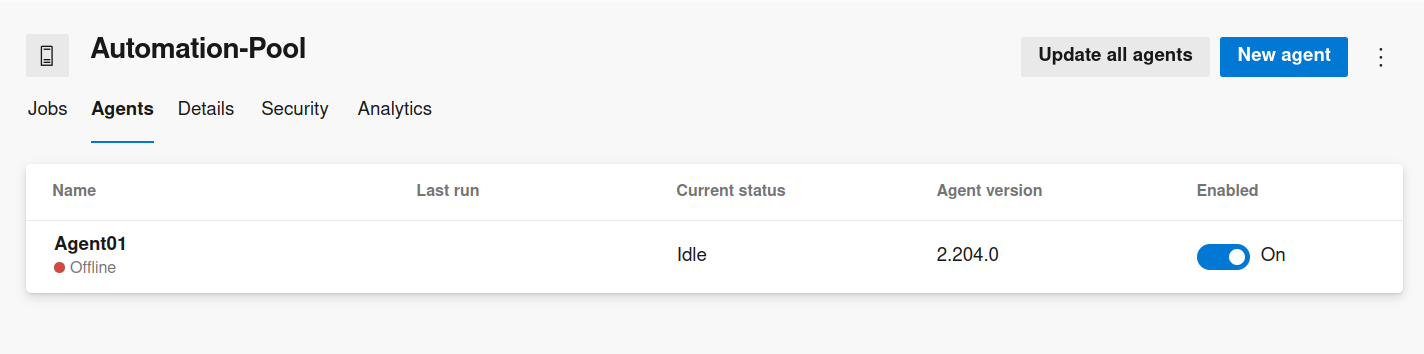
Step 6:
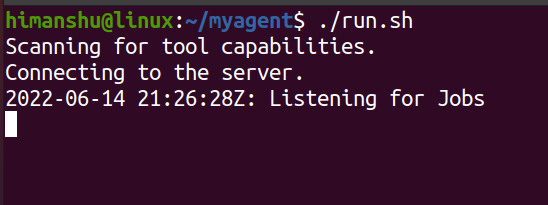
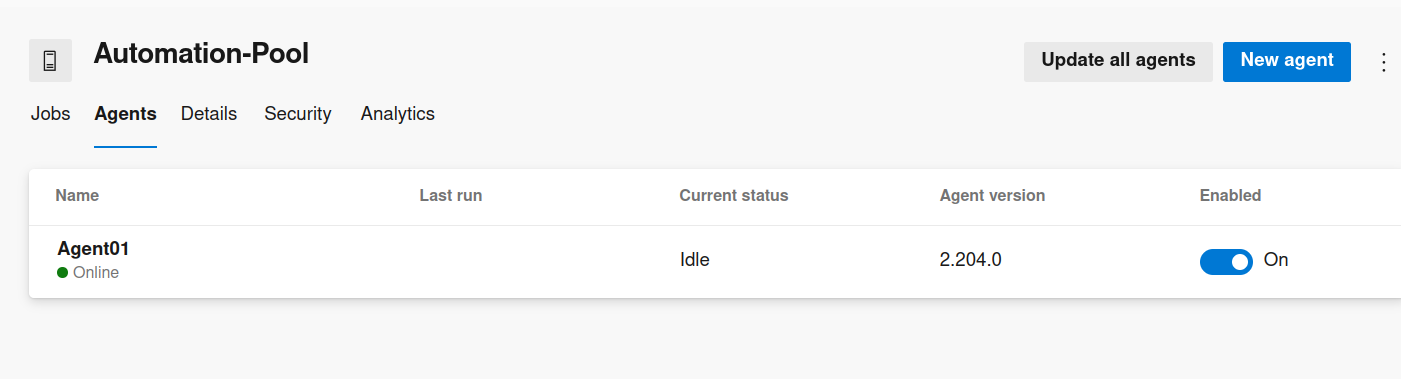
Now Run ./run.sh to bring your agent from Offline to Online.
Creating a Service For Self-Hosted Agent
Till now we have seen the process to enable our agent to listen for jobs. As you might have guessed up until now that just in case we stop running the script run.sh, our agent will get offline, which might be fatal while running a deployment. And obviously, nobody wants that to happen. To resolve that problem we will create an application service for our agent.
Application services help organizations boost performance, maintain availability, improve network and application security, and gain visibility into the behavior and health of their apps. By incorporating application services into their systems we can obtain the foundation needed to improve efficiency and increase their adaptability.
We will add this content in /etc/systemd/system.
cd /etc/systemd/system
sudo vim azureagent.service
[Unit]
Description="Service for SelfHosted Agent"

[Service]
User=ubuntu
WorkingDirectory=/home/ubuntu/myagent/
ExecStart=/bin/bash -c 'cd /home/ubuntu/myagent/ && ./run.sh'

[Install]
WantedBy=multi-user.target
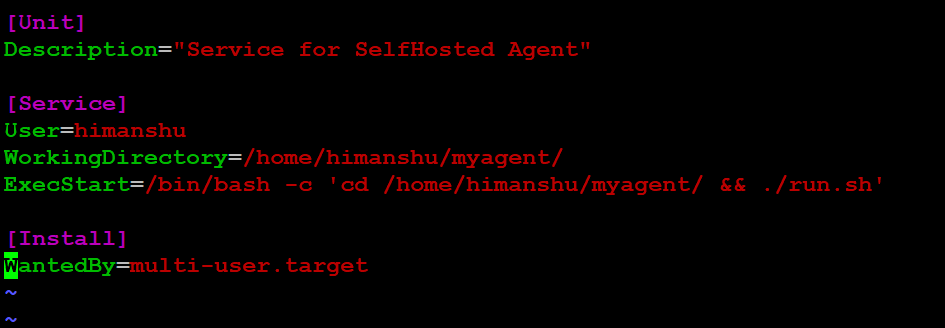
Just make sure that you replace ubuntu with your username, like I’ve replaced “ubuntu” with my user “himanshu” and respective WorkingDirectory and execStart. After saving the file we will enable and start our service.
sudo systemctl daemon-reload
sudo systemctl enable azureagent.service
sudo systemctl start azureagent.service
sudo systemctl status azureagent.service
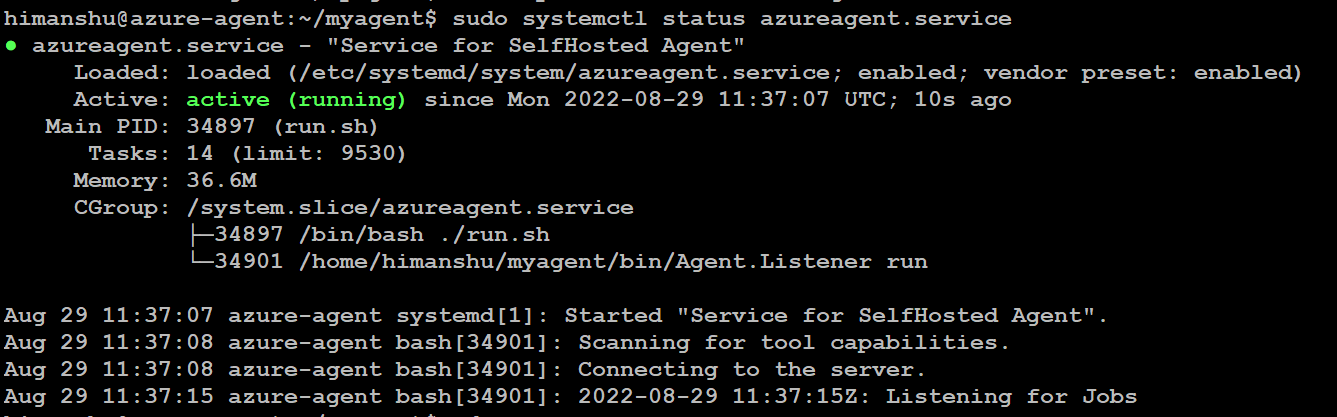
And that’s all we need to do to activate the service for our azure agent.
[Also Read: Azure Synapse Social Media Analytics Solution]
Conclusion
So, in this article, we have learned the importance of our Azure self-hosted Agents and how to configure them in a simple step-by-step manner. We also found out under what circumstances we must use self-hosted Agents than Microsoft Hosted Agents.