While mature CI pipelines often incorporate security scanner tools like Trivy and Clair. But these tools primarily identify vulnerabilities and to fix those vulnerabilities, developers manually upgrade versions of those dependencies like packages, libraries, etc.
Manually managing dependencies in software development can be a time-consuming and error-prone process, leading to several challenges. What if we use a tool that scans the entire repo and detects if updates/patches are available or not and raises PR to upgrade dependency automatically, allowing developers to review and merge them as needed. This proactive approach helps prevent the introduction of vulnerabilities in the first place by ensuring dependencies are kept up-to-date until it is zero-day vulnerabilities.
This blog introduces you to Renovate, a powerful open-source tool that automates dependency management. As an open-source, it offers various ways of installing and configuring it. We will specifically focus on installation using the command-line interface (CLI), in this blog.
Steps
1. Install Renovate with a single command:
npm install -g renovate
2. Configure Renovate:
Set up environment variables:
RENOVATE_REPOSITORIES: List of repositories (comma-separated) Renovate should manage.
export RENOVATE_REPOSITORIES="<username>/<repo-name>"
RENOVATE_TOKEN: Your personal access token for accessing repositories. e.g. if you are using GitHub, then create a PAT token and paste here.
export RENOVATE_TOKEN="<token goes here>"
3. Create a .renovaterc.json configuration file:
Create a file named .renovaterc.json in your project root and paste the following content:
JSON | base config with default behaviour.
{
  "$schema": "https://docs.renovatebot.com/renovate-schema.json",
  "extends": [
    "config:base"
  ]
}
OR
Just skip this step and jump to point number 5. By doing so a “Configure Renovate” PR will be raised with default configuration.
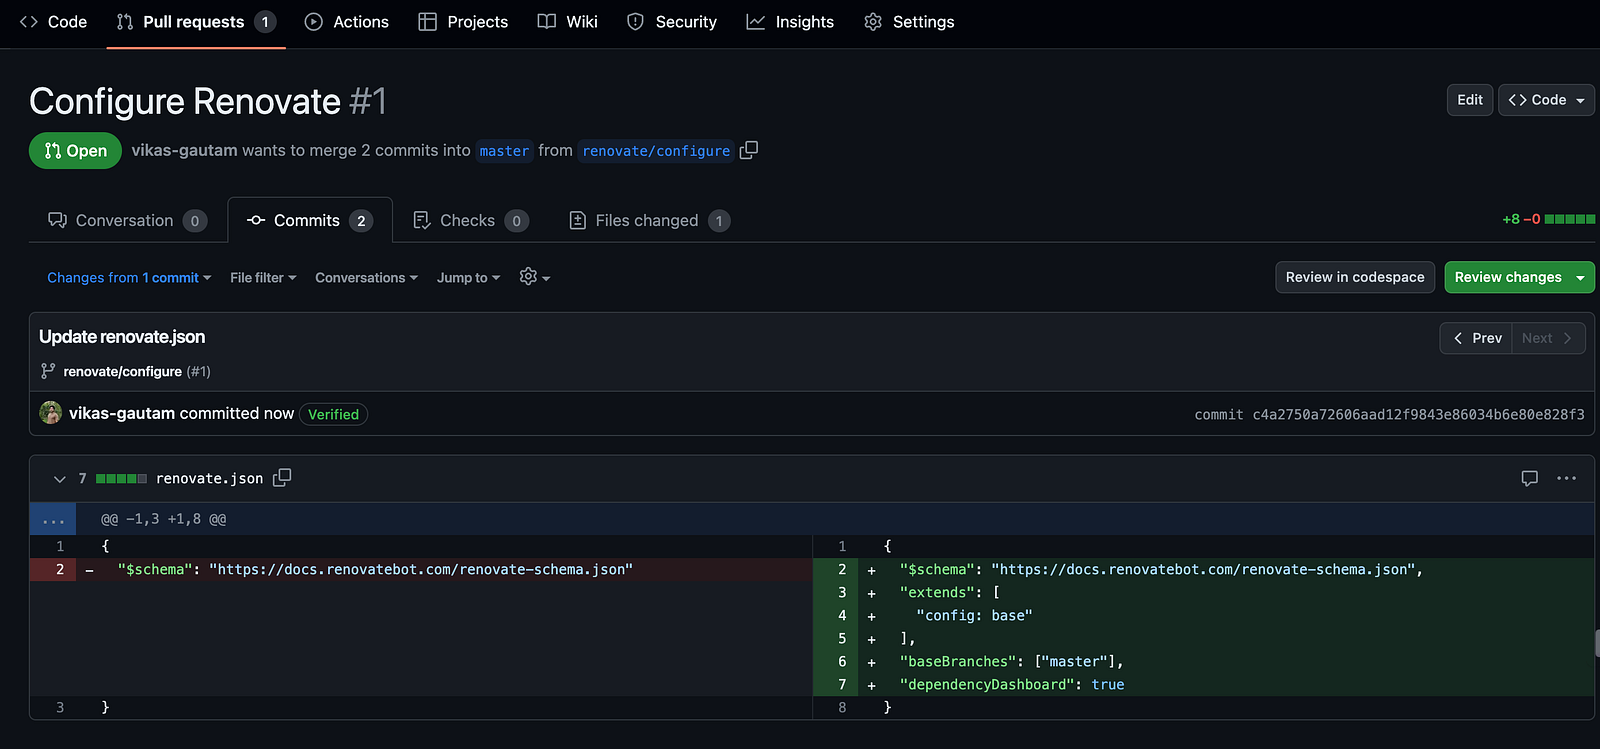
I chose to edit it to change the default behaviour of renovate (refer to the below images) and then merged it.


4. Push the Configuration File:
Commit and push the .renovaterc.json file to your repository in default branch ( as per the settings of version control ) e.g. master is default in my case because renovate retrieves this config from default branch only.

5. Unleash the Power of Renovate:
Renovate scans your dependencies, suggests updates and creates pull requests for your approval.
export LOG_LEVEL=debug
renovate
Demo
Here’s how you can set up Renovate for your Go application hosted on Github with this example repo.
Push file .renovaterc.json to the default branch ( master in this case ) of repo with below content.
Scenario(A) — JSON | base config only — it targets default branch only for pull request.
{
  "$schema": "https://docs.renovatebot.com/renovate-schema.json",
  "extends": [
    "config:base"
  ]
}
Scenario(B) — JSON | Targeting the “release” branch for pull request creation
{
  "$schema": "https://docs.renovatebot.com/renovate-schema.json",
  "extends": [
    "config:base"
  ],
  "baseBranches": ["release"],
  "dependencyDashboard": true
}
Run below commands or you can configure the renovate in dependency mangement pipeline.
npm install -g renovate
export RENOVATE_REPOSITORIES="vikas-gautam/renovate-demo"
export RENOVATE_TOKEN="<token goes here>"
export LOG_LEVEL=debug
renovate
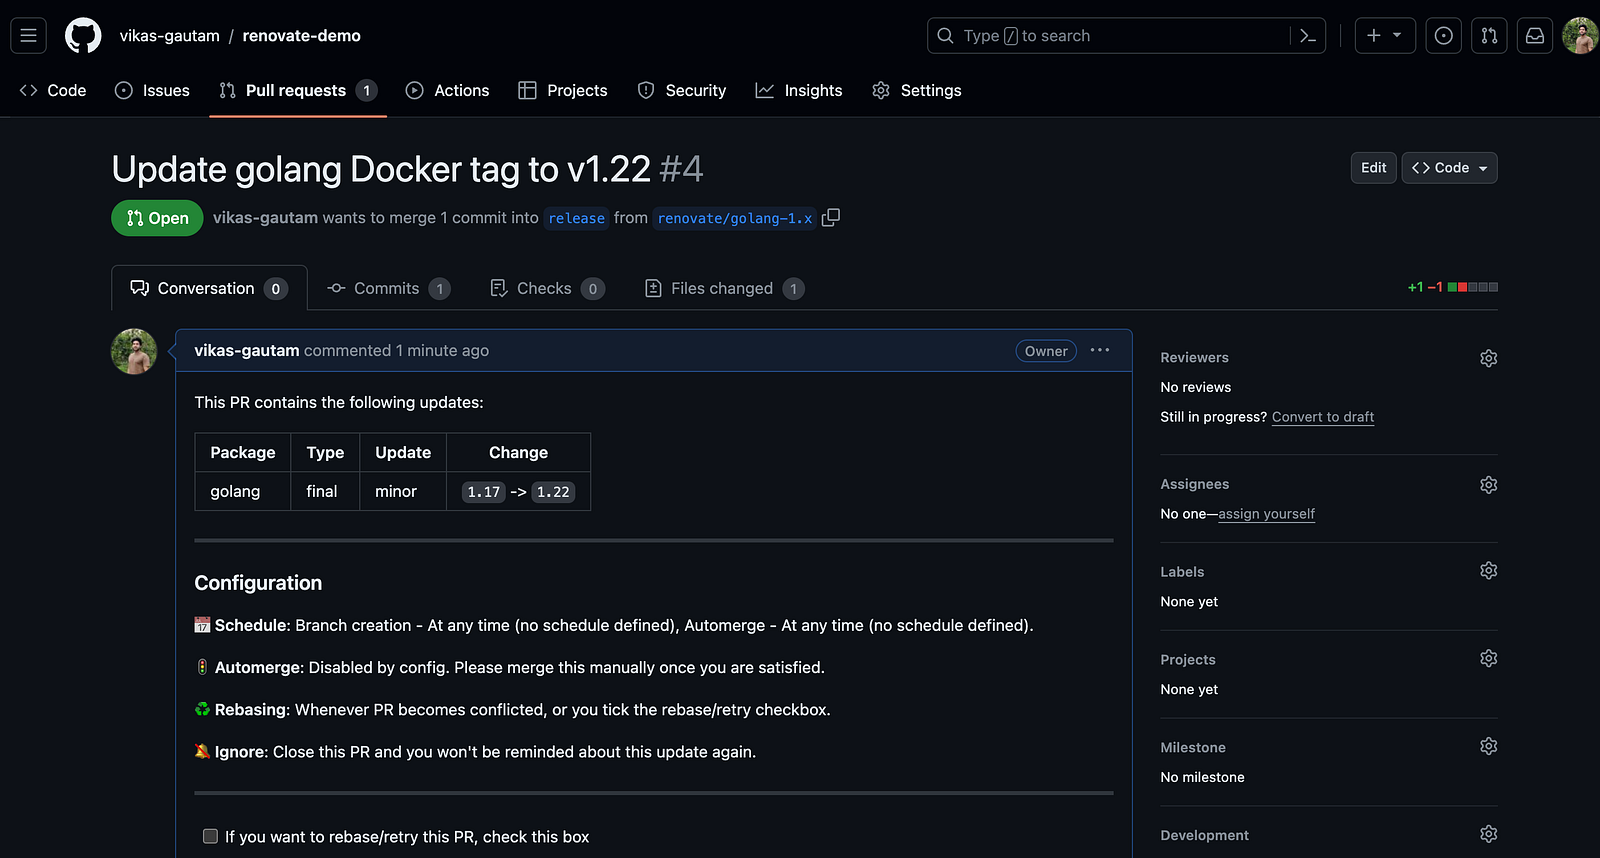
Result — As we can see that, PR has been raised for detected dependency in the code. Now, you can choose to merge this PR or close this.

Beyond Dependabot
Renovate offers unique features like:
- Grouping similar updates: Organize pull requests for related dependencies (e.g., all ESLint packages) for cleaner management. Check out the official doc to enable this.
- Scheduled auto-merge: Automate merging approved updates for a streamlined workflow. Refer the official doc to enable this.
- Dependency Dashboard: It shows an overview of the state of your repositories’ dependencies. To enable/disable this, just put below code in
.renovaterc.json
{
  "dependencyDashboard": true
}
It lists down all the PR raised in this repo in one place as tasks, so, you can mark them done, once respective PR will be merged.


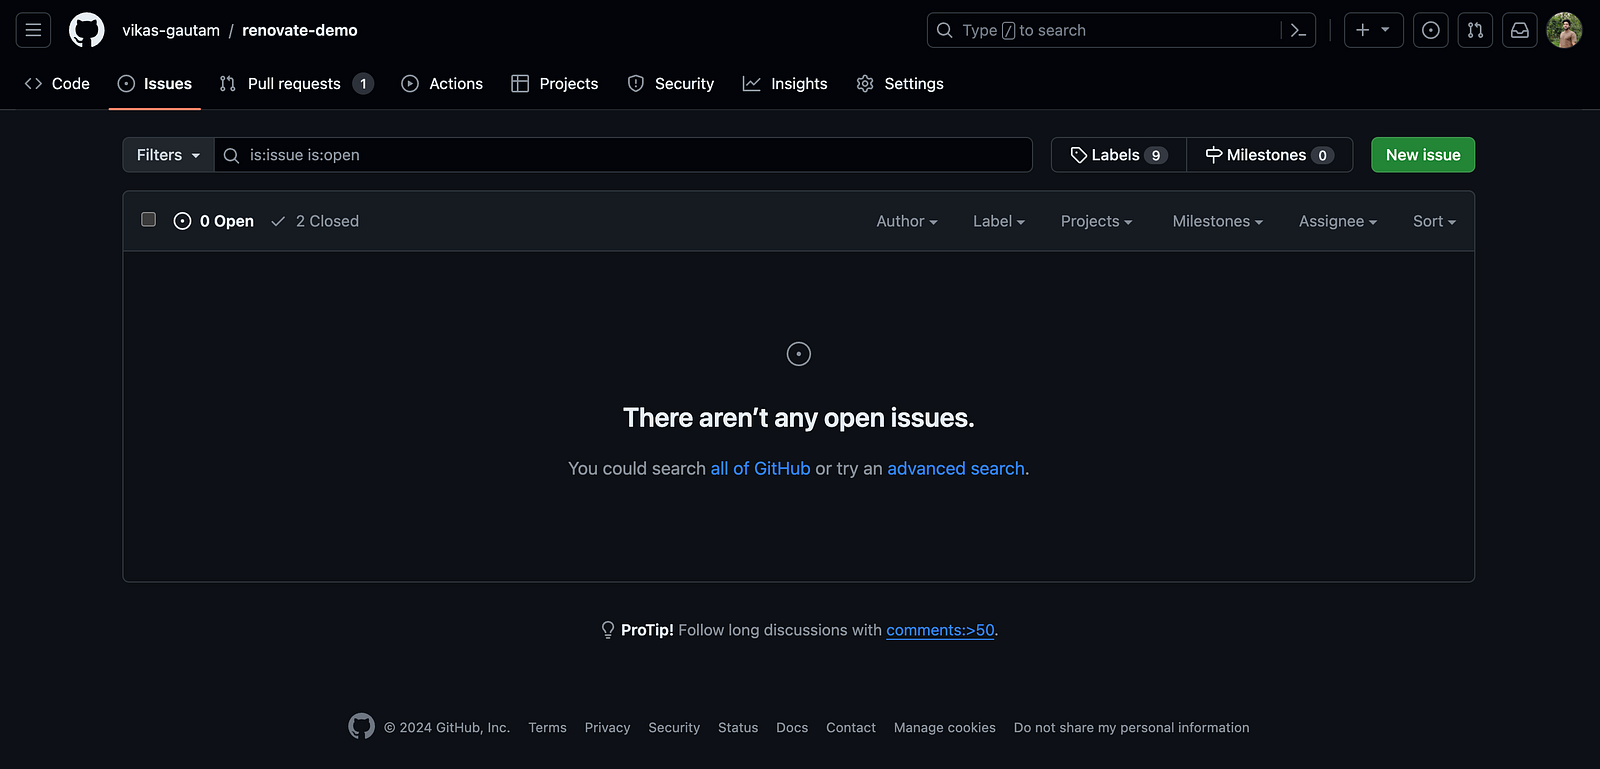
After disabling this, nothing will be shown under issues.
{
  "dependencyDashboard": false
}
Conclusion
While this blog provides a basic setup, remember that the .renovaterc.json file offers extensive configuration options. Explore the documentation to configure Renovate as per your specific needs and make dependency management truly handy.
I hope you found this information helpful. If you have any feedback or suggestions, please reach out to me or leave comments below.
References:
- https://docs.renovatebot.com/
- https://docs.renovatebot.com/presets-schedule/
- https://docs.renovatebot.com/configuration-options/#packagerules
Cheers till next time!!
Blog Pundits: Adeel Ahmed and Sandeep Rawat
OpsTree is an End-to-End DevOps Solution Provider.
Connect with Us