Do you have a large source code and find difficulties in searching the code or history of the code. There is a solution for you! Opengrok

OpenGrok is a Java-based application that helps you to search in source code in a fast manner. It is developed by Oracle and supports a large number of languages and formats.
Grok means understand i.e. to understand your source code. Some of the features of OpenGrok are as-
- Search for full text
- Definitions search
- Symbols search
- Path based search
- Revision history.
- Limit searches to any subtree.
- Search for files modified within a date range.
Let’s start the setup of OpenGrok, we need multiple applications to set up the OpenGrok.
To set up the latest version of OpenGrok and If you want any other version of Opengrok you can do that but you will need a different version of Java and Web Application. Rest of the things will be the same.
- Java – OpenJDK11 or Higher.
- Tomcat 10 or Higher.
- Universal Ctags
To make this blog short I have not covered the Java and Tomcat Installation. You can refer to the official site or any other link to download this software.
https://www.java.com/en/download/
https://tomcat.apache.org/download-10.cgi
For installing the universal ctags-
 $ git clone https://github.com/universal-ctags/ctags.git
    $ cd ctags
    $ ./autogen.sh
    $ ./configure --prefix=/where/you/want # defaults to /usr/local
    $ make
    $ make install # may require extra privileges depending on where to install
Once all the prerequisites have been Installed, you can proceed with Opengrok.

Source Root is the date or source code that needs to be indexed. Each Directory in this source root act as a Project.
Data Root is where the index data will be created.
Step 1: Download the Opengrok Tar file from https://github.com/oracle/opengrok/releases
Step2 : Create a opengrok directory-
$ mkdir /opengrokStep3: Create subdirectories in opengrok directory
          $ mkdir src
          $ mkdir data
          $ mkdir dist
          $ mkdir log
          $ mkdir etc
Step 4: Unpack the release tarball as follows:
$ tar -C /opengrok/dist --strip-components=1 -xzf opengrok-*.tar.gzStep 5: Copy the logging configuration:
$ cp /opengrok/dist/doc/logging.properties /opengrok/etcStep 6 : Clone the source code in the src directory which you want to search in opengrok. For the demo, you can add two codes-
$ cd /opengrok/src

# use one of the training modules at GitHub as an example small app.
$ git clone https://github.com/githubtraining/hellogitworld.git

# use OpenGrok as an example large app
$ git clone https://github.com/OpenGrok/OpenGrok
Step7 : Copy source.war from /opengrok/dist/lib/source.war to the /opt/tomcat/webapps
$ cp /opengrok/dist/lib/source.war /opt/tomcat/webappsStep8 : Tomcat will automatically extract the content of the source.war in the source directory. In this directory go to the source/WEB-INF/web.xml, edit param-value if your opengrok directory lies anywhere else.
<param-value>/opengrok/etc/configuration.xml</param-value>Step9 : Now, it’s time to create Index for the Opengrok.
$ java \
-Djava.util.logging.config.file=/opengrok/etc/logging.properties \
-jar /opengrok/dist/lib/opengrok.jar \
-c  /usr/local/bin/ctags \
-s /opengrok/src/ -d /opengrok/data -H -P -S -G \
-W /opengrok/etc/configuration.xml -U http://localhost:8080/source
Run the command with -h to get more information, from this you can understand why these flags used in above command
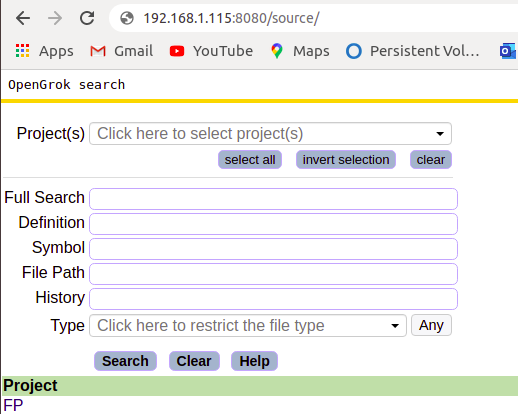
$ java -jar /opengrok/dist/lib/opengrok.jar -hFinally your Opengrok is ready, browse these Link to access Opengrok –
http://localhost:8080/source or http://ServerIP:8080/source.
It is much recommended for the developers who work on huge code like Android project and finds difficulty in searching in the code.
Search the most out of your code and Happy Searching.
Blog Pundit: Naveen Verma and Abhishek Dubey
Opstree is an End to End DevOps solution provider
Connect Us