Shell initialization files

Introduction

A shell initialization file is a shell script that runs automatically each time the shell executes. The initialization file sets up the “work environment” and “customizes” the shell environment for the user. The main agenda of Shell initialization files are to persist common shell configuration, such as Continue reading “Shell initialization files”

Achieve SSO in Privately Hosted Jenkins

Introduction

Providing OAuth 2.0 user authentication directly or using Google+ Sign-in reduces your CI overhead. It also provides a trusted and secure login system that’s familiar to users, consistent across devices, and removes the burden of users having to remember another username and password. One of the hurdles in implementing a Gmail authentication is that Google developer console and your  Jenkins server should be in the same network or in simple terms they can talk to each other.

Resources Used

  • Privately Hosted Jenkins
  • Google developer console
  • Ngrok
In this blog, I’m trying to explain how to integrate Gmail authentication feature in your privately hosted Jenkins server so that you get free of filling the form by the time of creating a new user.

Setup 1: Setup Ngrok

NGROK
 
Ngrok is multiplatform tunneling, reverse proxy software that establishes secure tunnels from a public endpoint such as the internet to a locally running network service while capturing all traffic for detailed inspection and replay.
We are using Ngrok to host our Jenkins service (running on port 8080) to public IP.

 
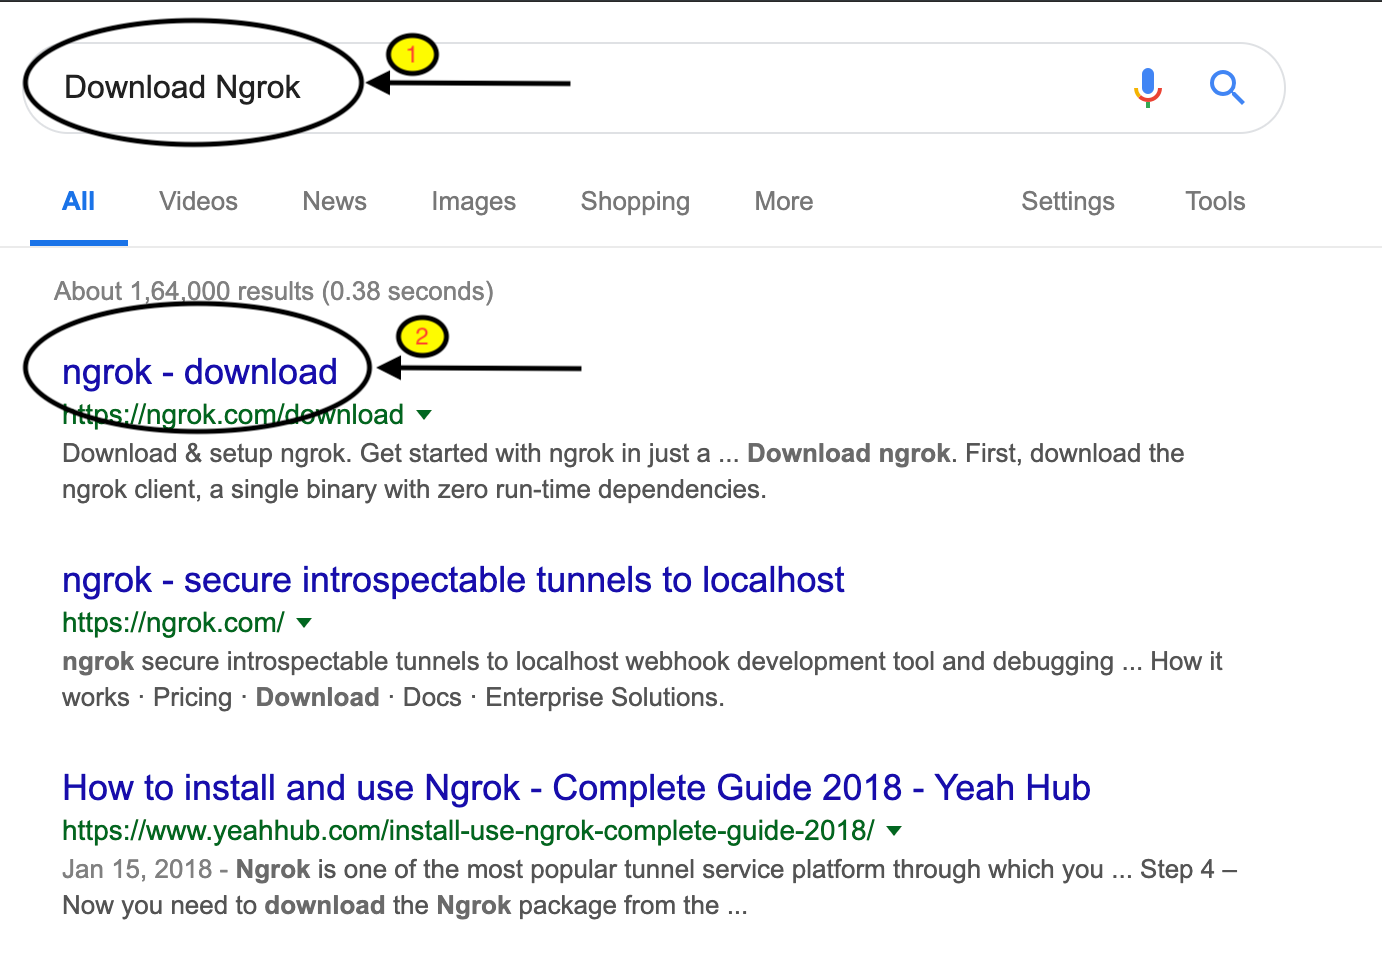
Go to google and search for Download Ngrok.


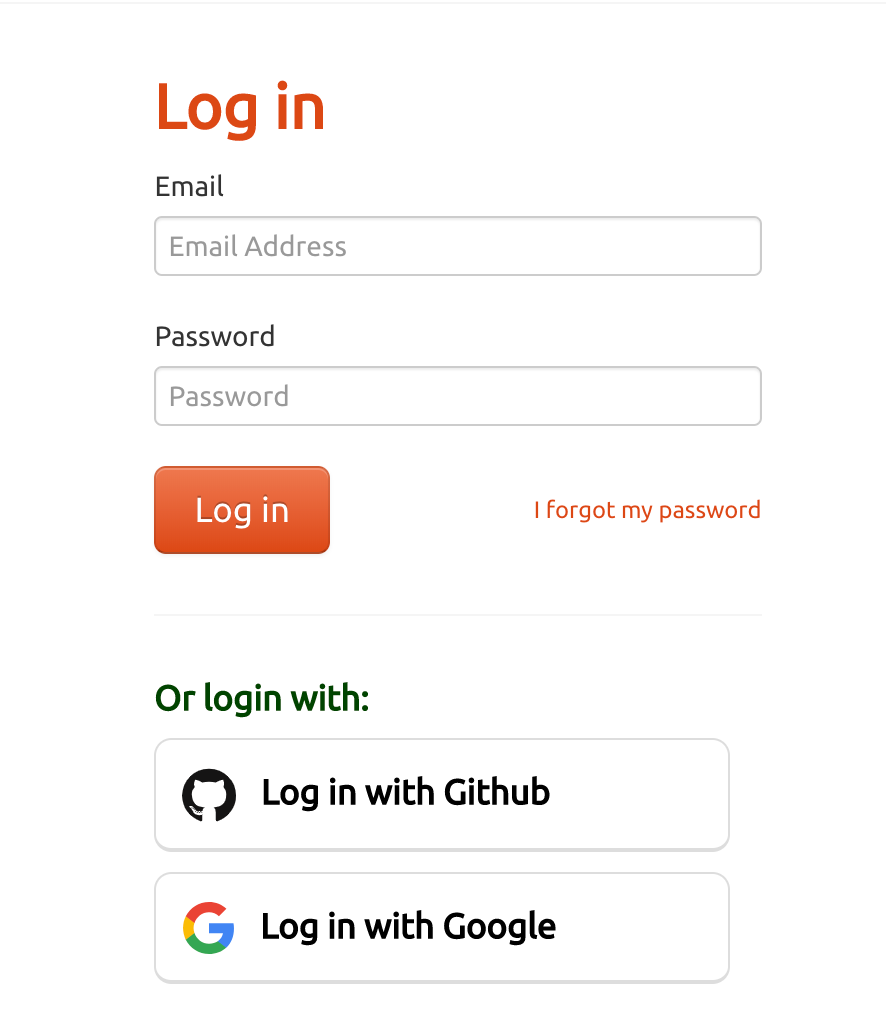
Either Login with google account or do Ngrok own signup.
 
 
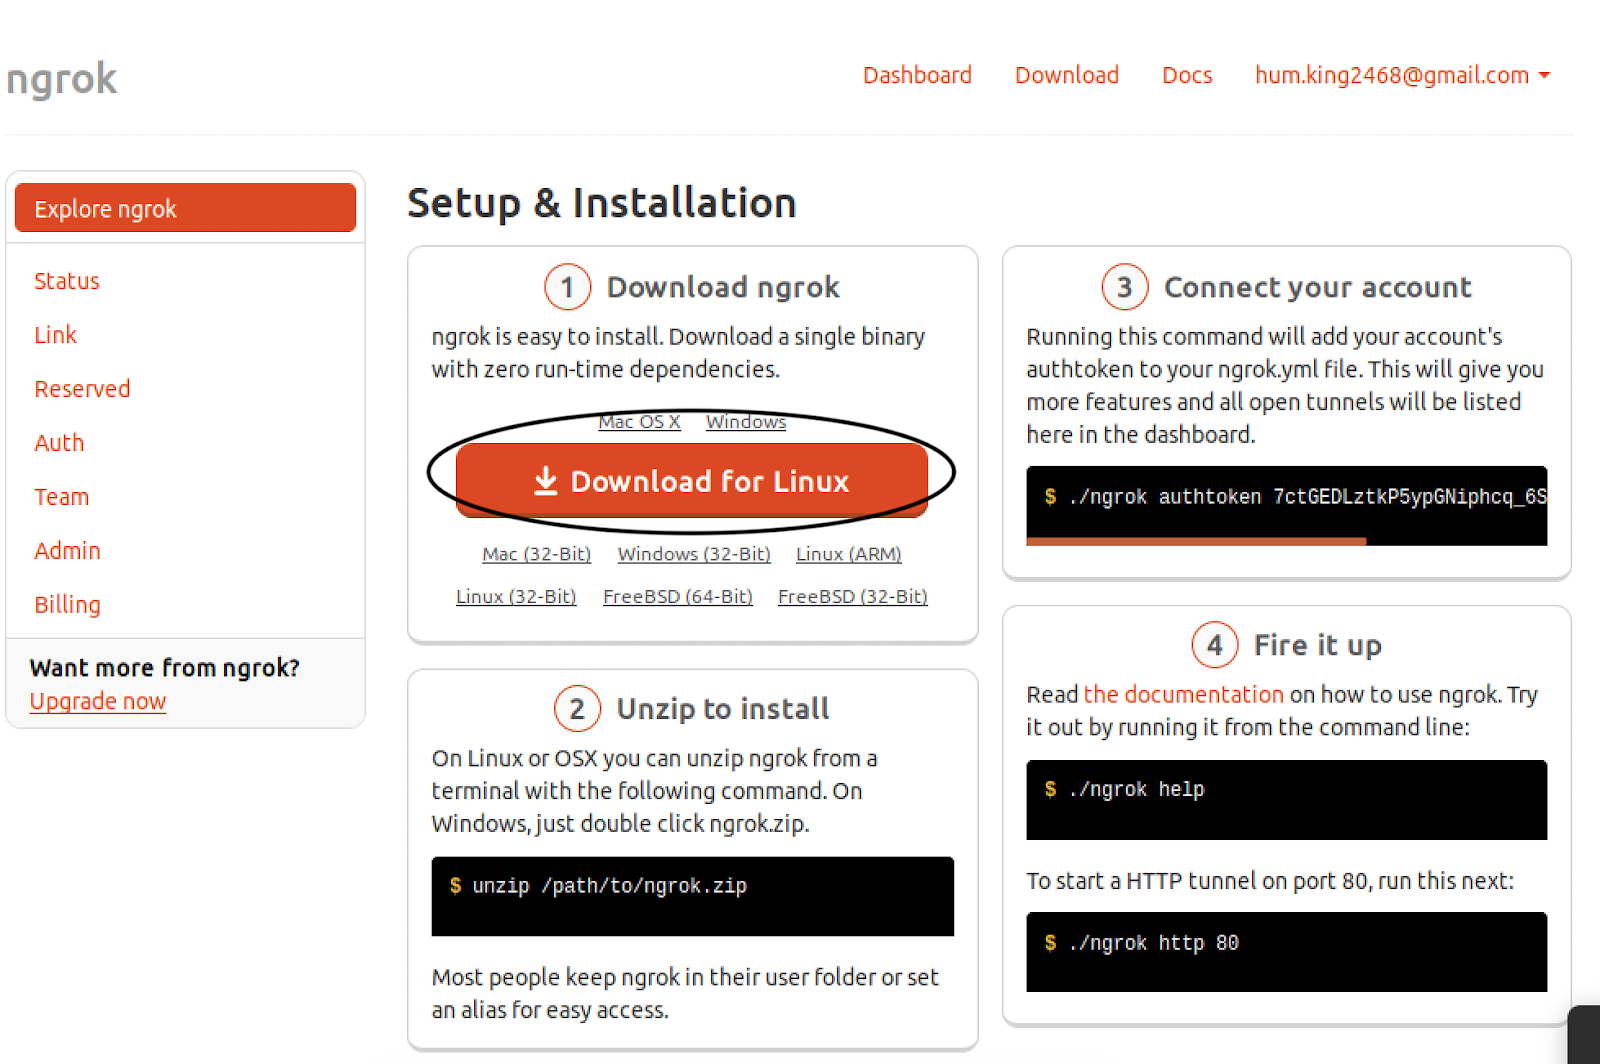
After Logged in Ngrok Download it.
 
 
After Download Ngrok, Go to the console and unzip the downloaded zip file and then move it to /usr/local/bin.
Note: Moving part is optional, we do so for accessing ngrok from anywhere.


Go to ngrok UI page , copy the authentication key and paste it.
Note: Remove ” . / ” sign because we moved ngrok file to /usr/local/bin
 
 
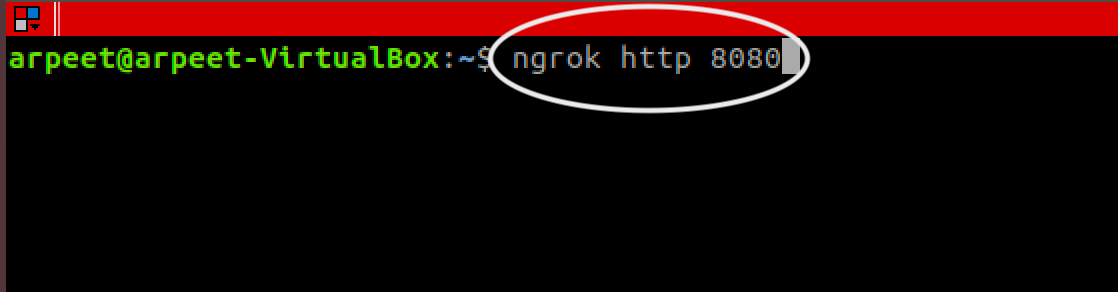
 Major configuration for Ngrok is done. Now type the command:
ngrok http 8080
 Assuming that Jenkins is running on port 8080.
 
 
Now Ngrok Host our Jenkins Service to public IP.
 
Copy this IP, we will use it in the google developer console.
 
Note: Make this terminal up and running.(don’t do ctrl+c)

Step 2: Setup Google Developer Console

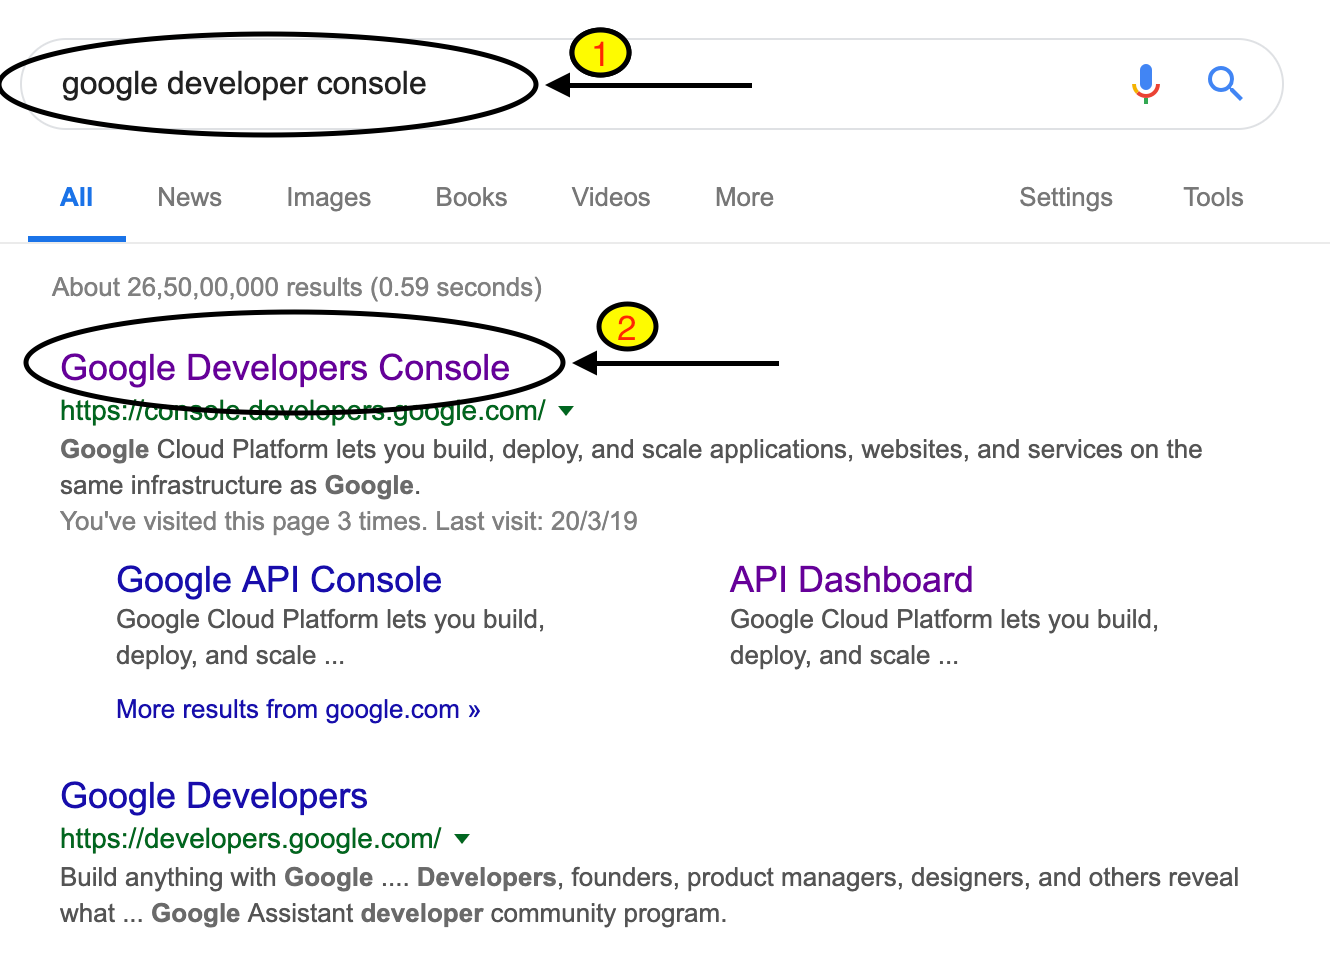
Go to google and search for google developer console.
 
 
After sign in into google developer console, we will redirect to Google developer console UI screen.
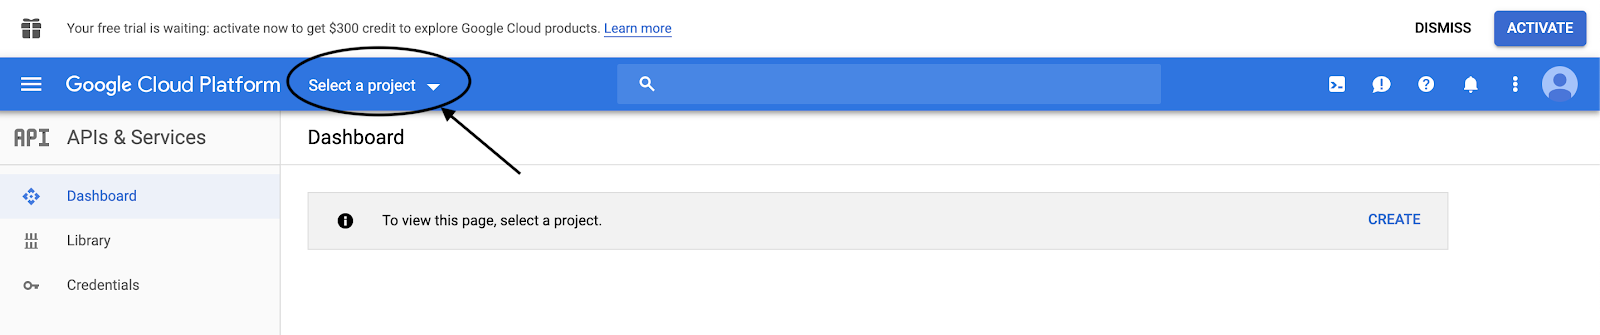
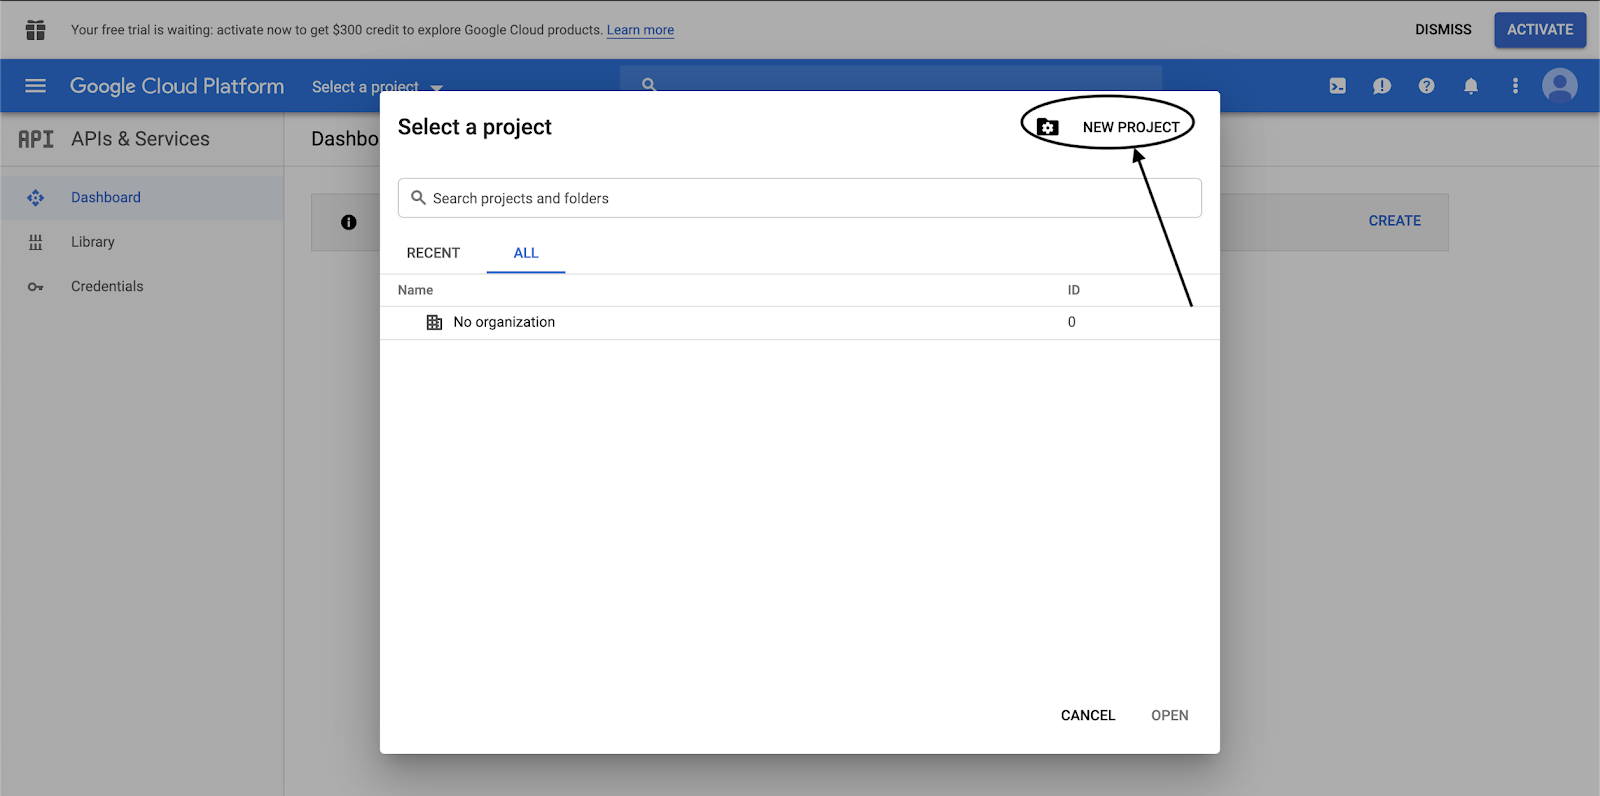
Go to Select a project  → New Project
 
 
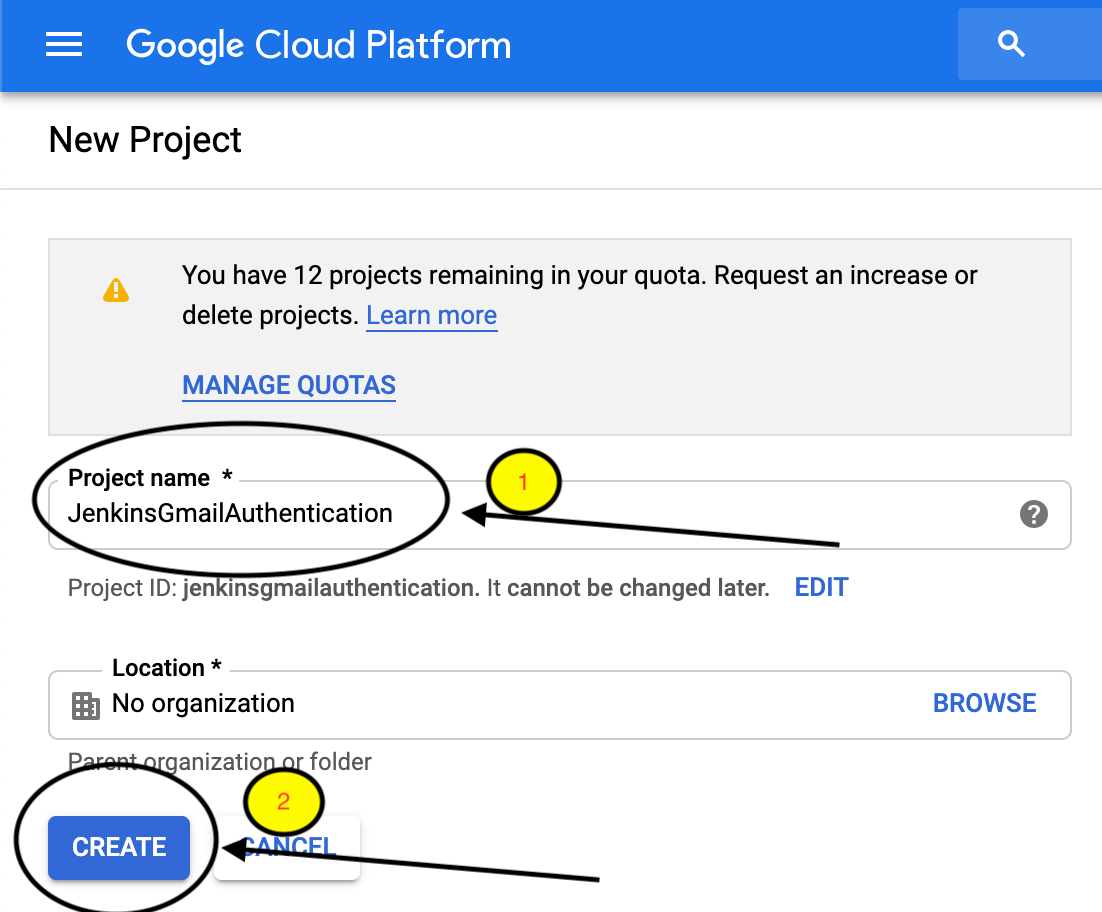
Give Project Name, here I will use “JenkinsGmailAuthentication” and create a project. Creating a project takes 1 or 2 minutes.
 
 
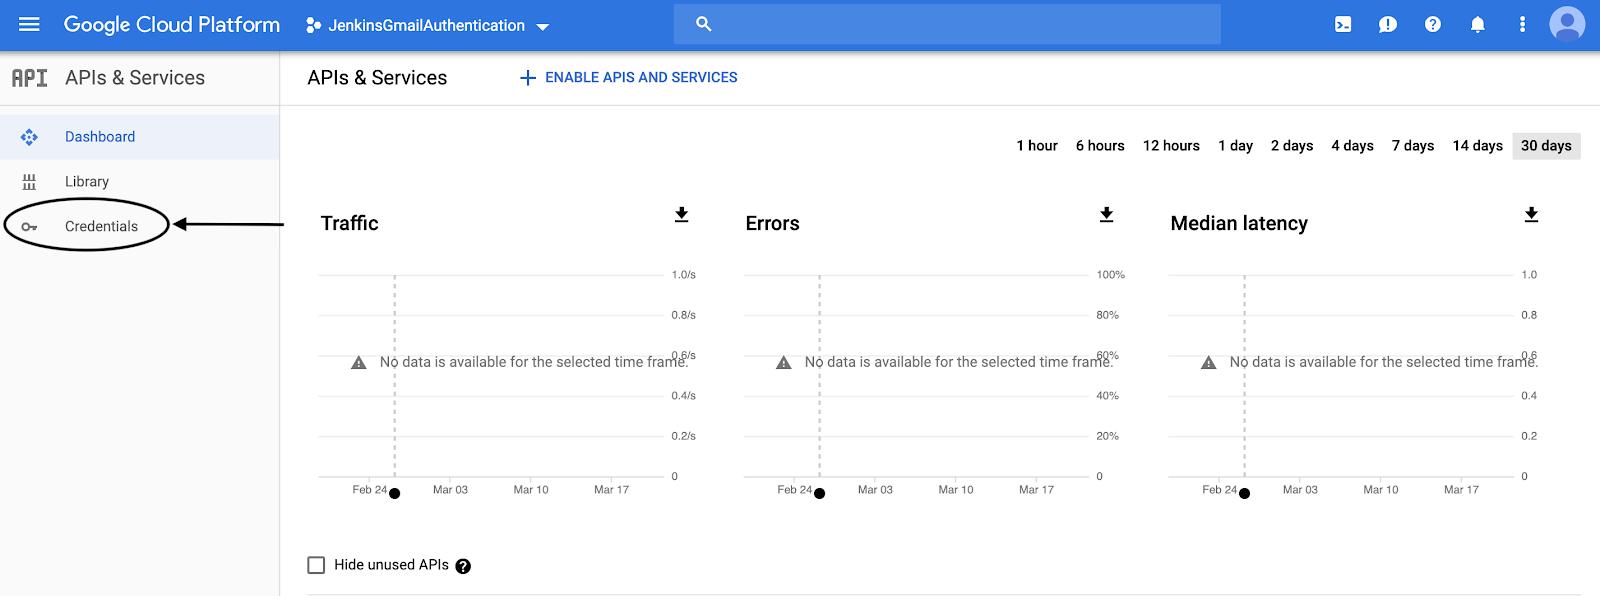
After Project created, we will be redirected to the UI page as shown below. Now click on on the “Credentials” Tab on the left slide bar.


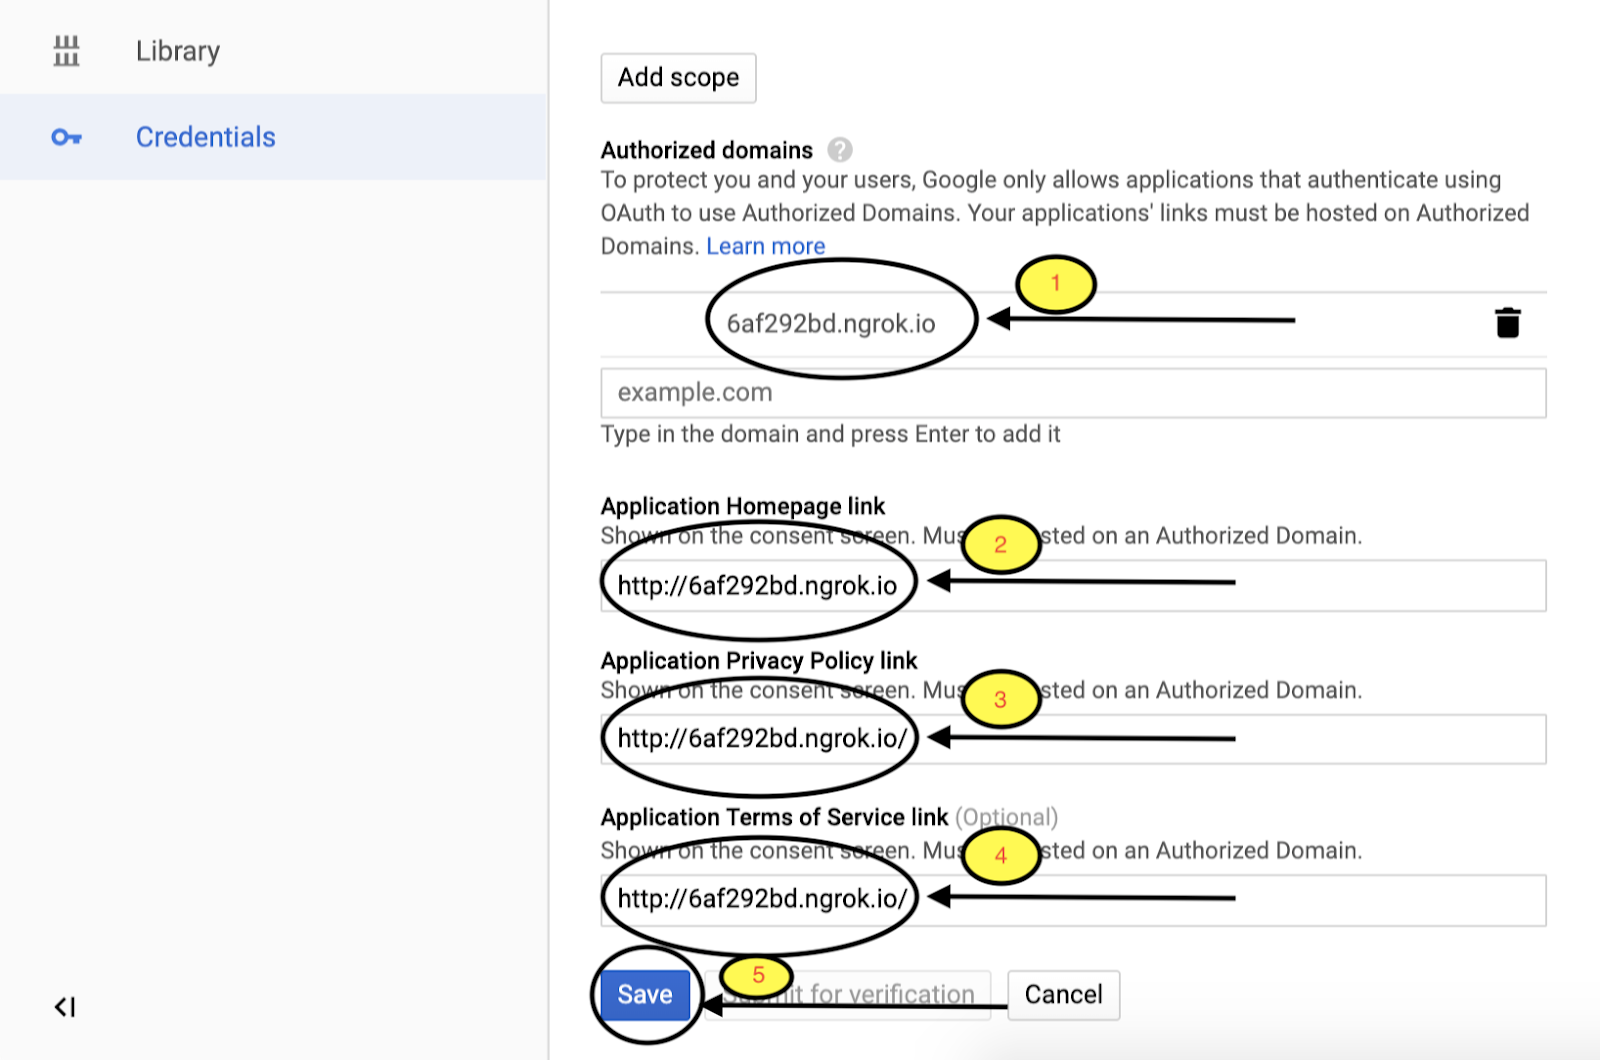
After Go to the OAuth consent screen tab and give the below entries. Here I will give Application name to “JenkinsGmailAuthentication”.
 
 
The important part of the Google developer console is Public IP we created using Ngrok. Copy Public IP in Authorized domains and note to remove ” http:// ” in Authorized domains.
 
 
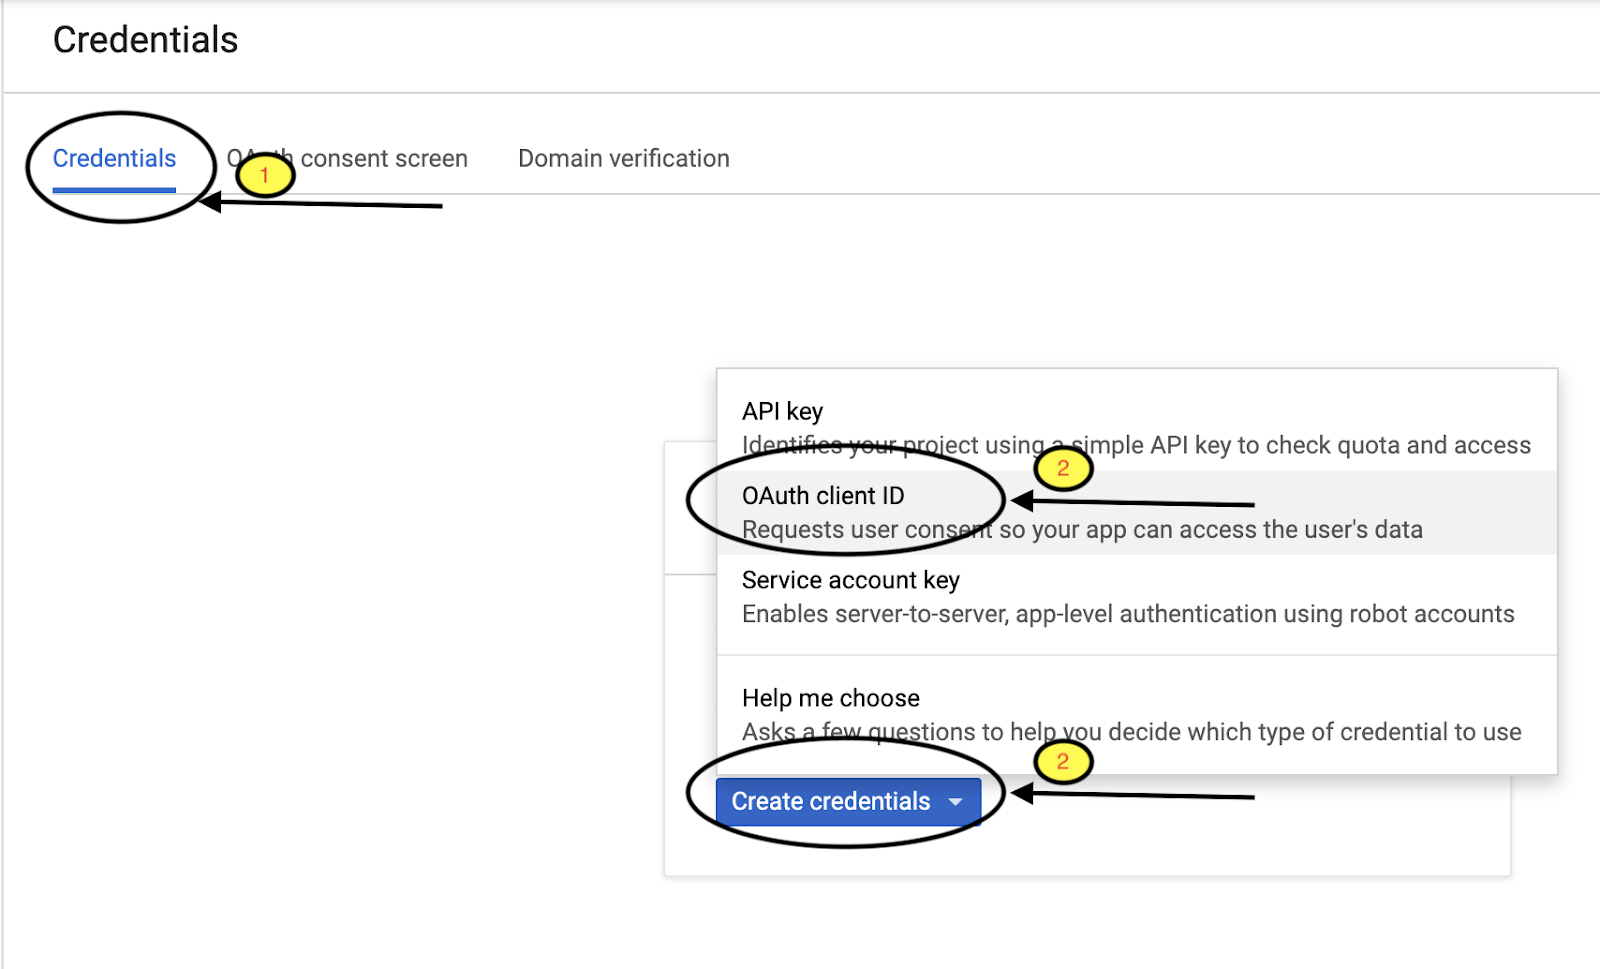
After Setting OAuth consent screen, Go to   “Credentials Tab”→ Create Credentials→OAuthClientID
 
 
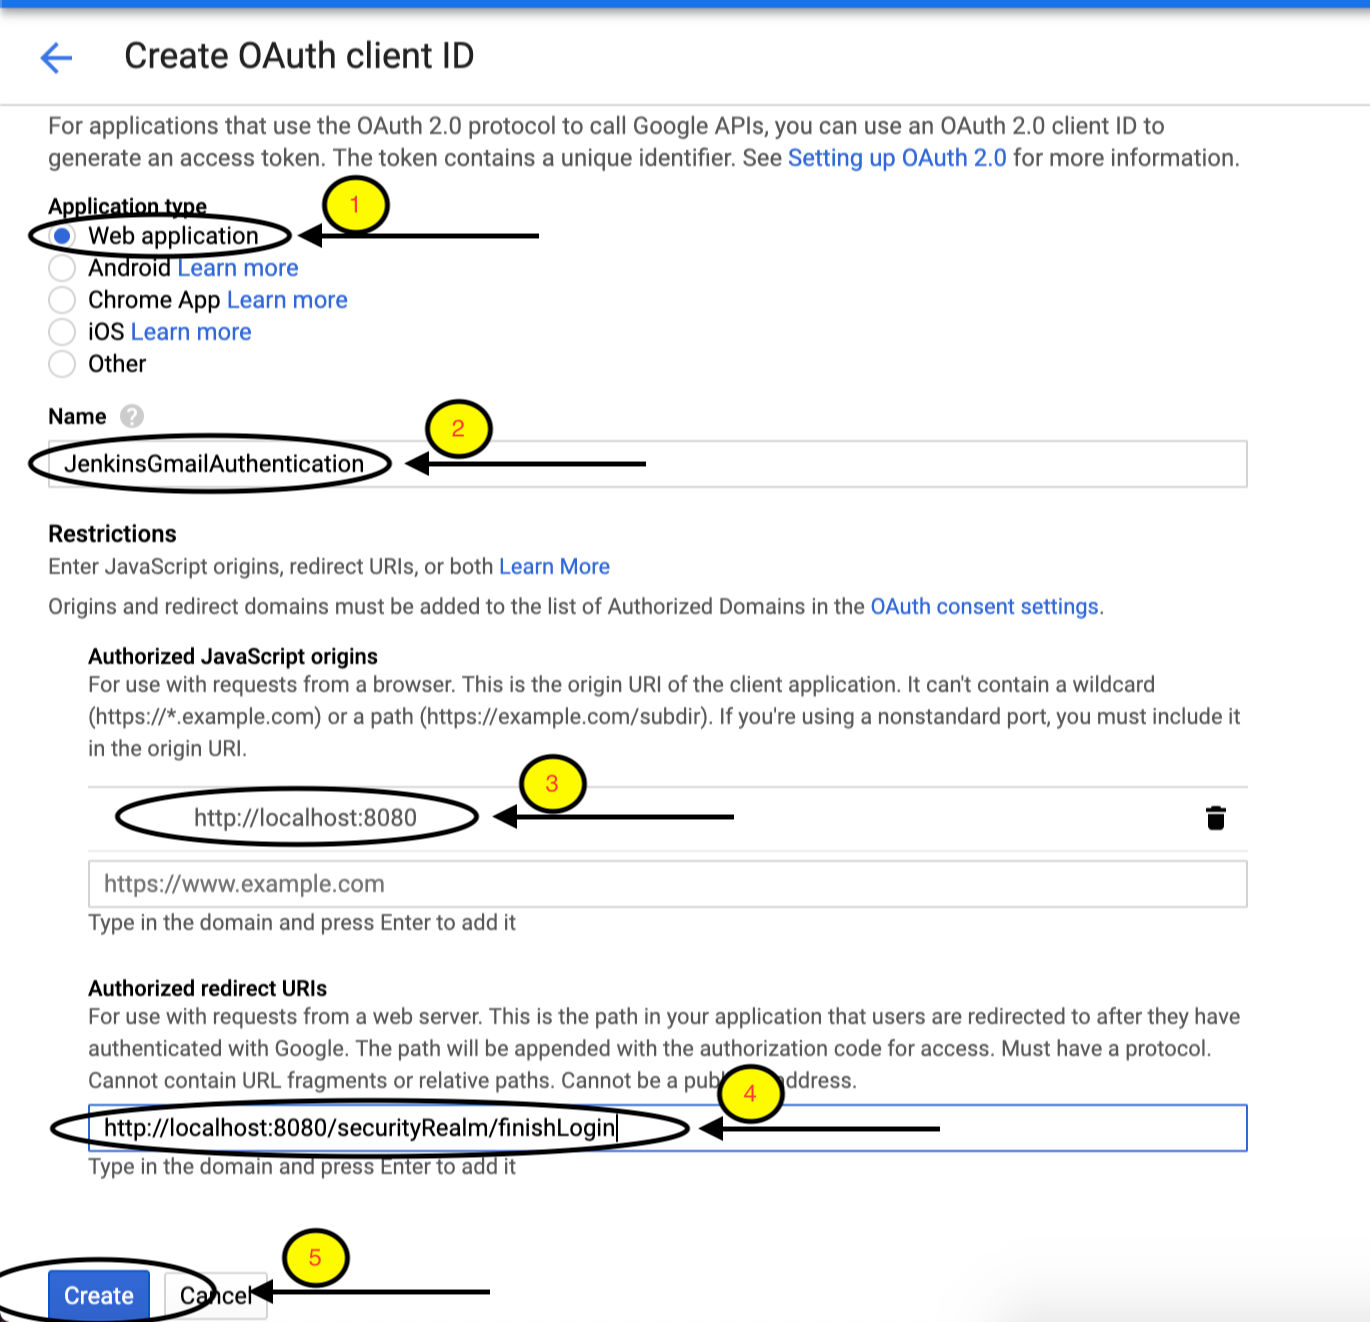
Select Application type as Web Application, give the name “JenkinsGmailAuthentication”.
Major Part of Create Credential has Authorized JavaScript origins and Authorized redirect URIs.
 
 
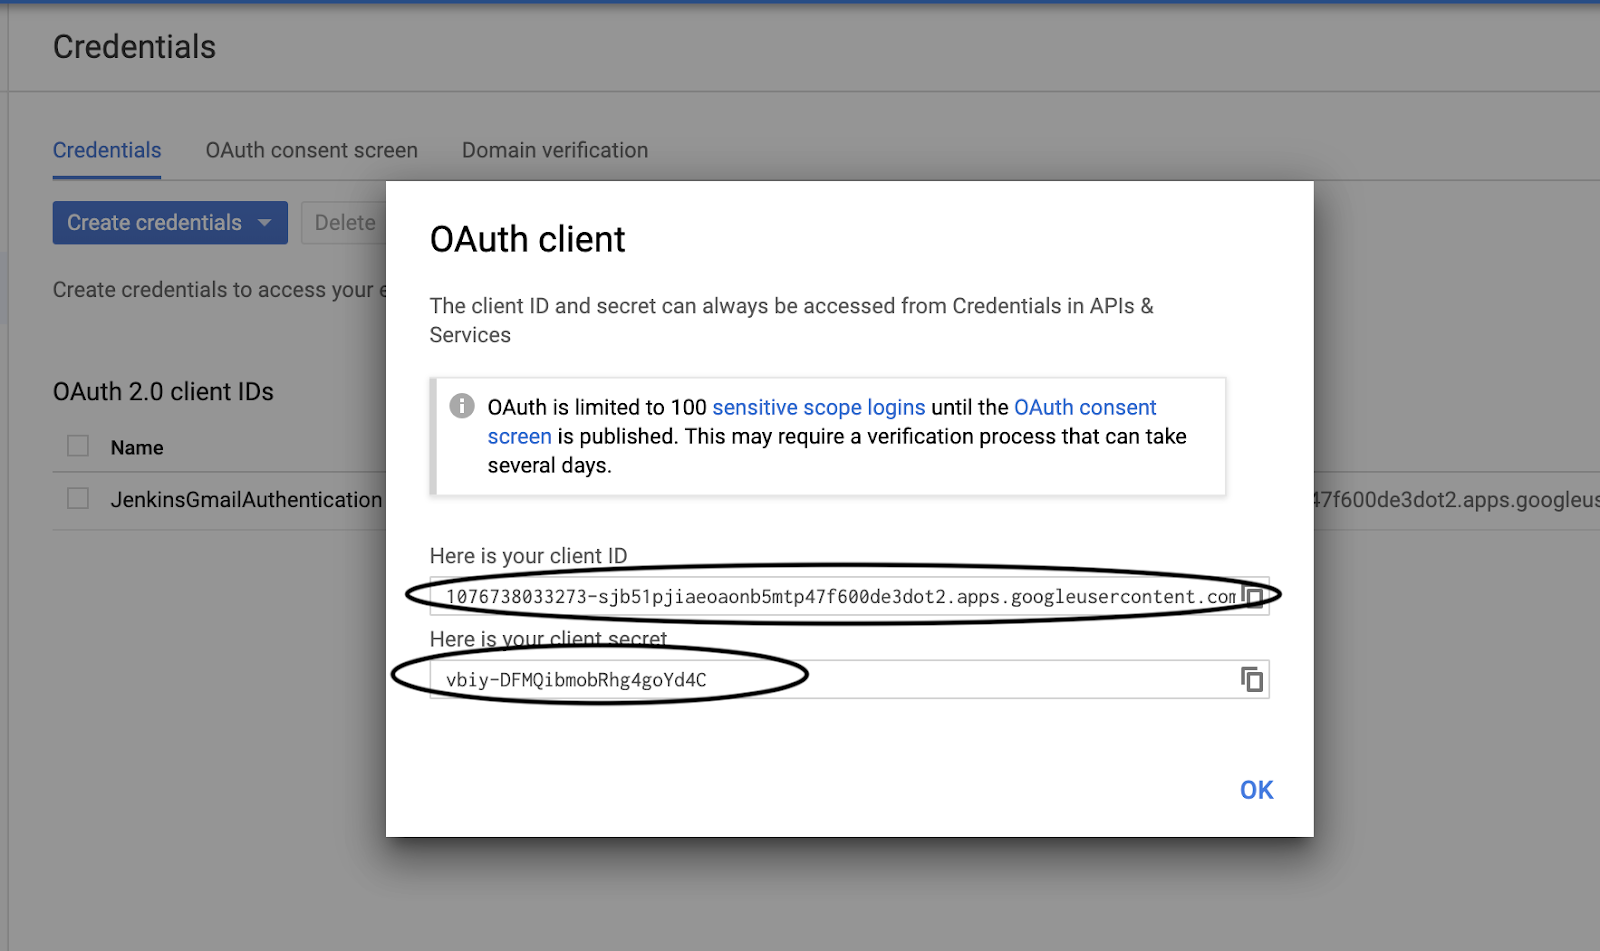
Copy Client ID and Client Secret because we are going to use these in Jenkins.
 

Step 3: Setup Jenkins

I am assuming that Jenkins is already installed in your system.
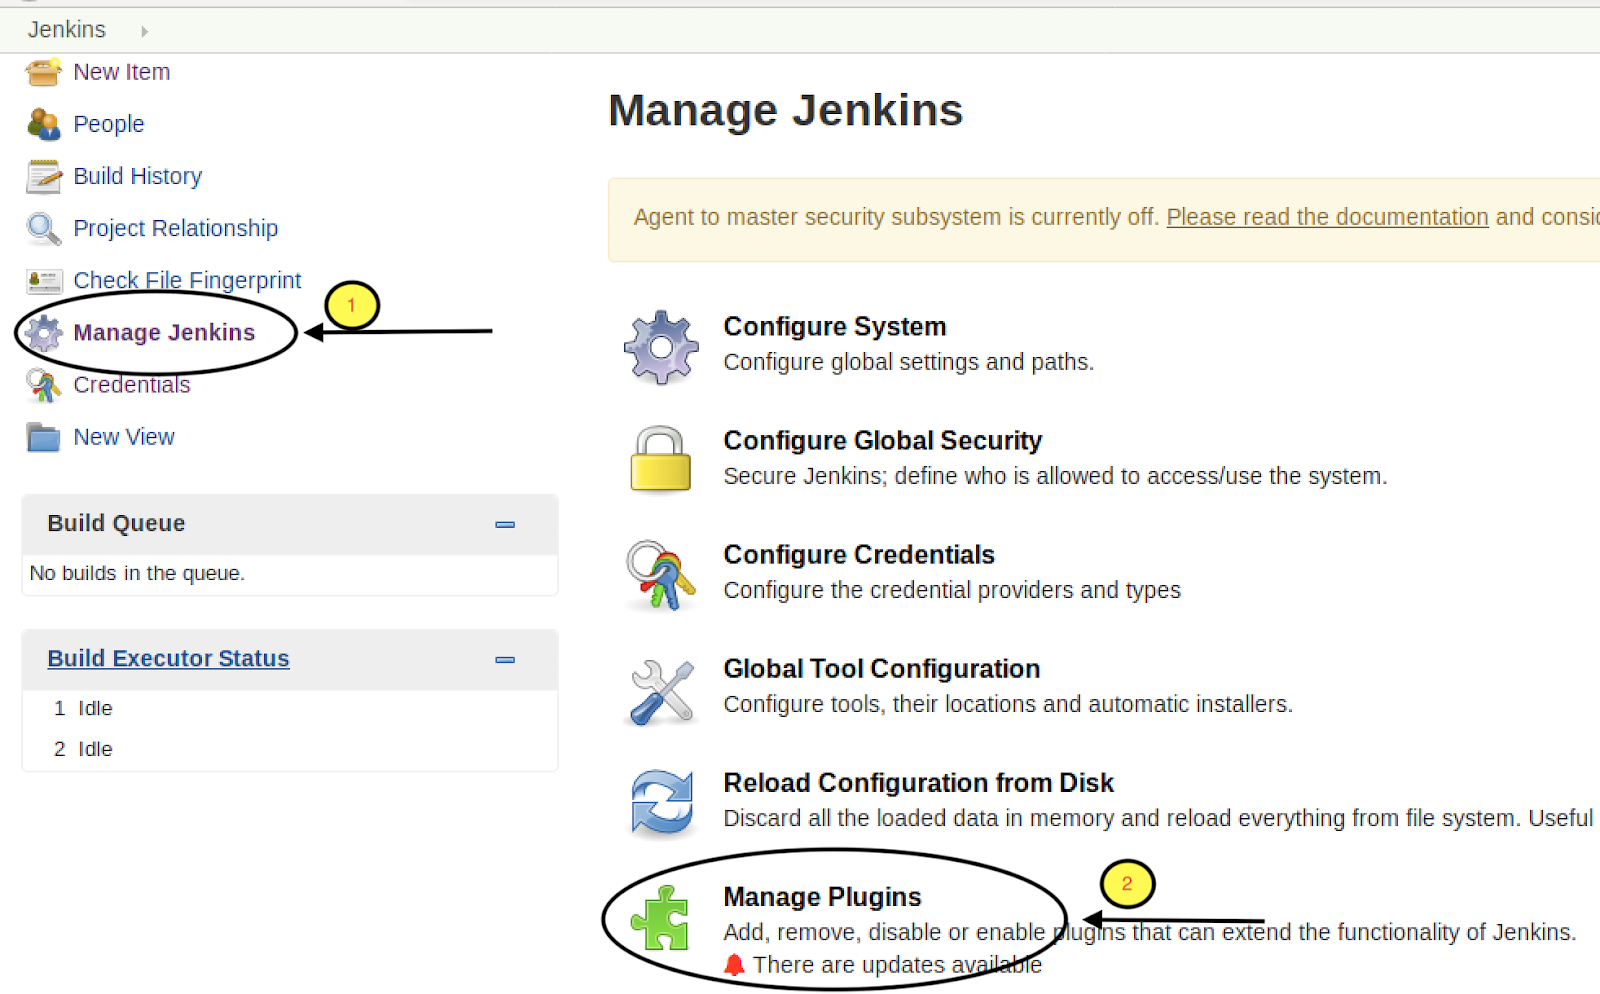
Go to Manage Jenkins → Manage Plugins→ Available
 
 
Search for “Google Login Plugin” and add it.
 
 
Go to Manage Jenkins → Configure Global Security
 
 
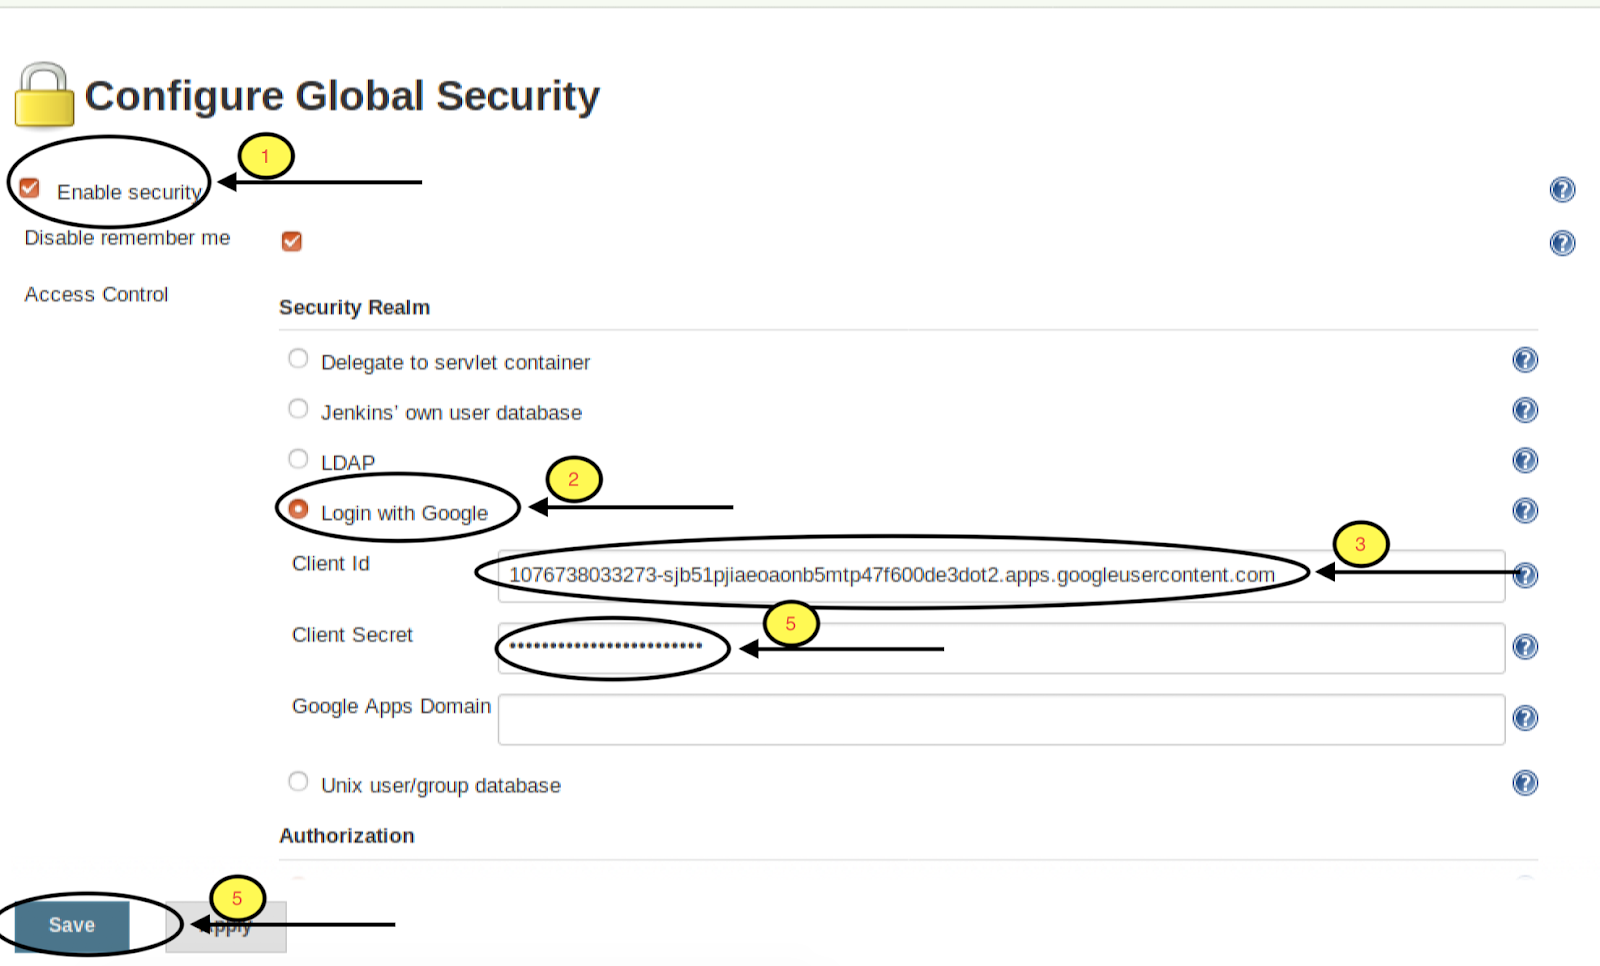
The major part of Jenkins Setup is to Configure Global Security.
Check the Enable security → Login with Google and Paste the Client ID and Client secret generated in Create Credential Step and Save.
 
 
Up to here, we are done with the Setup part.
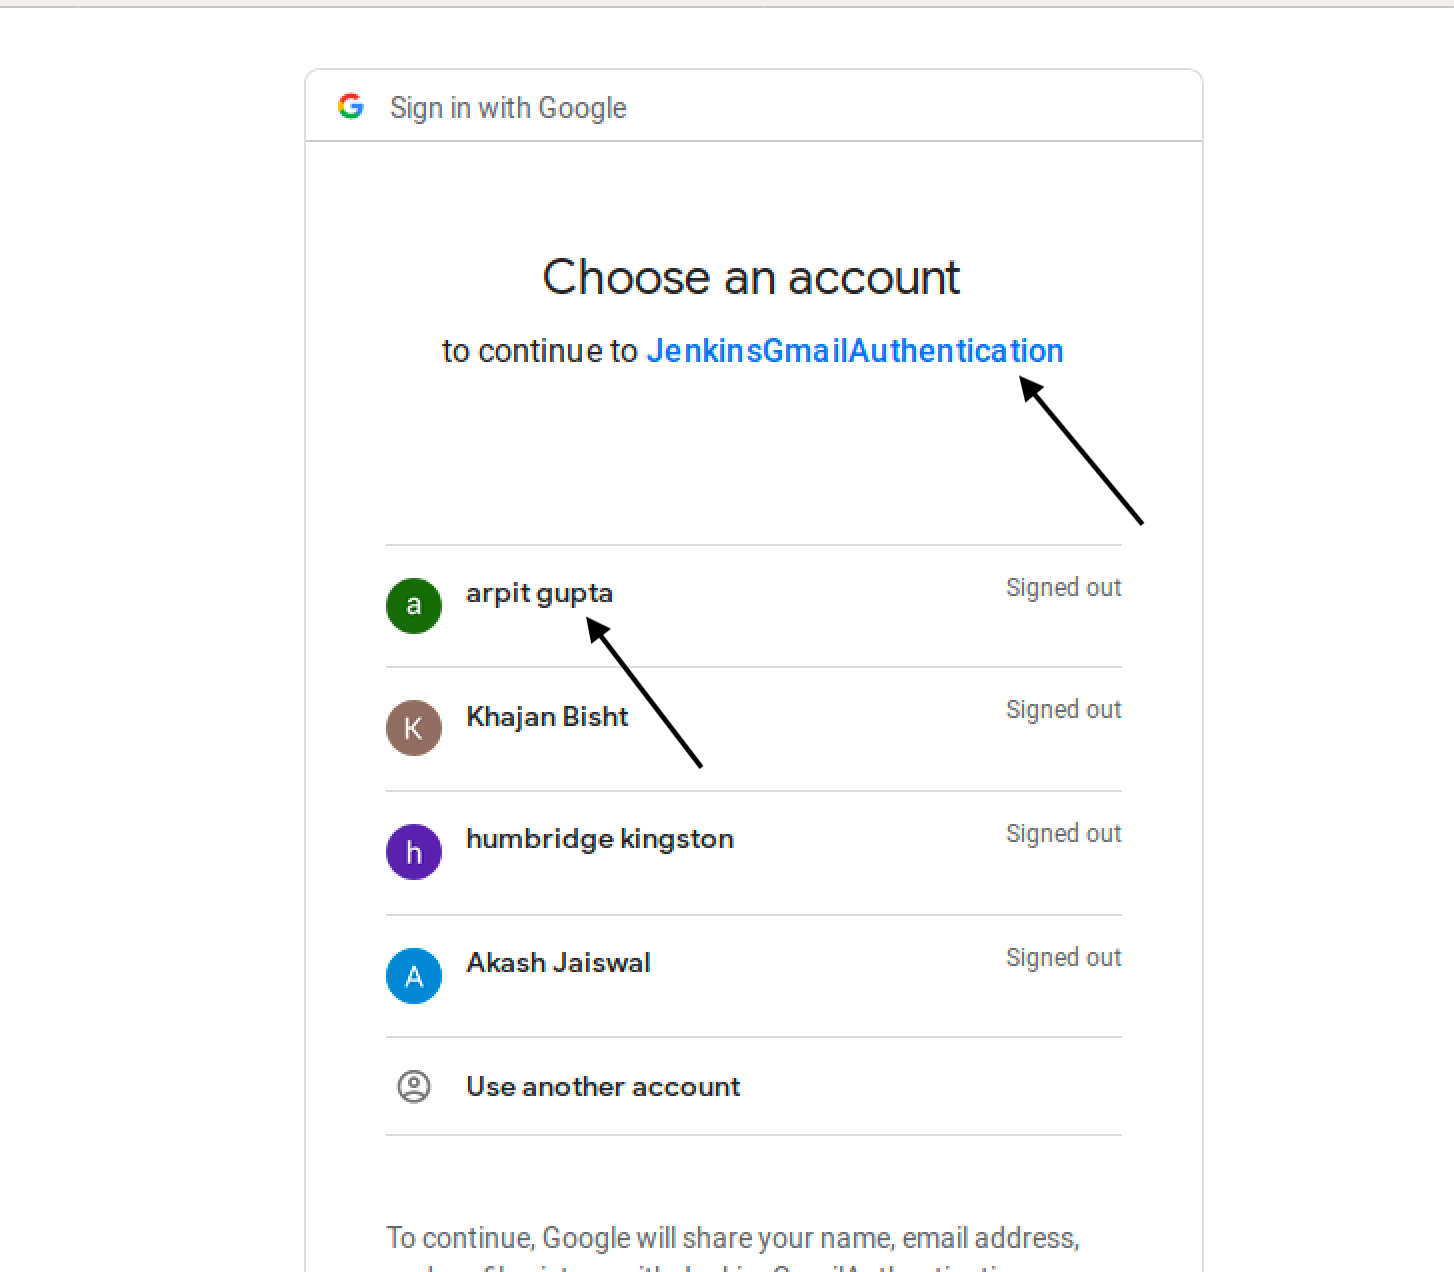
Now Click on login button on Jenkins UI, you will redirect to Gmail for login.
 
 
Select the account from which you want to log in.
 
 
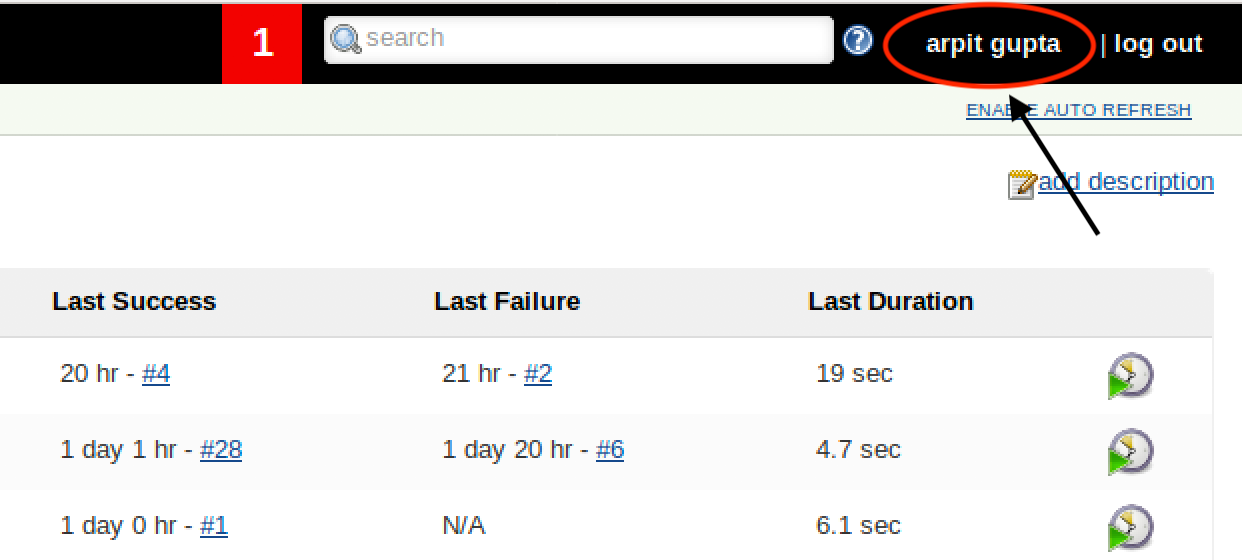
After selecting Account you will redirect to Jenkins and you are logged in as selected user.
 
 
You may be facing a problem when you log in again.
Logout from the current user and login again.
 
 
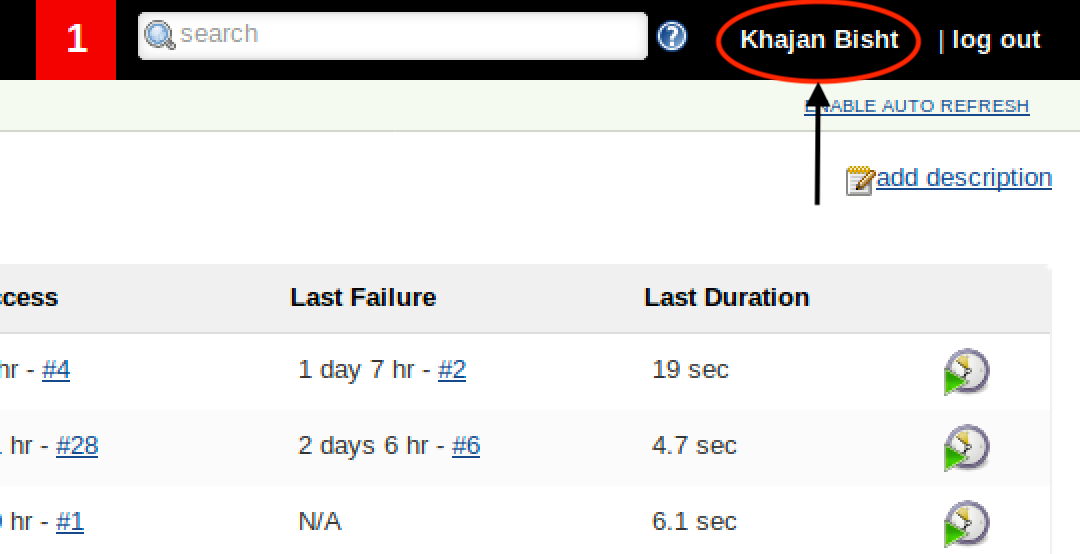
After redirected to Gmail select another user.
 
 
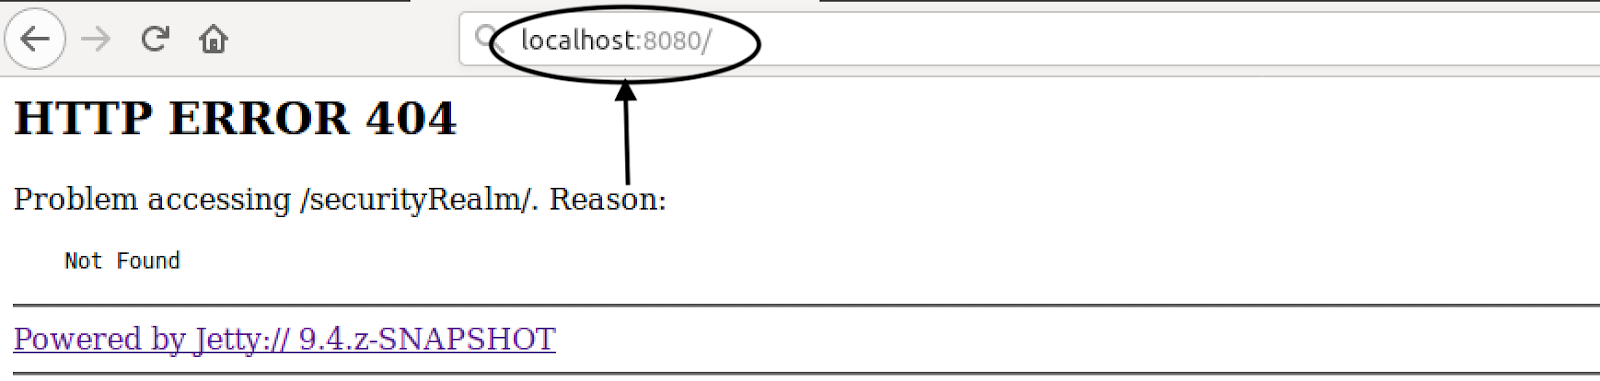
After selecting user you will be redirected to Error Page showing: HTTP ERROR 404.
 
 
Don’t worry, you have to just remove “securityRealm/” or enter again “localhost:8080”.
 
 
You are logged in with the selected user.
 
 
So now you know how to do Gmail Authentication between Google developer console and Jenkins when they are not directly reachable to each other.
Here the main bridge between both is Ngrok which host our Privately hosted Jenkins to outer internet.


Can you integrate a GitHub Webhook with Privately hosted Jenkins No? Think again

Introduction

Triggering Jenkins builds automatically after every code commit is a core requirement in any continuous integration setup. Jenkins supports automated triggers through repository polling or event based notifications. While polling works, it consumes resources and introduces delays. Push based triggering through webhooks is far more efficient.

The difficulty appears when Jenkins is hosted inside a private network and the version control system is hosted on a cloud platform such as GitLab. In this scenario, GitLab cannot directly reach the Jenkins endpoint, making webhook based triggering difficult without exposing Jenkins publicly.

Webhook Relay solves this problem by acting as a secure bridge between GitLab and a privately hosted Jenkins server. This article explains how GitLab webhooks can trigger Jenkins jobs using Webhook Relay, based on real implementation experience.

Installing the Webhook Relay Agent

The Webhook Relay agent needs to run on the same machine where Jenkins is hosted or where Jenkins is reachable internally.

Below is the installation process shown as step based instructions.

# download the relay binary
curl -sSL https://storage.googleapis.com/webhookrelay/downloads/relay-linux-amd64 > relay
# make the binary executable
chmod +x relay

# move it to a directory in system path
sudo mv relay /usr/local/bin/relay

Webhook Relay service runs on a public endpoint, while this agent runs locally and listens for forwarded webhook events.

Creating a Webhook Relay Account

Create an account on the official Webhook Relay platform using the registration page shown below.

https://my.webhookrelay.com/register

After signing up, access to the Webhook Relay dashboard is provided, where authentication tokens can be generated.

Authenticating the Relay Agent

From the dashboard, create an access token. This generates a key and secret pair.

Use those credentials to authenticate the relay agent.

relay login \
-k
<your_token_key> \
-s <your_token_secret>

A successful login message confirms that the agent is connected and ready.

Creating the GitLab Repository

Create a GitLab repository for testing webhook integration. To keep the setup simple, a public repository can be used.

For reference, assume the repository name is WebhookProject.

Preparing Jenkins for GitLab Webhooks

Install the required Jenkins plugins from the plugin manager.

Navigate through the Jenkins dashboard to install
GitLab Plugin
GitLab Hook Plugin

Once installed, Jenkins becomes capable of receiving GitLab webhook events.

Creating the Jenkins Job

Create a new Jenkins job and configure it to pull source code from the GitLab repository.

Enable the option that allows Jenkins to be triggered by GitLab webhooks.

After enabling this option, Jenkins generates a webhook endpoint associated with the job. It usually follows this pattern.

http://<jenkins-host>:8080/project/<job-name>

Example shown for reference only.

Copy this endpoint, as it will be used in the forwarding configuration.

Forwarding Webhooks Using Webhook Relay

Start webhook forwarding by creating a relay bucket. This bucket acts as a routing channel between GitLab and Jenkins.

relay forward \
--bucket gitlab-jenkins \
http://<jenkins-host>:8080/project/<job-name>

Important note
Do not stop this process. Keep it running in the background.
Open a new terminal tab for further steps.

Once this command starts, the relay agent generates a public forwarding URL.

Configuring GitLab Webhook

Open the GitLab repository settings and navigate to the integrations or webhook section.

Paste the forwarding URL generated by Webhook Relay into the webhook URL field.

For initial testing, SSL verification can be disabled to avoid certificate related issues.

Save the webhook configuration.

Testing the Integration

Clone the GitLab repository locally and push a new commit.

git add .
git commit -m "test webhook trigger"
git push origin main

As soon as the push is completed, GitLab sends a webhook event. Webhook Relay receives it and forwards it to the local agent, which triggers the Jenkins job internally.

You can verify this by checking the Jenkins job build history.

Viewing Logs

GitLab webhook logs can be viewed from
Repository settings
Integrations
Webhook edit section

Webhook Relay logs are available in the Relay Logs section of the Webhook Relay dashboard.

Jenkins build logs confirm successful job execution.

Conclusion

Webhook Relay makes it possible to trigger Jenkins builds through GitLab webhooks even when Jenkins is hosted inside a private network. This approach avoids exposing Jenkins publicly while still enabling real time CI automation.

The same pattern works for GitHub and other webhook enabled platforms. With proper configuration, secure and efficient CI workflows can be achieved in restricted network environments.