
Social Media is changing the ways we consume the internet. Users from almost every background have a social media presence and dedicate a significant amount of time to using social media.
So, it becomes equally important for businesses including enterprises to monitor social media metrics. This not only helps in staying informed about trends but also helps in gathering customer feedback and building a brand reputation.
To achieve this, building a comprehensive social media monitoring platform is crucial. This blog post will explore how Azure Synapse can be leveraged to create such a platform, from data gathering to insights visualization.
Architecture Diagram 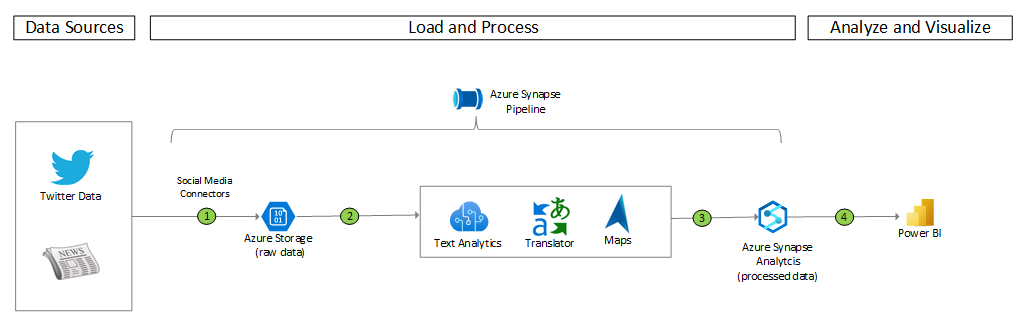
- Data Ingestion: The solution facilitates the ingestion of social media data from diverse sources such as Twitter, news feeds, and other APIs, ensuring a continuous flow of relevant data for analysis.
- Data Processing: Once ingested, the data undergoes a series of processing steps facilitated by Azure services such as Azure Storage, Azure Synapse Analytics, Language Service, Translator Service, and Azure Maps. These services work in tandem to cleanse, transform, and enrich the data, ensuring its quality and enhancing its value through language detection, translation, and geographical enrichment.
- Analytics and Insights: With the processed data at hand, the Solution Accelerator leverages the analytics capabilities of Azure Synapse Analytics to derive actionable insights. Through advanced analytics techniques, sentiment analysis, and trend detection, organizations can unlock valuable insights into user behavior, sentiment trends, and emerging topics.
- Visualization: The insights derived from the analytics pipeline are brought to life through intuitive visualizations powered by Power BI. Interactive dashboards, charts, and reports enable stakeholders to explore and understand the data effortlessly, facilitating informed decision-making and strategic planning
In this blog, we’re discussing a GitHub repository offered by Microsoft, which serves as an Azure Social Media Analytics Solution Accelerator. This template streamlines the process of establishing a solution for analyzing social media data through Azure services. To follow along with our discussion, you’ll need to clone this repository: https://github.com/microsoft/Azure-Social-Media-Analytics-Solution-Accelerator.
Getting Started With Azure Synapse Analytics
You’ll need an Azure subscription. Some familiarity with Azure Synapse Analytics, Azure Cognitive Services, Azure Maps, and Power BI could be beneficial, but it’s not mandatory.
- Azure Synapse Analytics
- Azure Text Analytics
- Azure Translator
- Azure Maps
- Power BI
- Twitter developer account
- News Feed API account
Twitter developer account and News API
- Go to the Twitter Developer Portal website and create a Twitter developer account if you don’t already have one
- After logging in to your Twitter Developer account, navigate to your project dashboard.
- In your project dashboard, go to the “Keys and tokens” tab. Generate your Consumer Keys (API Key and API Secret Key) and Authentication Tokens (Access Token and Access Token Secret). Save these keys securely.
- Visit the NewsAPI website at https://newsapi.org/.
- Register for an API key by signing up on the NewsAPI website. After registration, you’ll receive an API key. Copy and securely save this API key.
Create Azure Synapse Analytics, Azure Language Service, Azure Translator, Azure Maps and its related resources using template
- Go to https://github.com/microsoft/Azure-Social-Media-Analytics-Solution-Acceleratoab =readme-ov-file and click deploy to azure to create synapse workspace and related resources using a custom template.
- Fill all the details accordingly and click review and create
- Click create It will do the following:
- Create Azure AI service (translator, language)
- Create Key vault
- Authorization role assignment
- Microsoft resources/deployments
- Create azure storage account
- Create a synapse workspace
- It will start deployment and create the resources
Deploy Key Vault Secrets
- Go to https://github.com/microsoft/Azure-Social-Media-Analytics-Solution-Accelerator/b l ob/main/Deployment/Deployment.md, click Deploy to azure
- Configure the ARM template,
- provide the values in template,
- Twitter API Key
- Twitter API Secret Key
- Twitter Access Token
- Twitter Access Token Secret
- News API Key
- For Text analytics key, endpoint and region go to language service
- Under Resource Management, Select Keys and Endpoint.
- Copy Key1, Endpoint and Region.
- Paste your key1, region and endpoint in template.
- For translator key, region and endpoint, go to translator service.
- Under “Resource Management”, select Keys and Endpoint.
- Copy Key1 and under Web API copy “Text Translation” for endpoint and region.
- Paste the key and endpoint in template.
- For maps Key, go to maps service.
- Go to Azure Maps Account, Under settings click Authentication.
- Copy “Primary key” and paste it on template.
- Click review and create, click create.
- It will deploy all the values in your key vault which you have created earlier.
Access Control
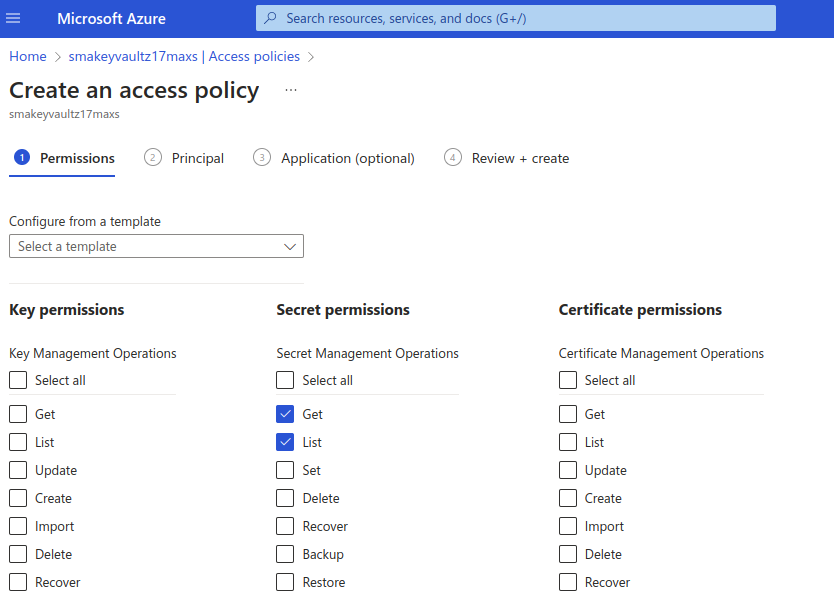
- Add Azure Synapse to Azure Key Vault
- Navigate to the Key Vault created in the previous step.
- Access its policies by clicking on “Access policies,” then select “+ Add Access Policy.” In the new window, choose “Get” and “List” under “Secret Permissions.”
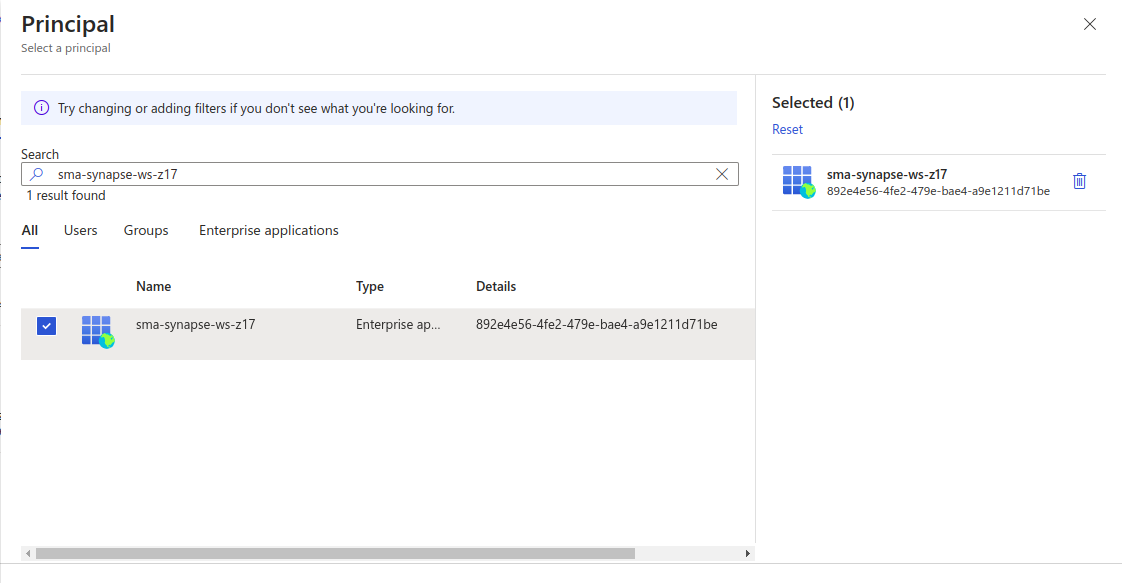
- In the “Select principal” option, include the name of your Synapse resource to be added to the Key Vault, then click “Save.”
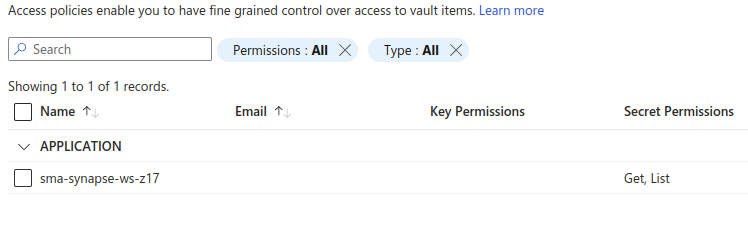
- Choose “Review + create” and then save the modifications.
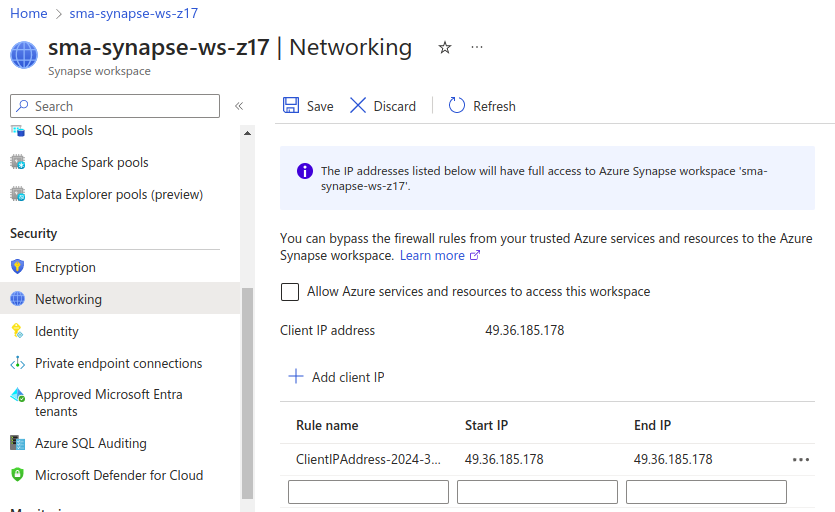
- To ensure your IP address is granted access to Synapse,
- Head to the Synapse resource you set up earlier.
- Navigate to “Networking” under “Security” on the left side of the page.
- In the middle of the screen, select “+ Add client IP.”
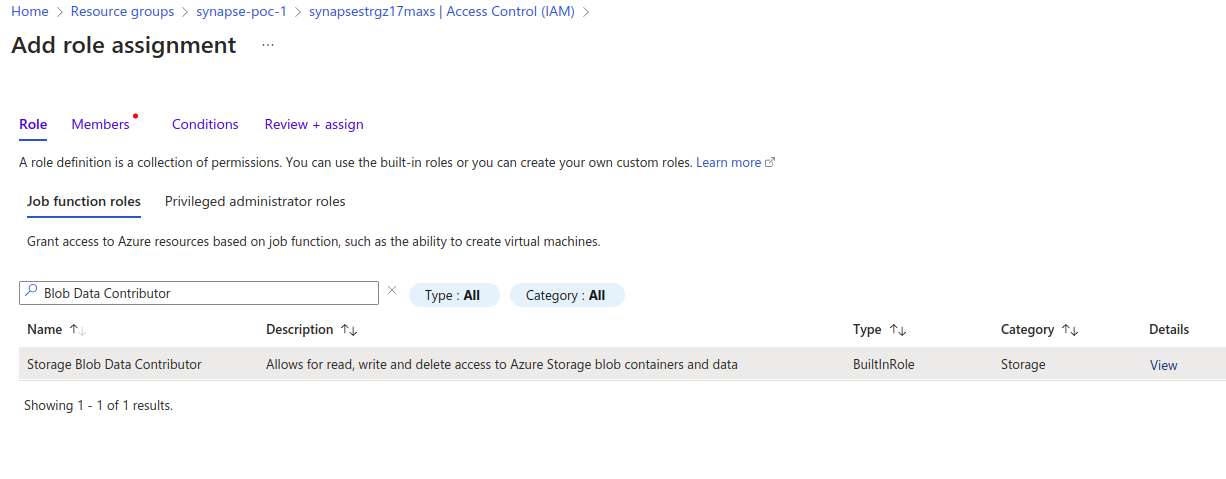
- To adjust the permissions for your storage account,
- head to the Azure Data Lake Storage Account associated with your Synapse Workspace. Go to “Access Control (IAM)” and select “+ Add” followed by “Add role assignment.”
- Next, find and choose the “Storage Blob Data Contributor” role, then click “Next.”
- Proceed by clicking “+ Select members,” search for and select your username, and click “Select.
- Finally, review the changes and assign them by clicking “Review and assign” at the bottom.
 Organise your assets and import your data.
- To equip your Spark cluster with necessary libraries, follow these steps:
- Open your Synapse workspace.
- In the Studio, head to the Manage tab, then proceed to Apache Spark pools.
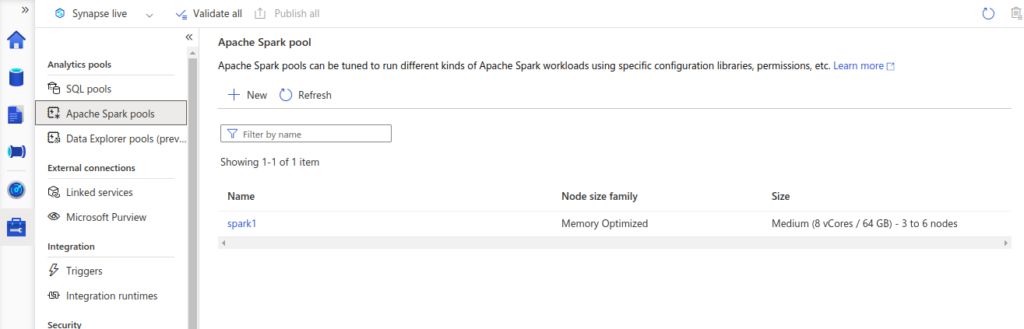
- Find your deployed Spark Pool, click the ellipsis (…), and choose Packages.
- Hit Upload, then pick the requirements.txt file from the cloned repository.
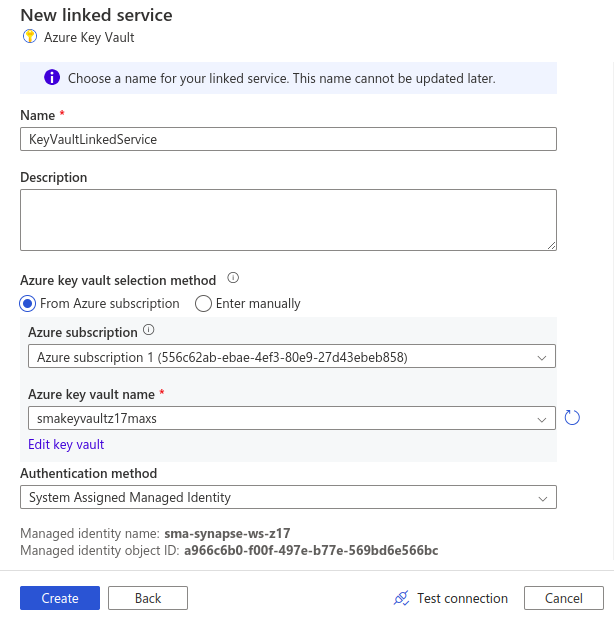
- set up your Key Vault Linked Service:
- Launch the Synapse workspace.
- Head to the Manage Hub and select “Linked services” under “External connection.”
- Hit + New, then choose Azure Key Vault. From the “Azure Subscription” dropdown, select your solution’s subscription, and from the “Azure key vault name” dropdown, choose your Key Vault name.
- Rename the linked service to KeyVaultLinkedService. Test the connection and save your settings.
Upload Country Coordinates Dataset
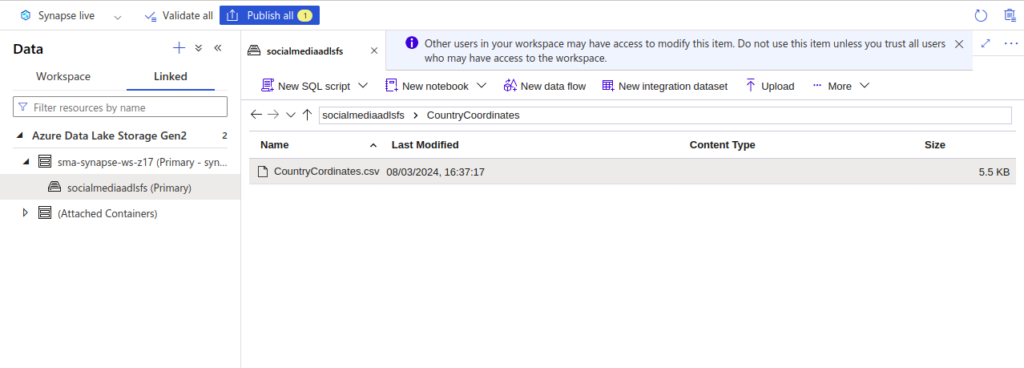
- Open Synapse Studio and head to the Data Hub.
- Choose Linked.
- Look for an item under Azure Data Lake Storage Gen2, likely named something like xxxxx(xxxxx- Primary).
- Click on the container named “social media ad lsfs (Primary),” then hit “New folder.” Name it “CountryCoordinates” and create it.
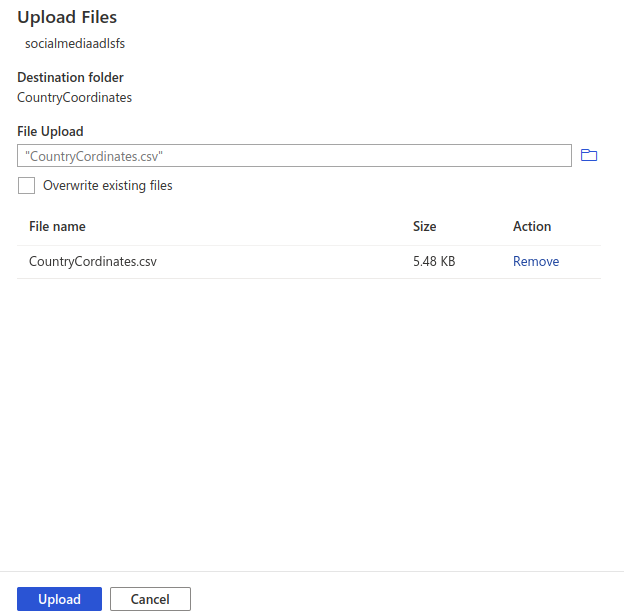
- Within the “CountryCoordinates” folder, select Upload to add the .csv file “CountryCoordinates.csv.”
 Upload Notebooks
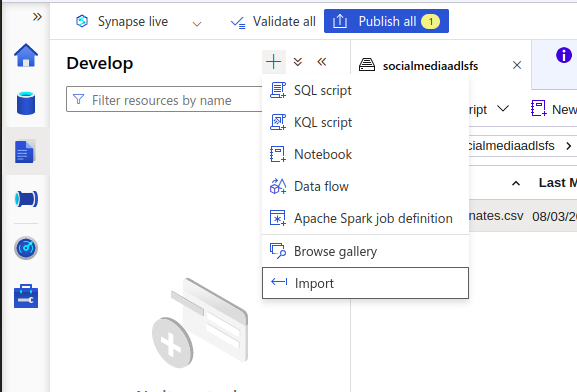
- Let’s get started in your Synapse workspace:
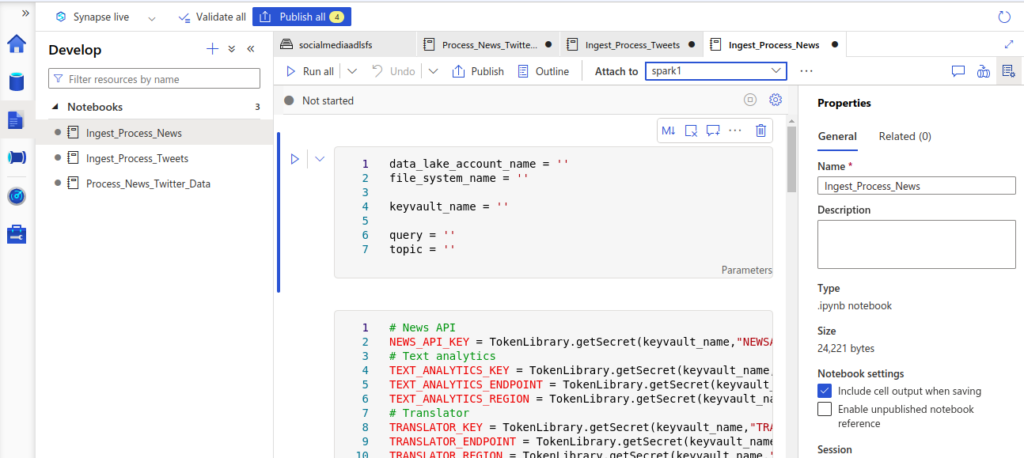
- Head to Develop and click the plus sign (+), then choose Import to pick all notebooks from this repository’s folder.
- For each notebook, select “Attach to” > “spark1” from the top dropdown menu.
 Set up Pipelines
- In Synapse workspace, Navigate to Integrate and click the plus sign (+), then opt for Pipeline.
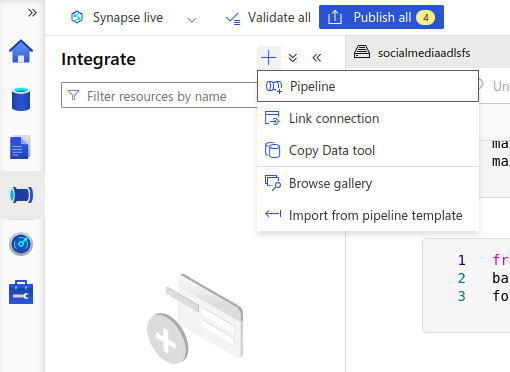
- Once “Pipeline 1” shows up, click on the three dots (…) at the top right corner. Select Rename and update the pipeline name to “Process_News_and_Twitter_Data_Pipeline.”
- Hit the curly braces {} icon at the top right corner to open the Code window.
- Copy and paste the contents of “Process_News_and_Twitter_Data_Pipeline.json.
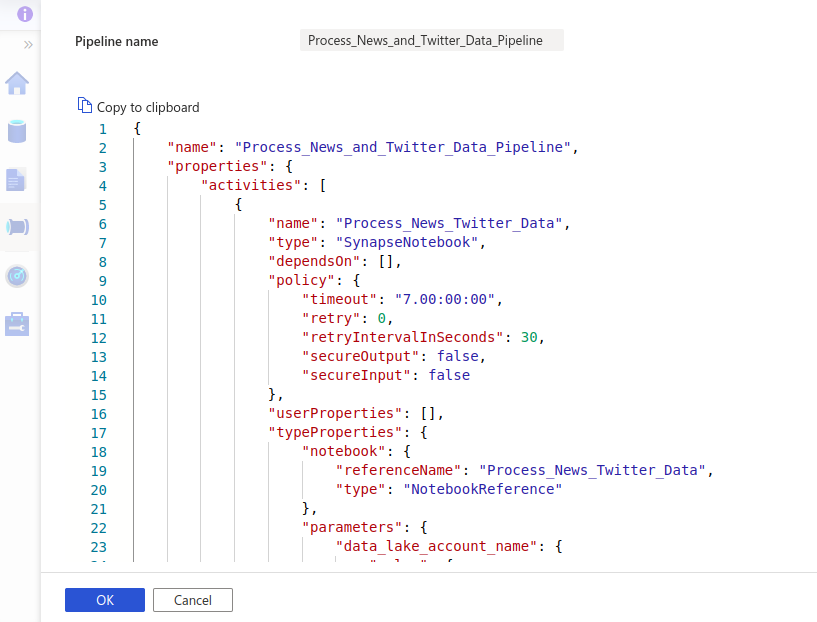
- Click OK to apply. Now, click Publish all at the top of the page.
- Click Publish all at the top of the page.
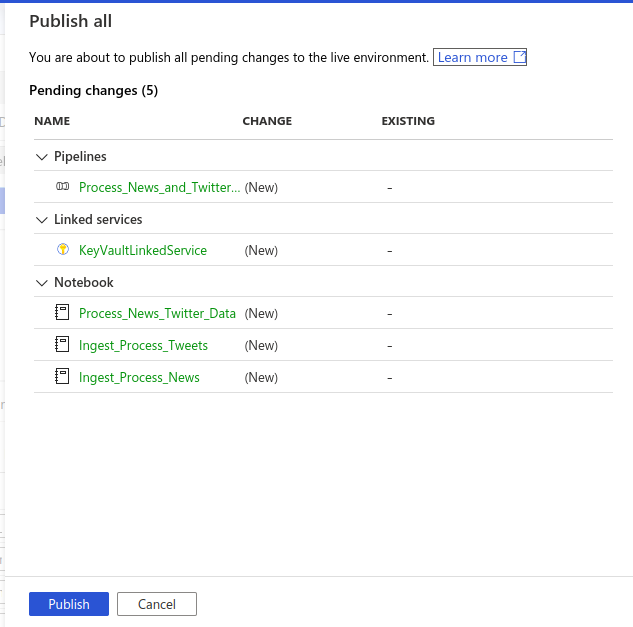
- Next, click Add trigger, choose “Trigger now,” and populate the parameter to trigger the pipeline.
Let’s get started with the Power BI report template:
- Open the Power BI report template provided in this repository.
- When prompted, enter the Synapse Serverless SQL endpoint and default SQLPool/database name.
- Head to the Synapse Workspace overview page in the Azure Portal and copy the Serverless SQL endpoint.
- Once all tables are loaded, select Refresh, and you’ll see the dashboard with three pages.
Conclusion
The Azure Social Media Analytics Solution Accelerator provides a comprehensive framework for organizations to harness the power of social media data. By seamlessly integrating Azure services for data ingestion, processing, analytics, and visualization, this solution empowers businesses to derive actionable insights and make informed decisions. With its user-friendly approach and robust capabilities, organizations can stay ahead of the curve in understanding user behavior, sentiment trends, and emerging topics in the dynamic world of social media. By leveraging this solution, businesses can unlock new opportunities for growth and success in the digital landscape.
Blog Pundit: Sandeep Rawat
Opstree is an End to End DevOps solution provider
Connect Us