
In recent time, I invested a good amount of time in learning and working on monitoring esp. Database Monitoring. So I found this medium the best way to share my journey, findings and obviously spectacular dashboards.
This blog will help you understand why we need MySQL monitoring and how we can do it.
Let’s start with the need to implement MySQL monitoring. There are multiple areas which we can monitor, here I am enlightening some important ones.
1. Resource Utilization
First of all, you have no idea what’s going on with MySQL, you can not know if it’s in a haywire state if there is no monitoring.
An ample number of queries run through it. Some of them are lightweight and some of them are very heavy which makes CPU over-utilized or overload. In that case, if we talk about production, a number of requests can be flushed out making it a business loss.
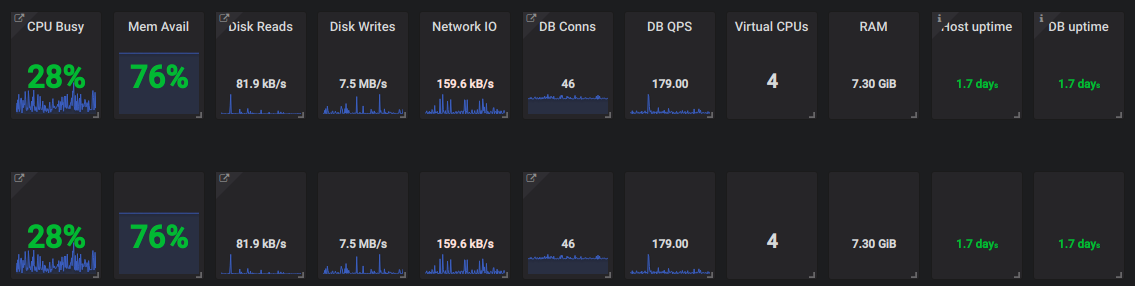
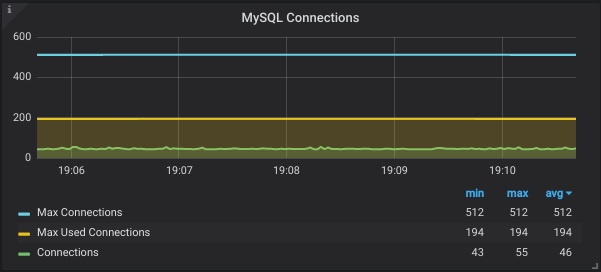
2. Database Connections
Sometimes the number of connections run out and no further connections are left for application to communicate with DB. In the absence of monitoring, it’s really hard to figure out the root cause.
3. Replication Lag
When we use MySQL as a master-slave cluster, real-time replication of data from the master to slave is a key factor to monitor. The lag between master and slave should be zero.
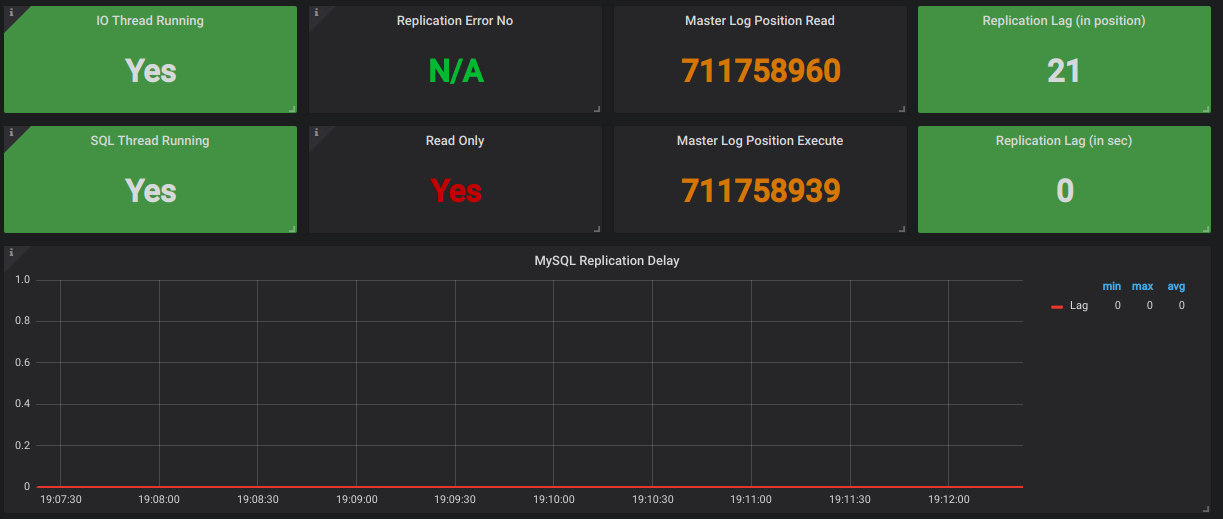
In my scenario, the slave is being used for DB replication from the
master and also serving read queries to avoid overburden on the master.
Now if replication lag is high and at the same time if any read query is
triggered for the slave, what will happen? The same data which is on
the master will not get replicated on the slave because of replication
lag!
That read query will show an unexpected or erroneous result.
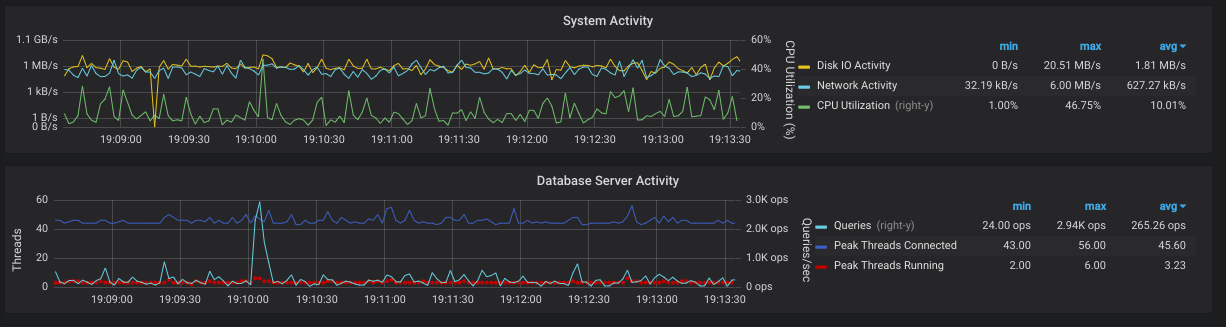
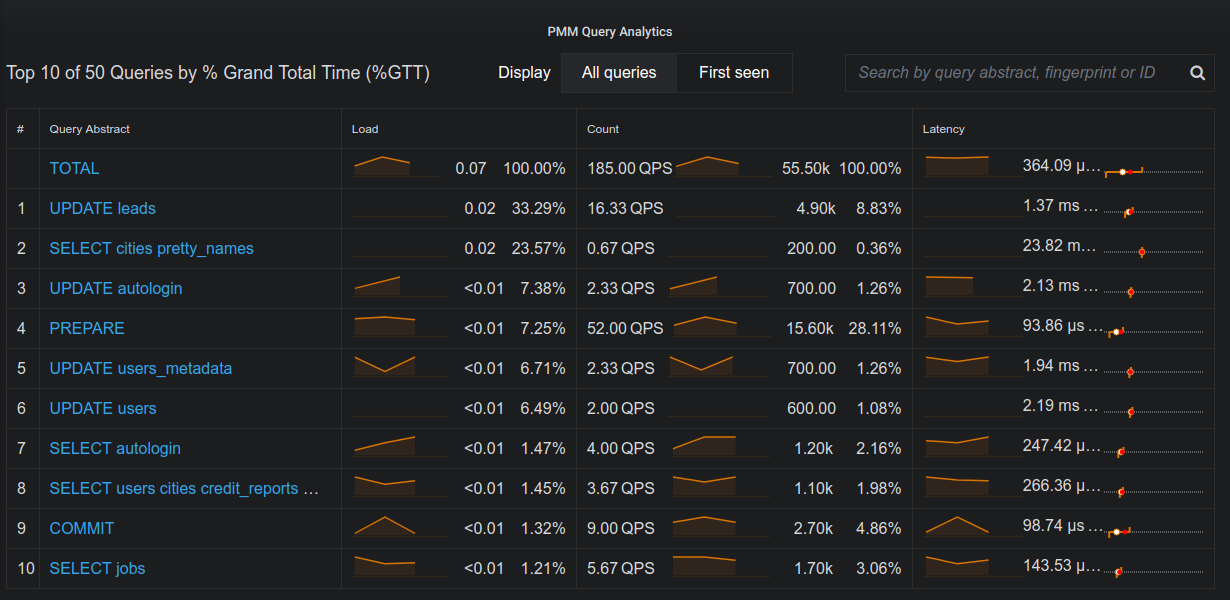
4. Query Analytics
Monitoring DB also helps in identify what queries are taking a long
time. It helps in identify and optimize slow queries. At the end its all
about being fast.
Ok, so how to monitor MySQL. There are multiple enterprise solutions
available to monitor Database with a single click solution, but I didn’t
have the luck to go for paid solutions. So, I have started exploring
open source solutions which will cover all my requirements. Finally, I
got one.
Its Percona Monitoring And management (PMM)Tool
PMM is an open-source platform to monitor and manage MySQL Database,
that we can run in own environment. It provides a time-series database
which ensures reliable and real-time data.
Installing PMM Server
curl -fsSL https://raw.githubusercontent.com/percona/pmm/master/get-pmm.sh -o get-pmm.sh
Change permission to make it executable
chmod +x get-pmm.sh
Now run pmm script to install it.
./ get-pmm.sh
This will run a docker container. Once docker container is up and running we will install PMM client and will bind the port
Installing PMM Client
Add the below repo
wget https://repo.percona.com/apt/percona-release_0.1-6.$(lsb_release -sc)_all.deb
Install the package from added repository
dpkg -i percona-release_0.1-6.$(lsb_release -sc)_all.deb
Update your ubuntu follow below steps:
apt-get update
pmm-admin config --server <server_ip>:<port>-get update
pmm-admin add mysql
It’s not only MySQL you can monitor, in fact, but pmm also allows to integrate it with other databases as well like Amazon RDS, Postgres, and MongoDB.
There are many alternatives for MySQL monitoring in the market like Nagios, VividCortex Analyser, SolarWinds server and application monitor, LogicMonitor and Management tool, MySQL OpsPack etc. But exploring open-source tools has its pros and cons but the level of learning you get from it, that makes it worth using. So anyone out there reading this blog I would suggest to give it a try.
Happy monitoring!!
Image Source: https://www.kisspng.com/png-clip-art-brand-line-technology-text-messaging-6462820/preview.html