
When we talk about service mesh, consul is one of the open-source tools which is widely used as a service discovery for multiple ephemeral or non-ephemeral resources. There are multiple consuls [service mesh] alternatives which are used as a service discovery but we won’t be discussing service discovery & alternative comparisons here.
If we talk about consul, it is not only used as a service mesh but also provides multiple options and features other than a service mesh. Yes, you heard it right, this lad can do lots of things that we didn’t know or haven’t explored yet.

Let’s talk about some of the options or features provided by the consul and further, we will discuss some of the aspects and impact of things provided by the consul.
Consul hidden talent
It is known that consul is not only being used for service discovery but for multiple purposes like
- health checking
- load balancing
- Key-value store
- Web-UI [ for accessibility & monitoring]
ACL – The good lad
Consul setup makes you feel like you can achieve everything in one go or seems pretty straightforward because we need to implement binary, few configurations, and boom! That’s it.

Yes, I lied! It is not what it looks like when we talk about production or real scenarios. We cannot consider or run our production servers on basic configuration or setup. For example, consider the security part of the consul which is not covered in the base consul setup or configuration. So, we need something which can help us to achieve this thing.
Consul ACL [Access Control List] is the option that was introduced or added in the consul version 1.4.0 as per the official documentation. This option is very important in terms of security because it provides multiple layers of security when we configure or access consul for the multiple options we mentioned. Let’s discuss how consul ACL works. Consul ACL divides its work in two parts-
- Consul token
- Policy
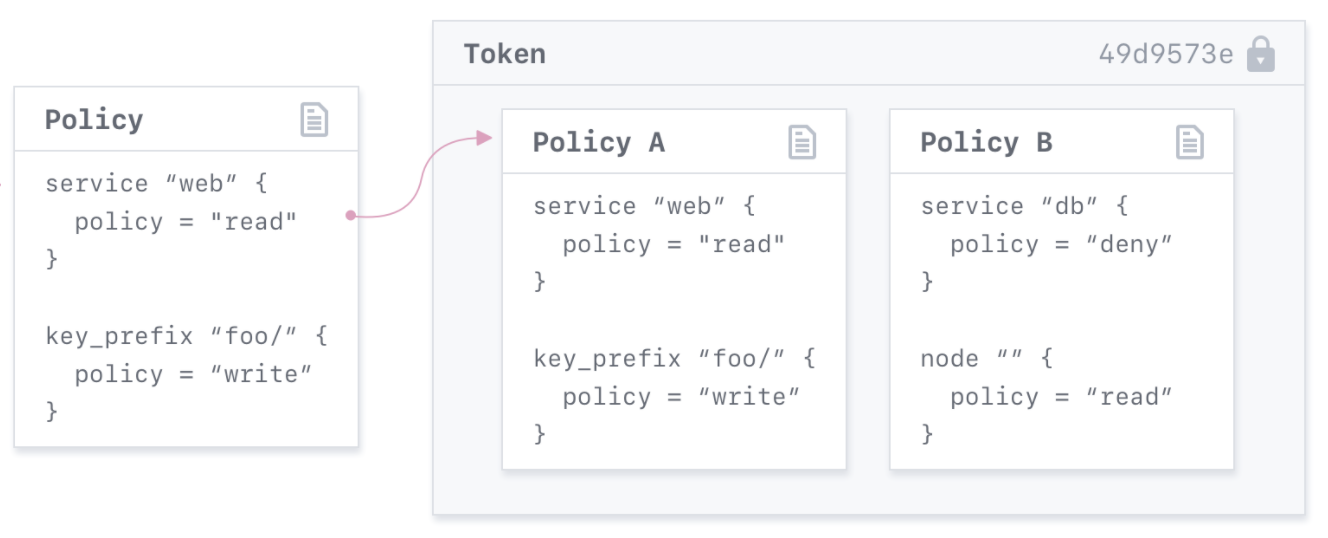
Consul token is used as an authentication mechanism between client & server means it provides access only if someone authenticates with valid consul ACL token. Each token behaves as a separate entity when we try to create in server. When we set up a consul token, the consul asks for few things like restricting token option, description & policy but the thing is all options are not mandatory but optional while configuring.
The policy is one of the important aspects of consul ACL after token generate because it provides the authorization part of consul ACL. In short, the policy provides access or permission type of any consul ACL token and also tells how specific consul ACL token will behave and its permission boundary.
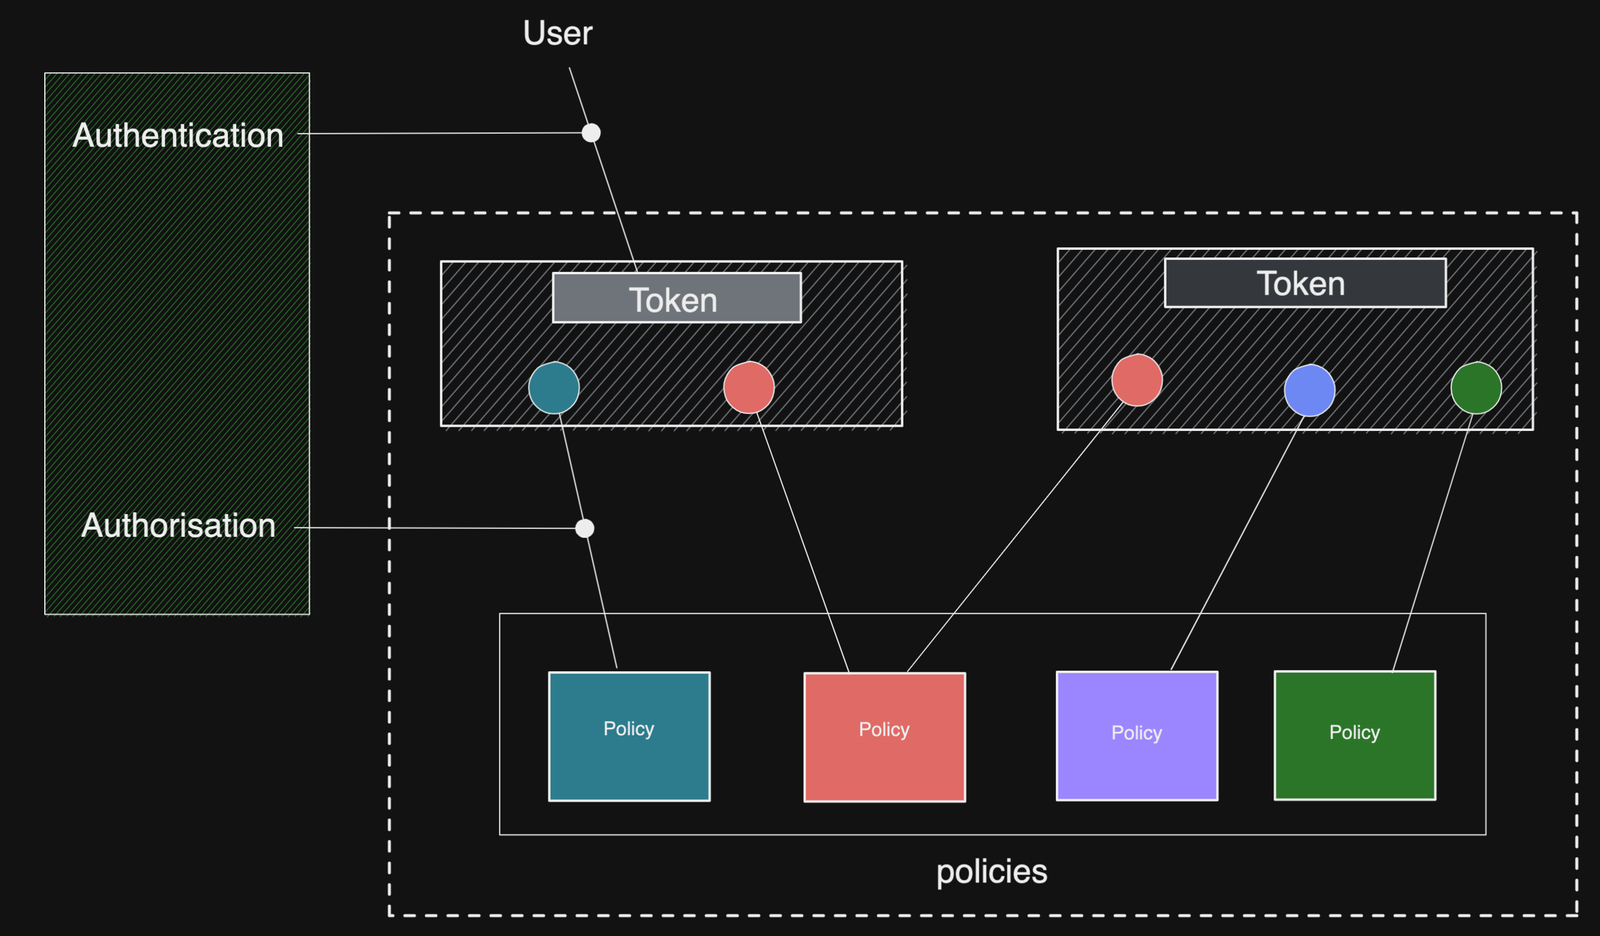
There are multiple options provided by consul ACL like consul roles, service identities, node identifiers & binding methods which are introduced in different consul versions but for now, we are only covering policy & consul tokens for basic authentication & authorization requirement.
Consul ACL – the scope
All the option provided by the consul covers by consul ACL means the consul ACL policy provides permission boundaries for all the options like key-value, service discovery, health-check, etc.
The consul ACL policy is written in HCL language [HashiCorp Configuration Language] which is the core language of most of the Hashicorp tools like terraform, vault & Nomad. Consul policy uses HCL language to implement policies for tokens. Below is the format of creating a consul ACL policy:
<resource> "<segment>" {
policy = "<policy disposition>"
}
Let’s break down this format and know about each and every part of this consul ACL policy format.
<resource> specify the type of option provided by consul like service, key-value
Following rules can be configured for multiple consul resources like
- acl
- agent
- event
- key
- keyring
- node
- operator
- query
- service
- session
There are even more and the list is too big and yes it supports almost every feature that the consul provides.
<segment> only applicable for a few of the consul resources like key-value otherwise for many services we can leave it blank using two double-quotes.
<policy disposition> means what kind of access it needs like
- read
- write
- list
- deny.
If we consider all the above points, check the example below for more clarifications:
key_prefix "redis/" {
    policy = "read"
}
Consul ACL: Bootstrapping
The latest consul version supports ACL and all the consul versions greater than 1.4.0 supports ACL. So, to make sure use the latest consul. To cross-check if the current consul version in your system support ACL. Type consul –version and check if there is a sub command is present for ACL or not.
ubuntu@ip-172-31-18-58:~$ consul --help
Usage: consul [--version] [--help] []
Available commands are:
acl Interact with Consul's ACLs
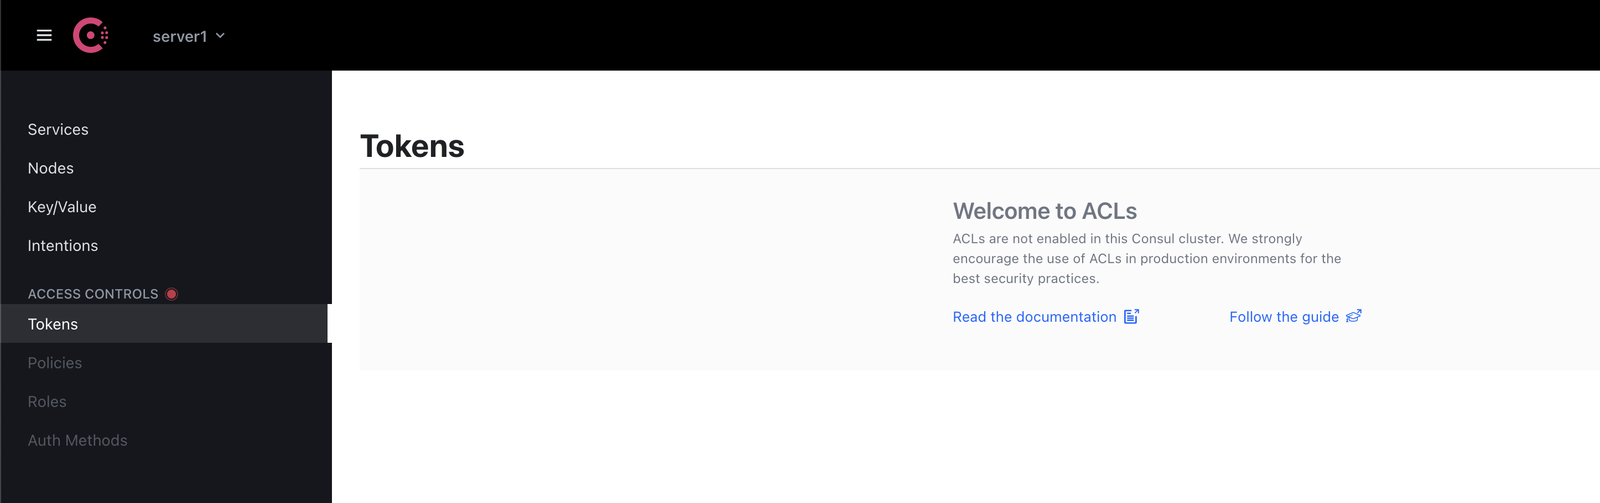
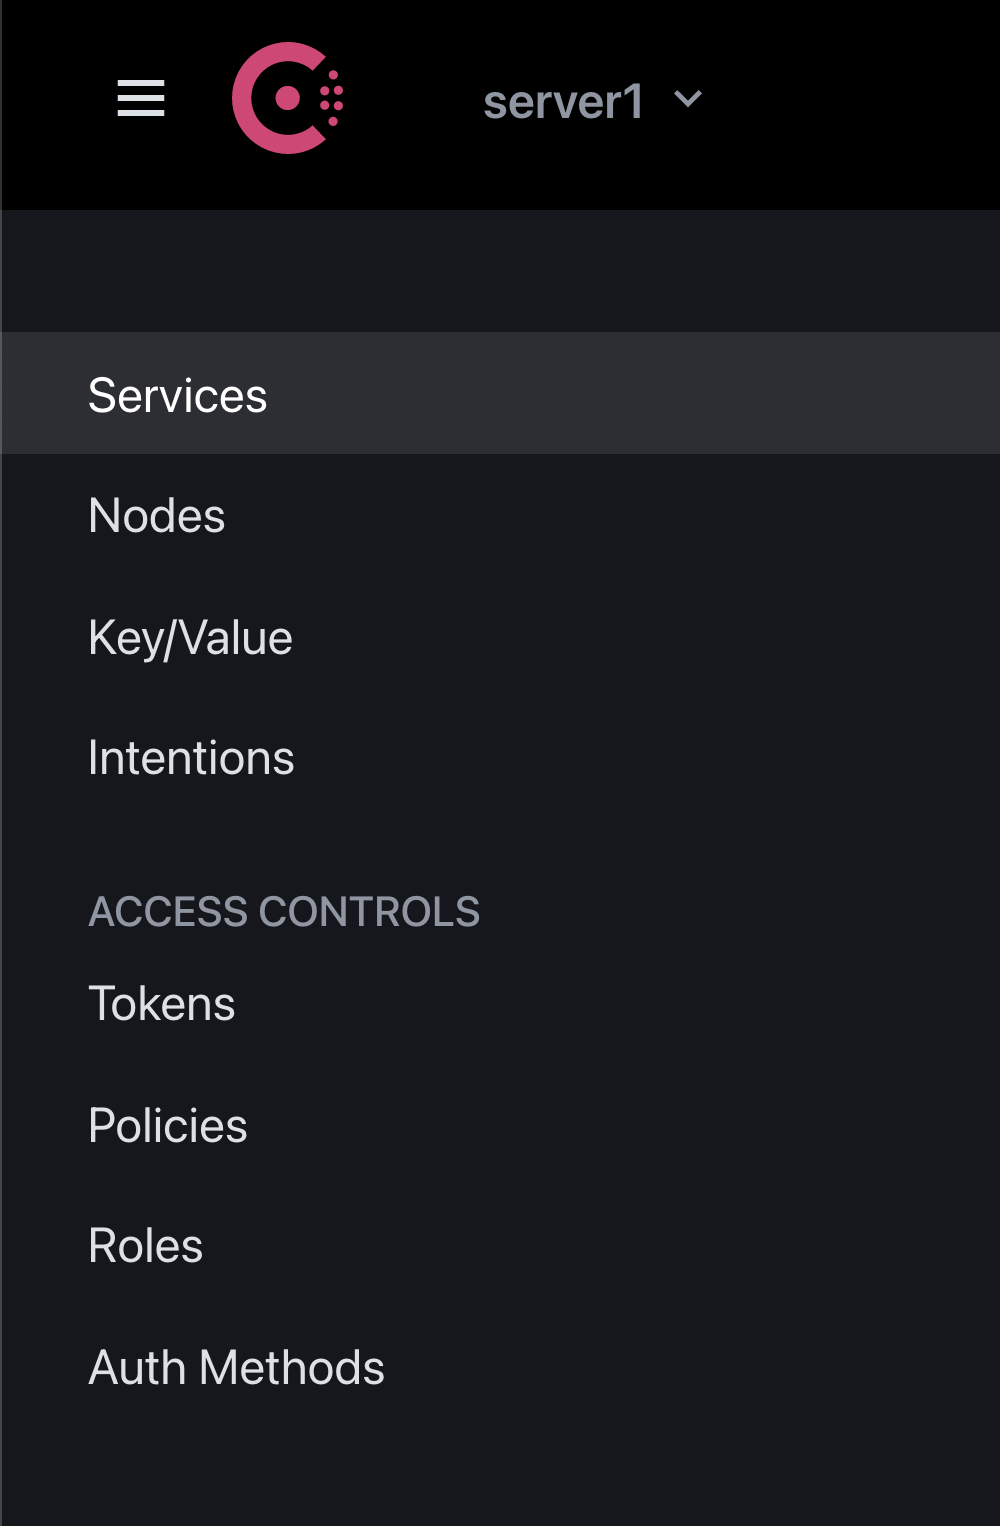
Or you can check web UI only if UI is enabled for consul. Under the ACCESS CONTROLS section, click Tokens,
http://<IP-ADDRESS>:8500/
To implement Consul ACL, it basically contains two steps:
- Enable ACL
- Creating Bootstrap token
If we try to create a bootstrap token [ global token], it will throw an error that ACL support is disabled.
ubuntu@ip-172-31-18-58:~$ consul acl bootstrap
Failed ACL bootstrapping: Unexpected response code: 401 (ACL support disabled)
To enable ACL, add the following lines under agent.hcl or use any file name that ends with .hcl
acl = {
    enabled = true
    default_policy = "deny"
    enable_token_persistence = true
}
Once added, save the file & use the consul command to enable to consul ACL.
root@ip-172-31-18-58:/etc/consul.d# consul acl bootstrap
AccessorID: xxxxxxx-xxxx-xxxx-xxxx-xxxxxxxxxxxx
SecretID: xxxxxxx-xxxx-xxxx-xxxx-xxxxxxxxxxxx
Description: Bootstrap Token (Global Management)
Local: false
Create Time: 2021-09-19 18:58:10.624843962 +0000 UTC
Policies:
00000000-0000-0000-0000-000000000001 - global-management
Once you get the bootstrap token which consists of the following IDs/Token.
- AccessorID
- SecretID
SecretID is responsible for authentication and this secretID is a bootstrap token which means this is an admin token that can do anything or has full privileges. Keep this bootstrap token in a safe place. Otherwise, anyone can access or change anything using this bootstrap token.
Once you create the bootstrap token, this enables the consul ACL which requires token-based authentication. So, use the above command wisely.
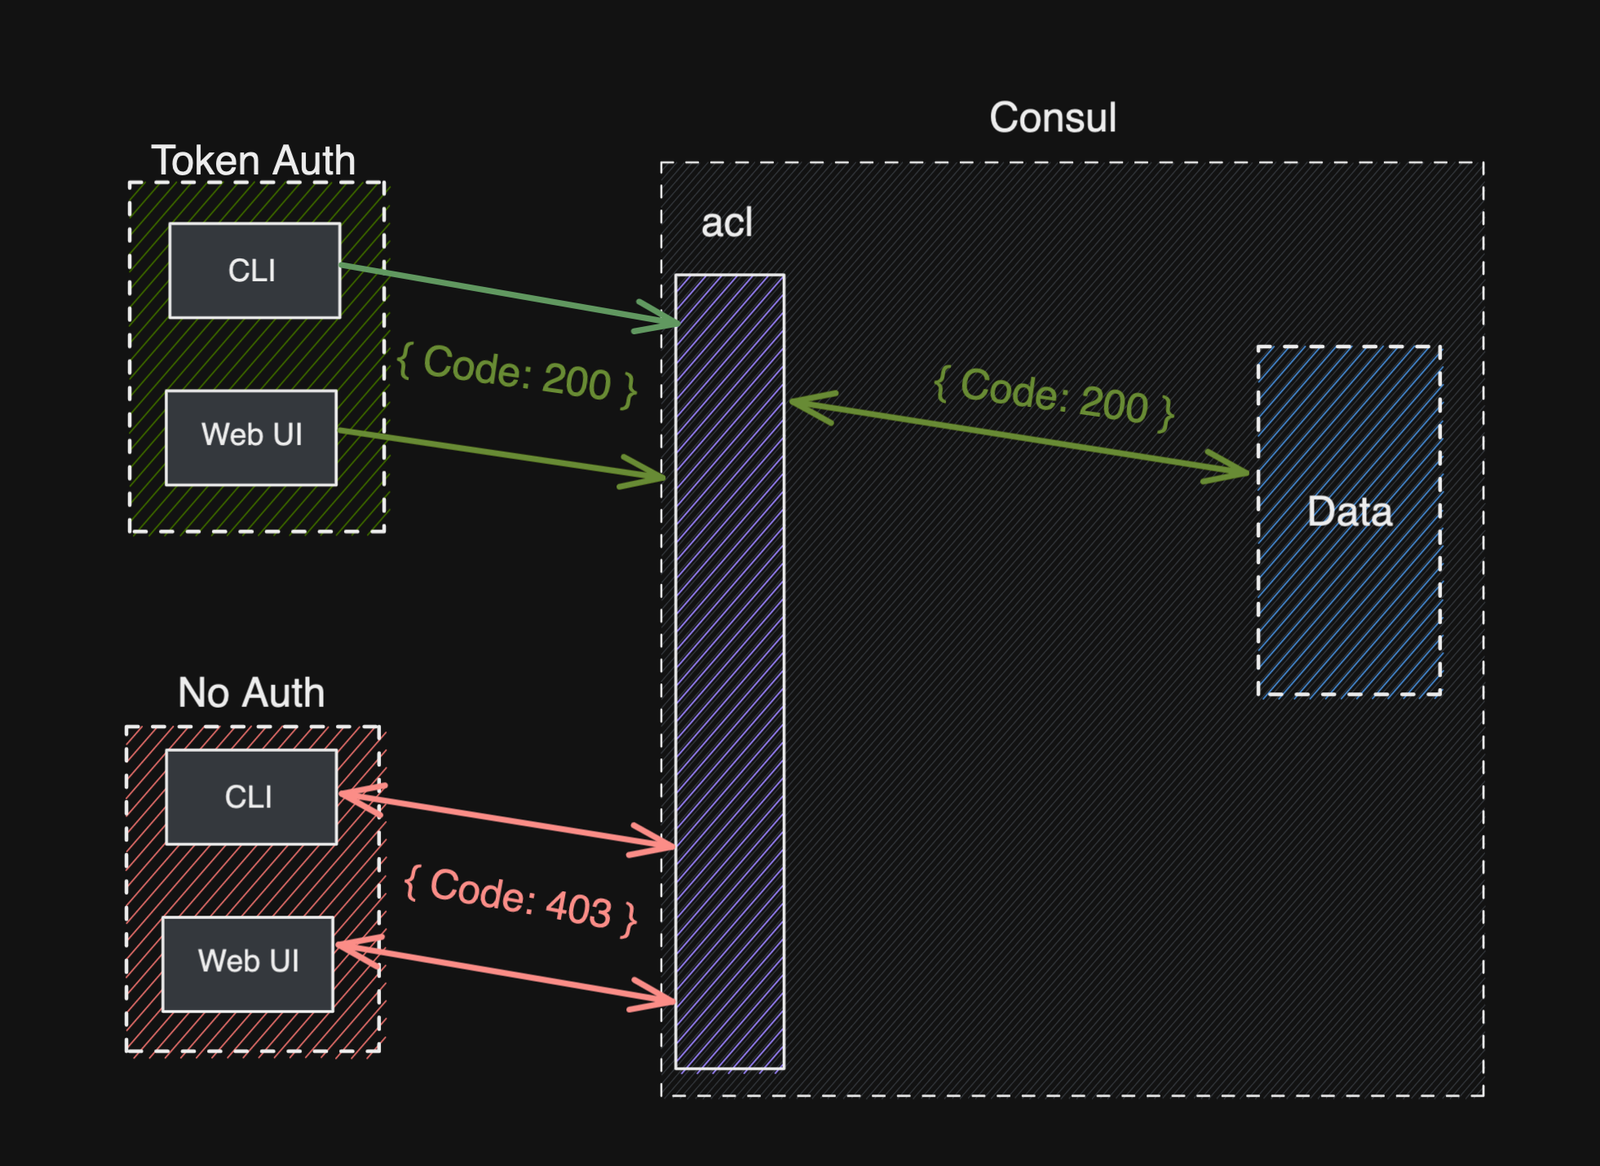
Access UI using consul URL and it will ask for consul login because, by default, anonymous access is disabled means no read, no write.
Click on Log in, and provide the consul token.
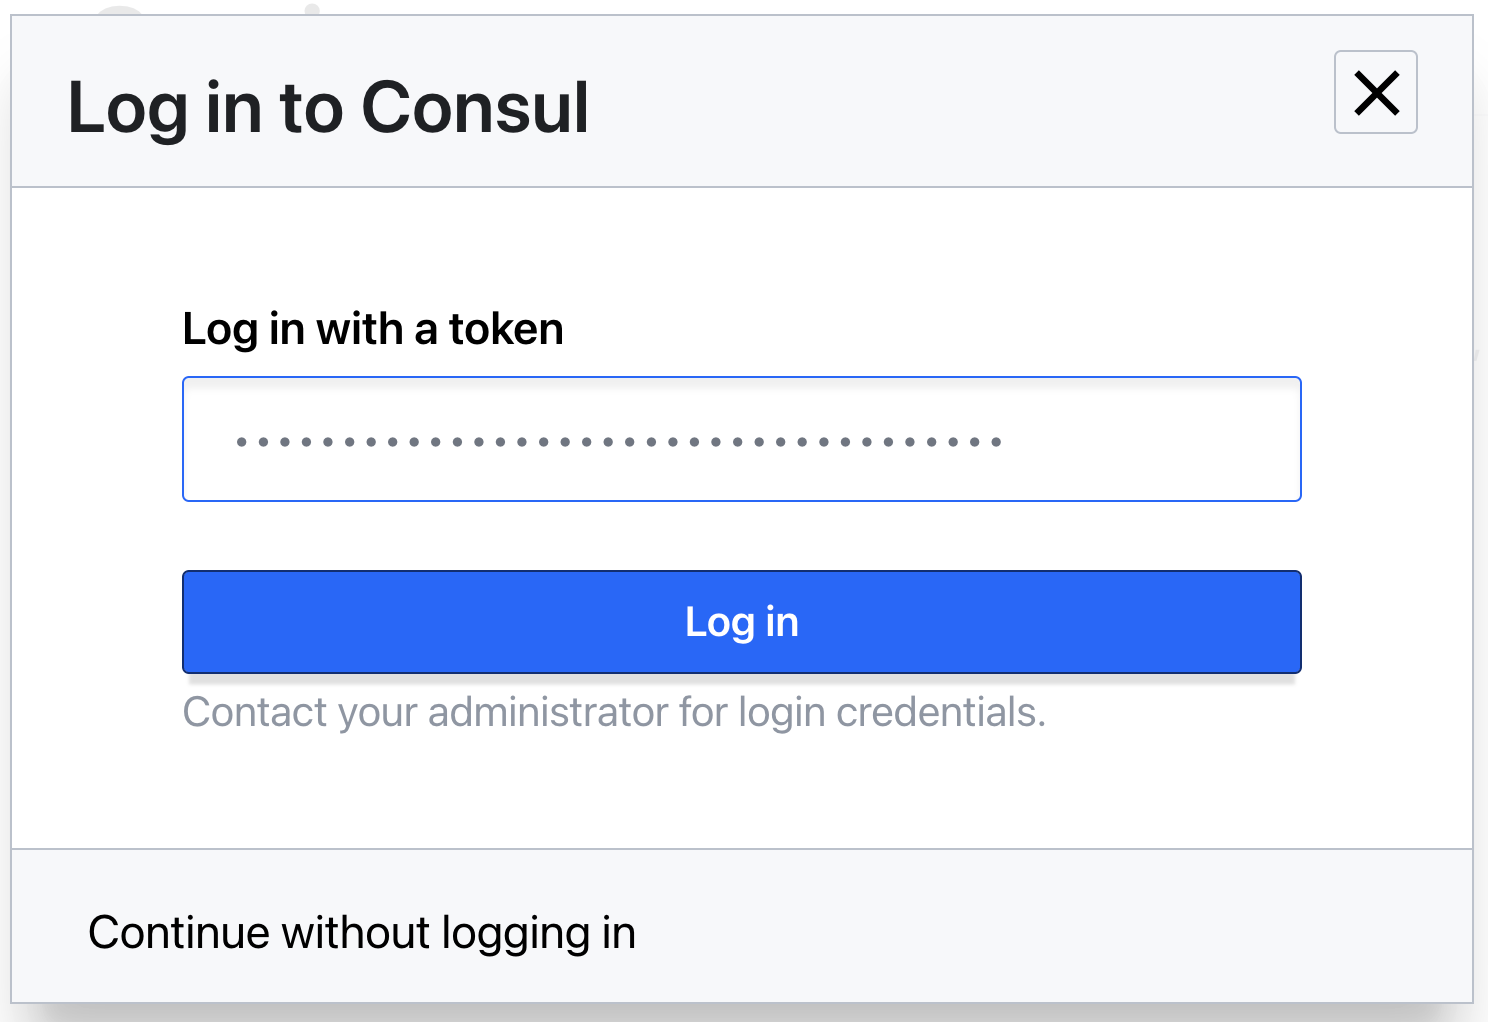
Once you’ve logged in, it will provide you access according to the token you generated and permission attached to the ACL token.
You can create multiple consul tokens and attached policies accordingly.
Note: The above UI steps can be done with CLI too which means when we enable the ACL, it basically adds an authentication mechanism for both CLI & UI. So, to access or modify consul resources, we need to add consul tokens accordingly.
Conclusion
This is a very short blog in terms of consul ACL because Consul ACL is a very vast topic & has a variety of options but we’ve covered a few of the aspects only. We discussed why consul ACL is important for consul security. Consul ACL consists of two-part, which is token & policy where token is used as an authentication mechanism & policy is used as an authorization mechanism. We discussed bootstrapping of consul ACL from scratch which includes multiple steps & validations. Consul ACL policy is not meant for providing access but also for disabling or denying the resource access.
Let us know in the comment section about your experience with the consul & its components and & also if you want more blogs regarding service discovery/mesh or consul components & its feature.
References
Blog Pundit: Adeel Ahmad
Opstree is an End to End DevOps solution provider
Connect Us