
Several factors affect database performance, and one of the most critical is how efficiently your application manages database connections. When multiple clients connect to PostgreSQL simultaneously, creating a new
connection for each request can be resource-intensive and slow. This is where connection pooling comes into play. Connection pooling allows connections to be reused instead of creating a new one every time, reducing overhead and improving performance. In this blog, we’ll explore PgBouncer, a lightweight PostgreSQL connection pooler, and how to set it up for your environment.
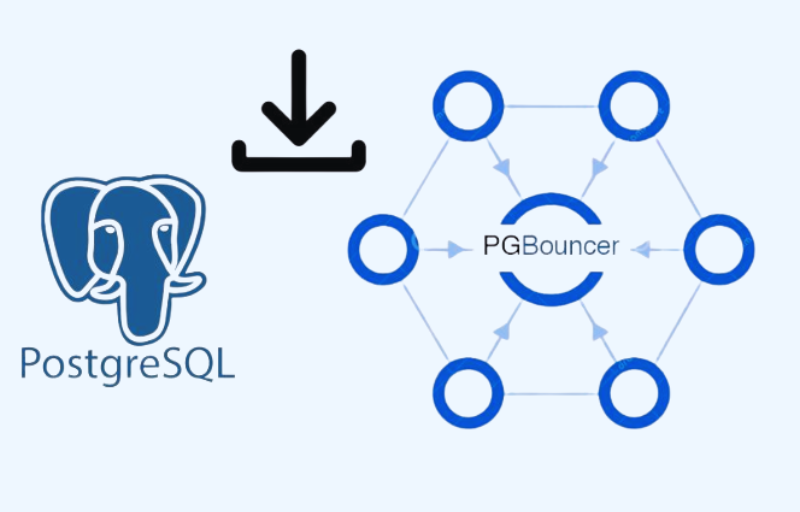
What is PgBouncer and Why Use It?
PgBouncer is an open-source, single-binary connection pooler for PostgreSQL. It acts as an intermediary between clients and the database, efficiently reusing backend connections to improve performance
Key Benefits
- Reduces PostgreSQL resource consumption (memory, forks, backends)
- Improves response time by reusing existing connections
- Supports all PostgreSQL authentication methods
- Simple, lightweight, and easy to configure
In short, PgBouncer is essential for high-concurrency PostgreSQL
environments
How Does PgBouncer Work?
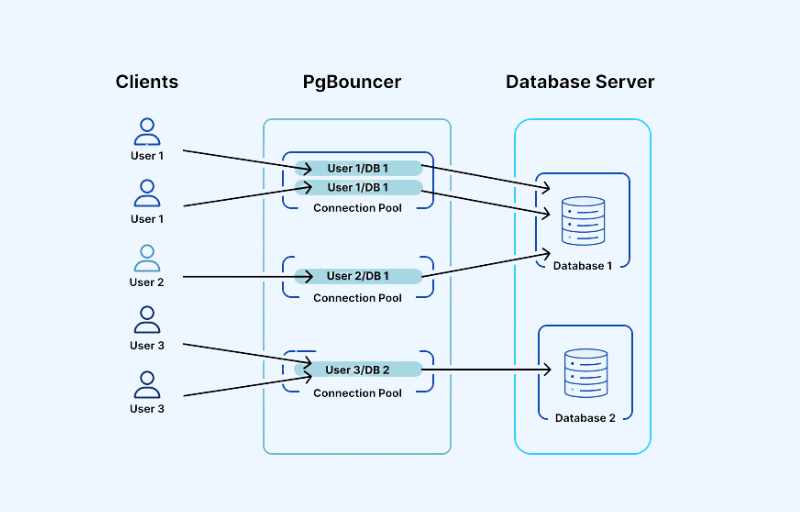
Instead of every client opening a direct connection to PostgreSQL, PgBouncer maintains a pool of persistent connections:
- A client requests a connection.
- PgBouncer checks for an existing cached connection with the same username and database.
- If found, it returns the cached connection; if not, it creates a new backend
connection. - This reduces the overhead of repeatedly opening and closing connections, lowering latency and improving throughput.
When Should You Use PgBouncer?
PgBouncer is useful when:
- Your PostgreSQL server has many simultaneous client connections
- You want to reduce memory usage and the number of backend
processes - You need faster response times for applications with short-lived
queries
Essentially, PgBouncer is ideal for high-concurrency scenarios where
performance matters
Dataflow Diagram
This diagram shows how PgBouncer manages client connections and
backend pooling.
Step-by-Step Installation & Configuration of PgBouncer
Before starting, ensure you have:
- A cloud account (AWS, Azure, Scaleway, etc.)
- SSH key and instance running Ubuntu/Debian
- Sudo privileges or root access
Step 1: Install PgBouncer
sudo apt update
sudo apt install pgbouncer
pgbouncer --version
Step 2: Configure PgBouncer
Configuration file path: /etc/pgbouncer/pgbouncer.ini
Define Databases
Add the following under the [databases] section:
[databases]
employee = host=127.0.0.1 port=5432 dbname=employee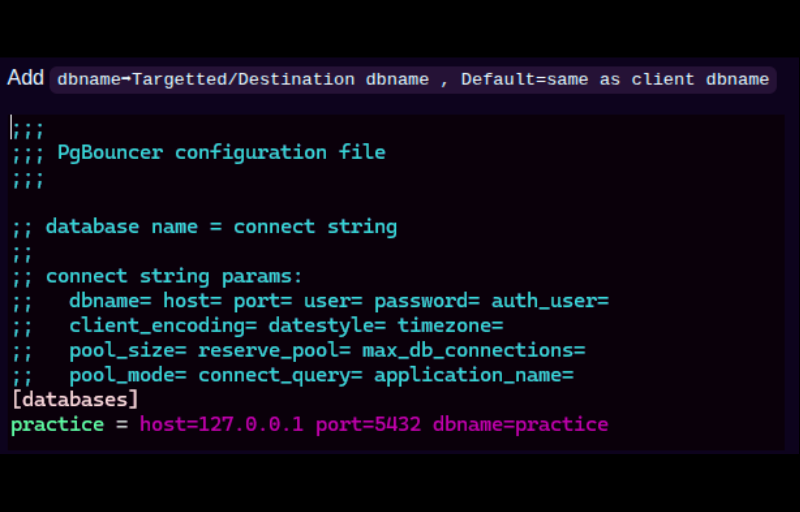
Set Pooling Mode and Client Limit
[pgbouncer]
pool_mode = transaction
max_client_conn = 1000
Note:
Using transaction mode releases backend connections after each
transaction, improving resource efficiency.
Step 3: Configure Authentication
Open the PgBouncer configuration file and set the authentication type and file location:
auth_type = md5
auth_file = /etc/pgbouncer/userlist.txt
Define Admin Users
admin_users = postgres
Step 4: Add Users
Edit the /etc/pgbouncer/userlist.txt file and add your users in the following format:
"shubhanshi" "SCRAM-SHA-256$4096:xd55Qkz5WNarPsBWG5wTIw==$ZsgbdrzalbuawI2RJmWEITyNQvBnoGRz/IRgd+7Ktdc=:ru+QjXpBUYf0WAaAR/b/q2g7P8eYSE1sBG0RYps28u4="
To check password hashes in PostgreSQL:
SELECT usename, passwd FROM pg_shadow;
Step 5: Test Direct PostgreSQL Connections
Initialize the pgbench benchmarking tool:
pgbench -i <my_db>
Run a benchmark test without PgBouncer:
pgbench -c <connections> -T <time> <my_db> -h <ip> -p <port> -U <user>
Step 6: Update pg_hba.conf
Add the following line under IPv4 local connections to allow MD5 authentication:
host all all 127.0.0.1/32 md5
Step 7: Restart Services
Restart PostgreSQL and PgBouncer to apply changes:
sudo systemctl restart postgresql
sudo systemctl restart pgbouncer

Step 8: Run Benchmark Using PgBouncer
The default PgBouncer port is 6432. Use the following command to run the benchmark:
pgbench -c <connections> -T <time> <my_db> -h <ip> -p 6432 -U <user> -f <file_name>
Tip: Comparing the benchmark results with and without PgBouncer helps you measure connection pooling efficiency and overall database performance improvement.
Conclusion
Using PgBouncer significantly improves PostgreSQL performance in
high-concurrency scenarios by:
- Reducing latency
- Increasing transaction throughput
- Optimizing connection managemen
It is a lightweight, effective solution for any PostgreSQL setup with multiple
client connections
FAQs
Q 1. How can you check if PgBouncer is running on your system?
Ans: Run: sudo systemctl status pgbouncer or check with ps aux | grep pgbouncer
Q2. What is the default port used by PgBouncer?
Ans: PgBouncer listens on port 6432 by default.
Q3. How can you test PostgreSQL performance with and without PgBouncer?
pgbench tool:- Without PgBouncer:
pgbench -c <connections> -T <time> -h <db_host> -U <user> - With PgBouncer: use the same command but with
-p 6432\
Q4. Which command is used to restart PgBouncer after configuration changes?
Ans: sudo systemctl restart pgbouncer
Q5. Where is the main PgBouncer configuration file located?
Ans: /etc/pgbouncer/pgbouncer.ini