Speed fascinates everyone, but only if its under control.
It is well said and a proven fact that everyone needs to implement a cache at some point in their application lifecycle, and this has become our requirement too.
During the initial phase we placed Redis in a Master Slave mode with next phase involving Sentinal setup to withstand Master failover. I would like to throw some light on their architecture along with pros and cons so I can put emphasis on why I finally migrated to Redis Cluster.
Redis Master/Slave
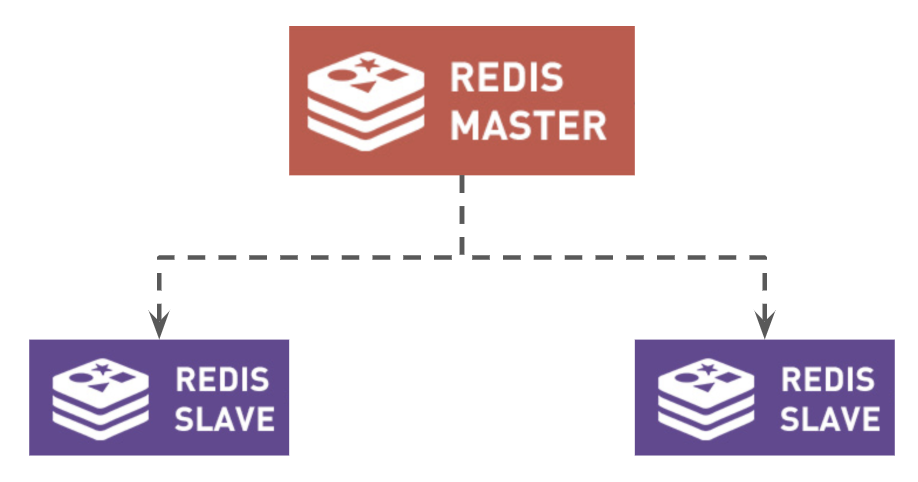
Redis replication is a very simple to use and configure master-slave replication that allows slave Redis servers to be exact copies of master servers.
What forced me to look for Redis Sentinel
When using Master-Slave architecture
- There will be only one Master with multiple slaves for replication.
- All write goes to Master, which creates more load on master node.
- If Master goes down, the whole architecture is prone to SPOF (Single point of failure).
- M-S architecture does not helps in scaling, when your user base grows.
- So we need a process to Monitor Master in case of failure or shutdown, that is Sentinel.
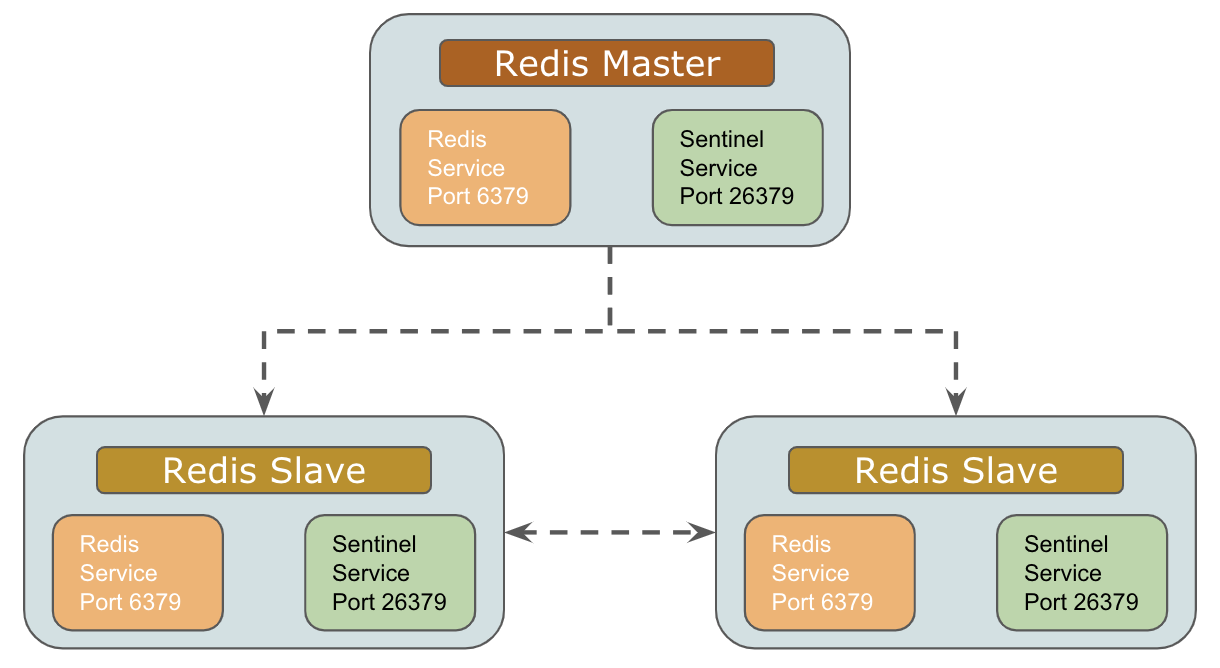
Redis Sentinel
Initial Setup
Failover Handling
I was still concerned about the below Sharding of data for best performance
Concept of Redis Cluster
“A query that used to take an hour can run in seconds on cache”.
Redis Cluster is an active-passive cluster implementation that consists of master and slave nodes. The cluster uses hash partitioning to split the key space into 16,384 key slots, with each master responsible for a subset of those slots.
Each slave replicates a specific master and can be reassigned to replicate another master or be elected to a master node as needed.
Ports Communication
Each node in a cluster requires two TCP ports.
- One port is used for client connections and communications. This is the port you would configure into client applications or command line tools.
- Second required port is reserved for node-to-node communication that occurs in a binary protocol and allows the nodes to discuss configuration and node availability.
Failover
When a master fails or is found to be unreachable by the majority of the cluster as determined by the nodes communication via the gossip port, the remaining masters hold a vote and elect one of the failing masters’ slaves to take its place.
Rejoining The Cluster
When the failing master eventually rejoins the cluster, it will join as a slave and begin to replicate another master.
Sharding
Redis sharded data automatically into the servers.
Redis has a concept of hash slot in order to split data. All the data are divided into slots.
There are 16384 slots. These slots are divided by the number of servers.
If there are 3 servers; A, B and C then
- Server 1 contains hash slots from 0 to 5500.
- Server 2 contains hash slots from 5501 to 11000.
- Server 3 contains hash slots from 11001 to 16383.
6 Node M/S Cluster
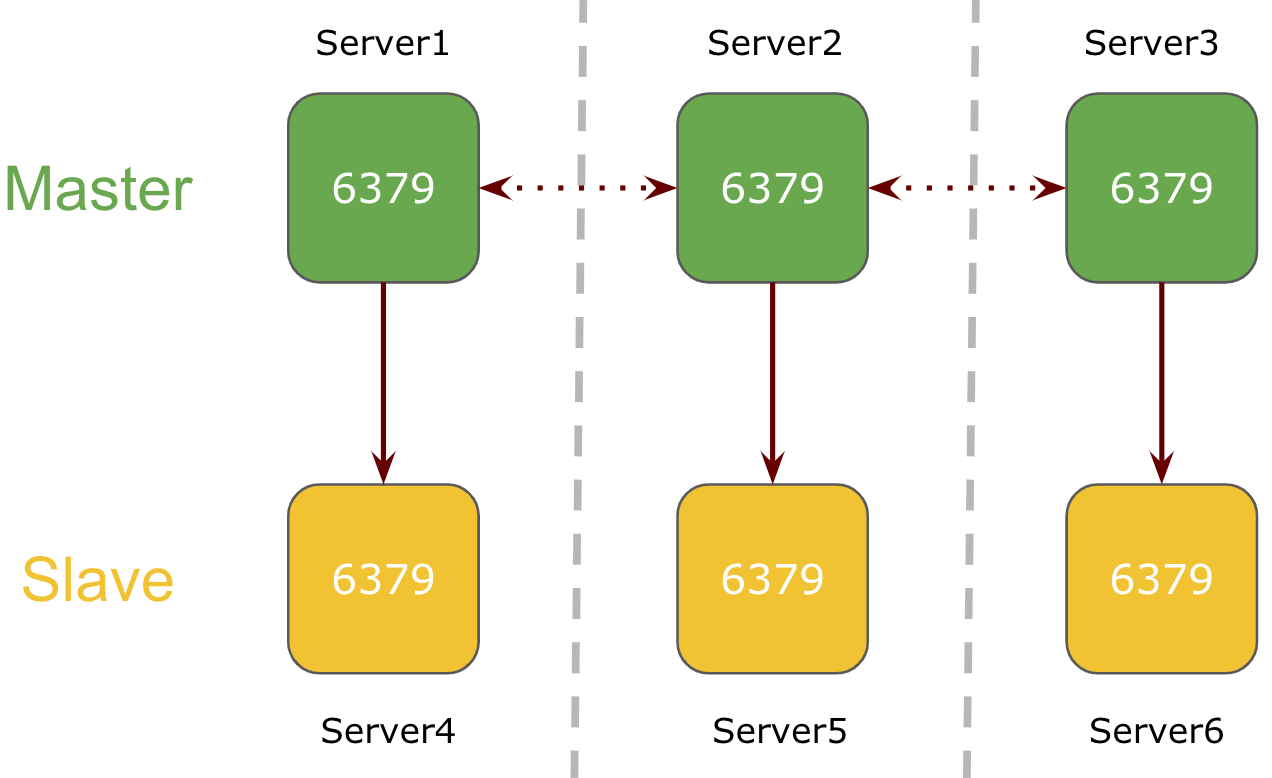
In a 6 node cluster mode, 3 nodes will be serving as a master and the 3 node will be their respective slave.
Here, Redis service will be running on port 6379 on all servers in the cluster. Each master server is replicating the keys to its respective redis slave node assigned during cluster creation process.
3 Node M/S Cluster
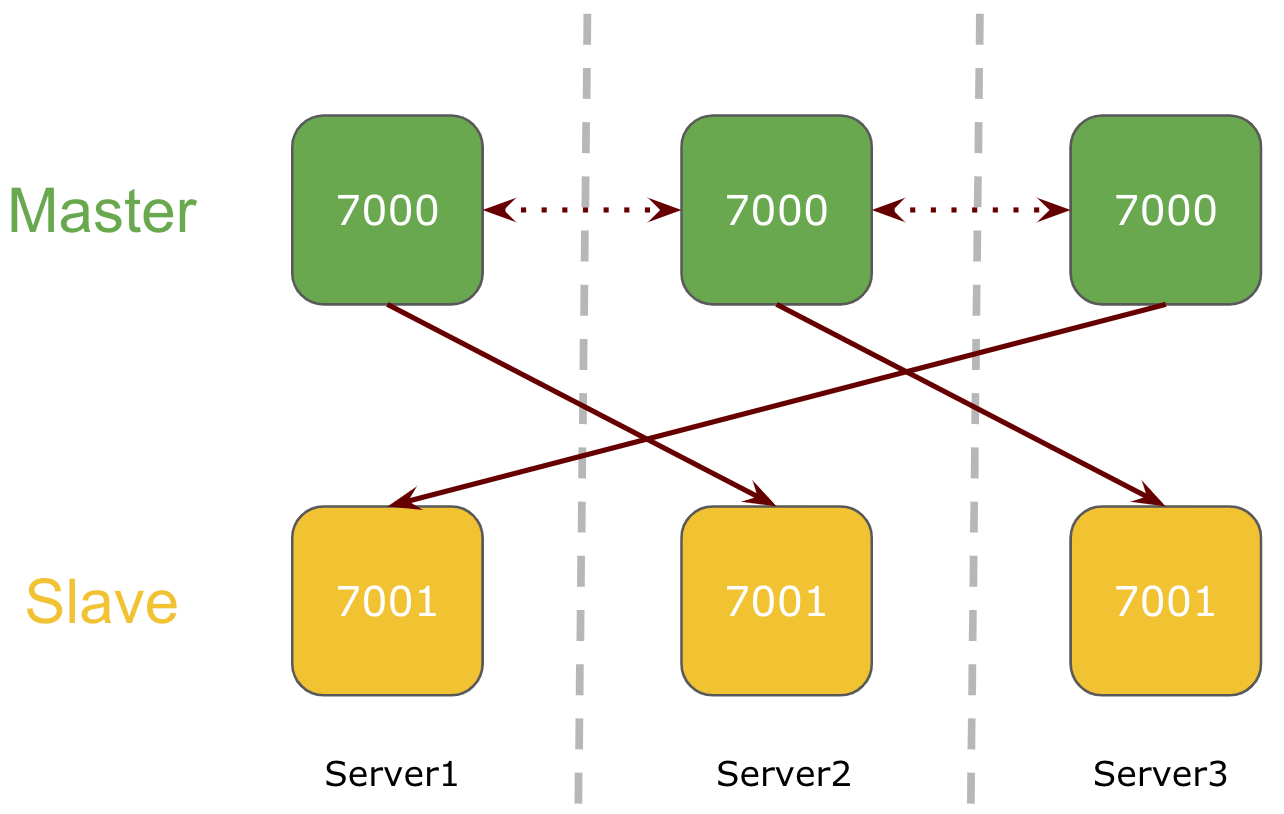
In a 3 node cluster mode, there will be 2 redis services running on each server on different ports. All 3 nodes will be serving as a master with redis slave on cross nodes.
Here, two redis services will be running on each server on two different ports and each master is replicating the keys to its respective redis slave running on other node.
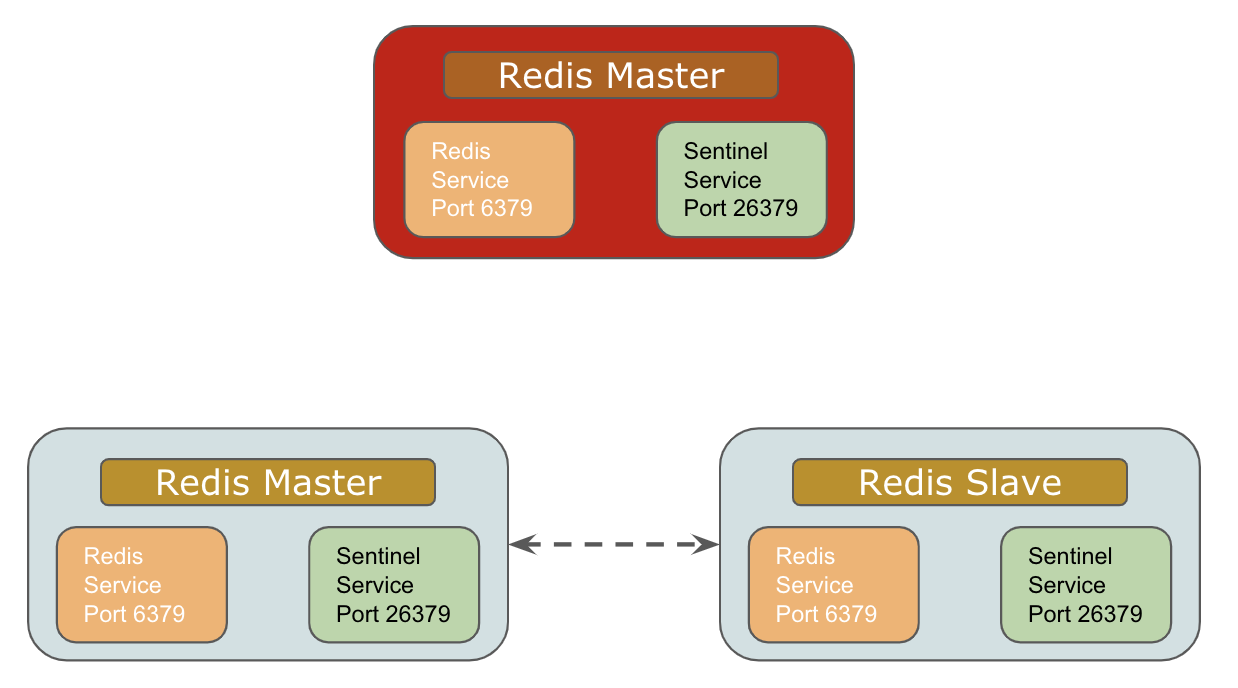
WHAT IF Redis Goes Down
1 node goes down in a 6 node Redis Cluster
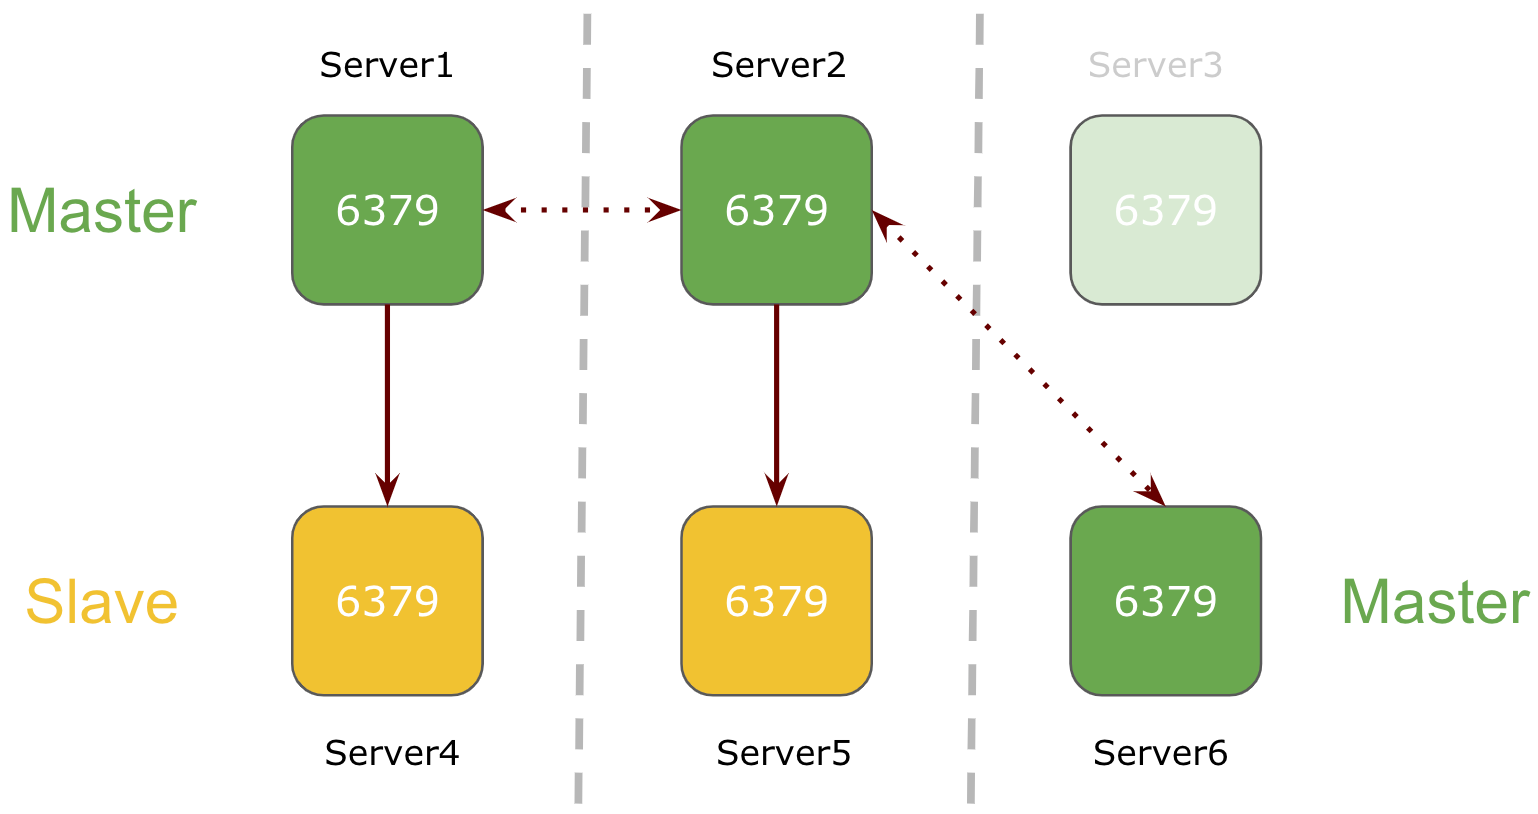
If one of the node goes down in Redis 6-node cluster setup, its respective slave will be promoted as master.
In above example, master Server3 goes down and it slave Server6 is promoted as master.
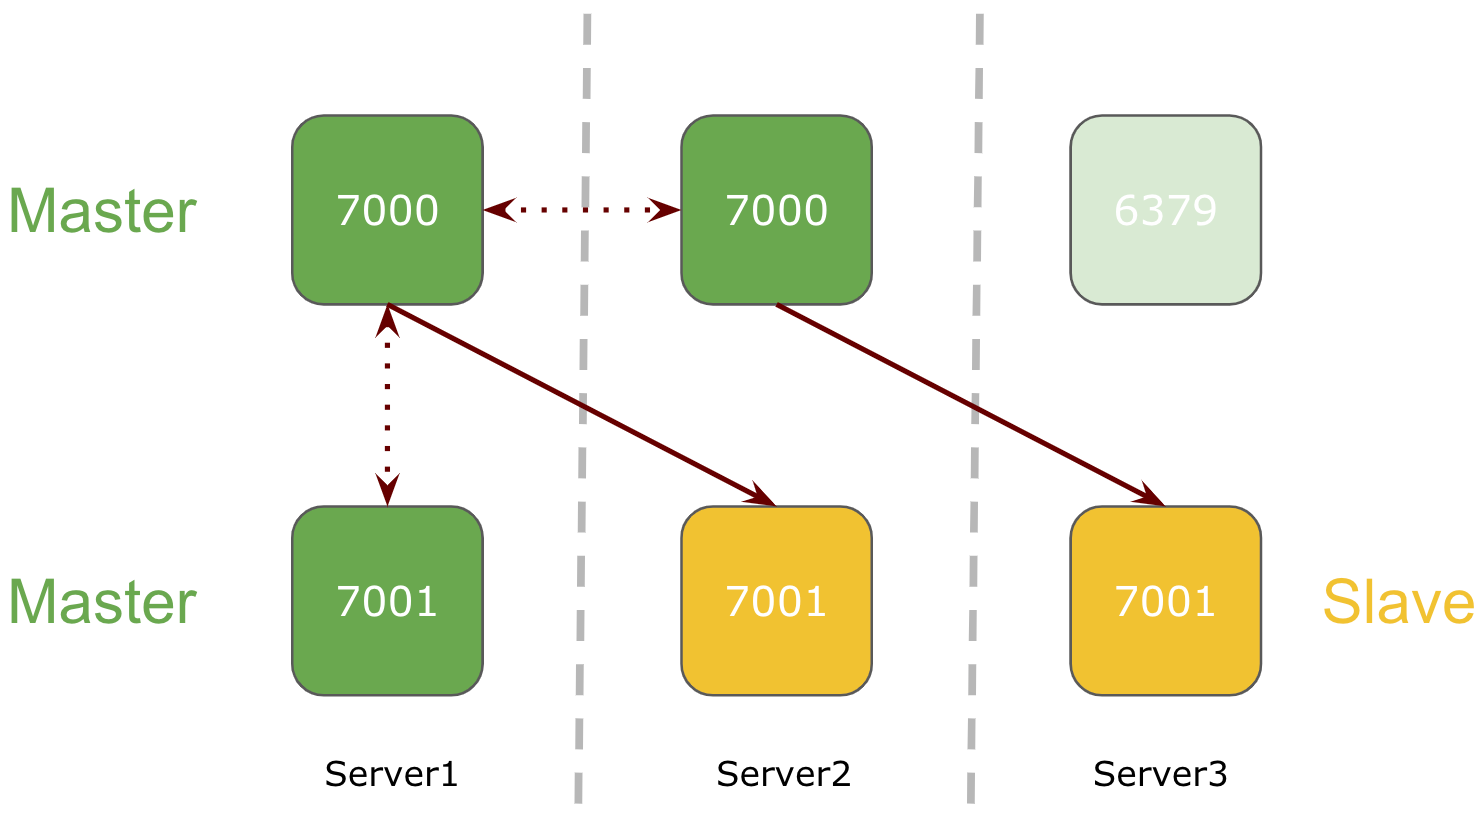
1 node goes down in a 3 node Redis Cluster

If one of the node goes down in Redis 3-node cluster setup, its respective slave running on the separate node will be promoted to master.
In above example, Server 3 goes down and slave running on Server1 is promoted to master.
Redis service goes down on one of the 3 node Redis Cluster
If redis service goes down on one of the node in Redis 3-node cluster setup, its respective slave will be promoted as master.
Conclusion
Although, this methodology will prevent Redis Cluster in partial Failover scenarios only, but if we want full failover we need to look for Disaster Recovery techniques as well.
Well this implementation helped me having a sound sleep while thinking of Redis availability, sharding and performance.
Enough of reading, eager to know how this all works when it comes to implementation. Don’t worry, my next blog Redis Cluster: Setup, Sharding and Failover Testing will be guiding you through the process.
Enjoy happy and safe DIWALI